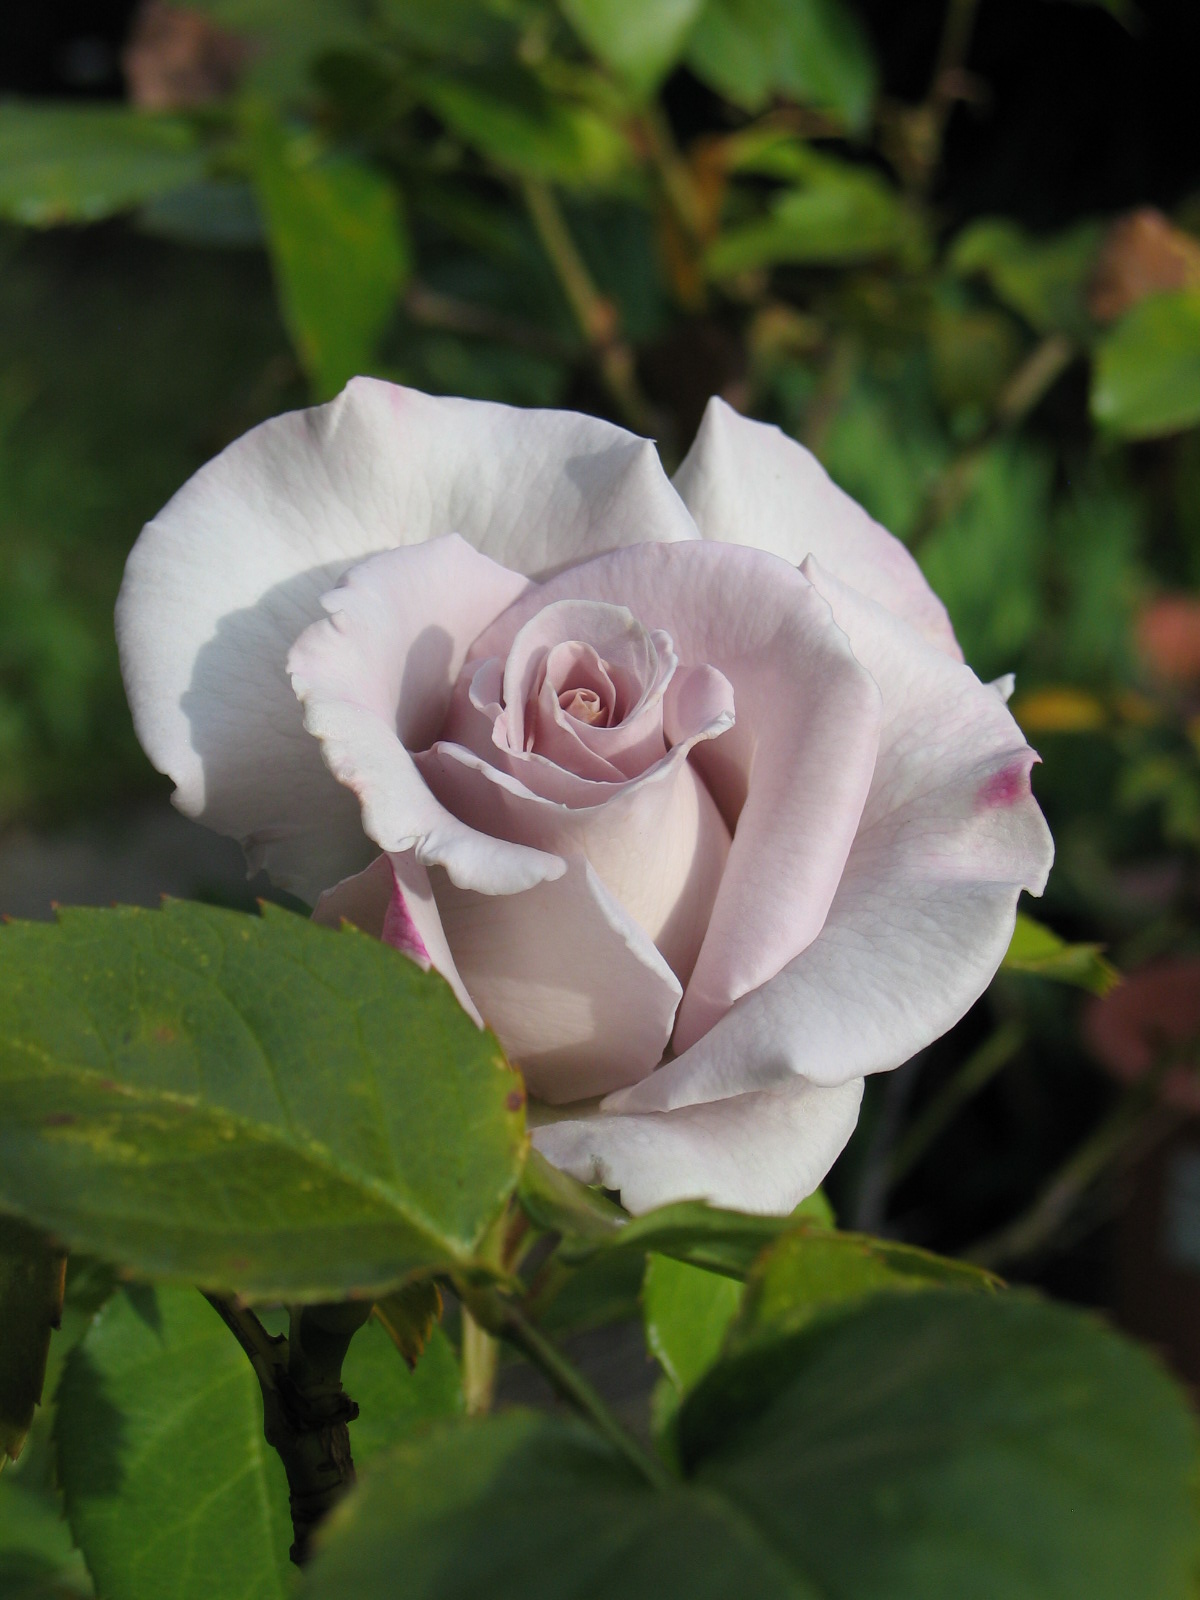
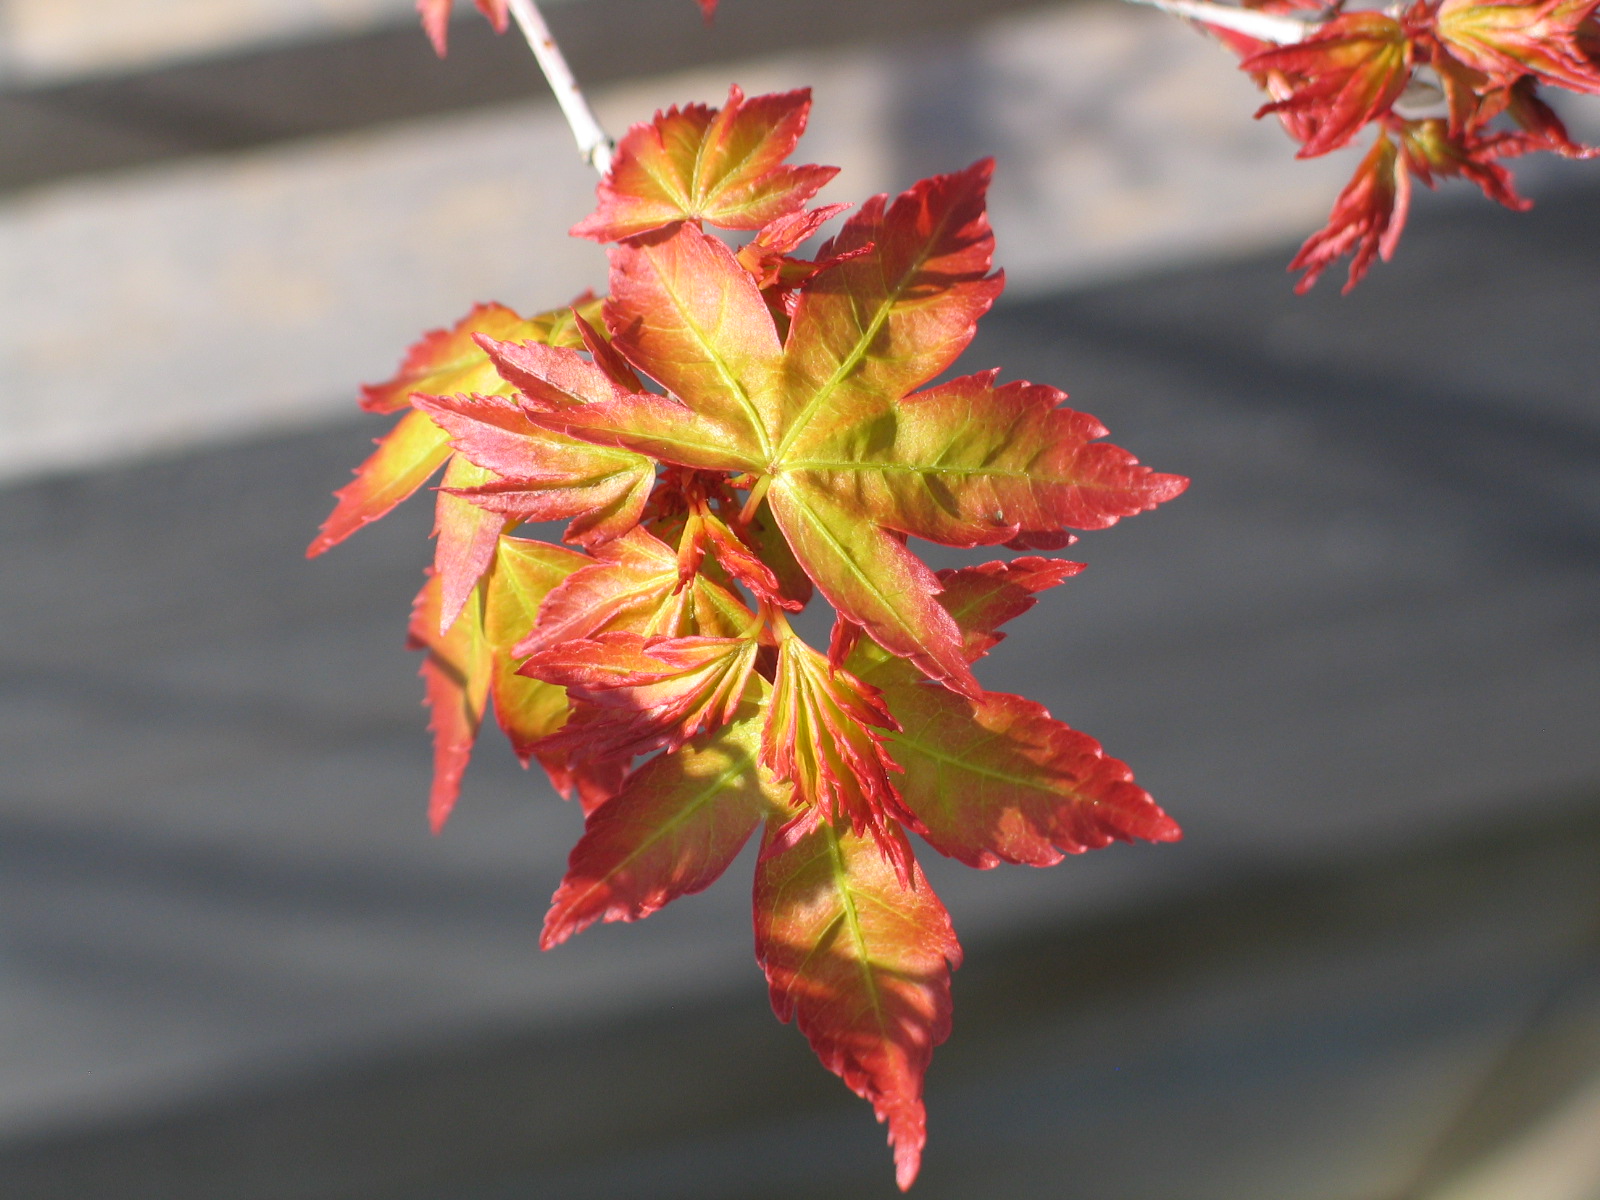
Lathyrus ‘blue shift’ in the author’s garden and experience appreciating the change of the shifting blues!
Read moreScientific names rule. Here's why
common names suck.png
The argument for using scientific names (against using common names alone) in sourcing and discussing plants.
Read morePlease install the irrigation
Client: the irrigation is going to be expensive and I just want it done, so I'm going to hand water. I don't mind watering the garden myself.
Me: I strongly recommend that you install the system, here's why: (see the rest of this post)
But my brain is screaming: dear Lord, this again?!
160816 water ring 002
Yes. In California, you really do want to pay for that irrigation system... and no, I do not recommend you design it yourself with components from Home Depot. My own father, on hearing that I had attended several classes and installation workshops on drip irrigation asked me 'why? drip irrigation doesn't even work, the pipes always blow apart. 'uh, dad? That's 'cause you did it wrong. Sorry, man. Below are a couple of reasons to install that system:
Regular irrigation is sorta like regular nutrition. Everyone (plants, animals, you) does better and stays healthier on a regular diet - you wouldn't eat only 20,000 calorie breakfasts on Monday and nothing the rest of the week, right? (right?!) - well, your plants want water they can count on, too. Not 3x a day like you, no, but consistently? yes.
It isn't going to get cheaper if you wait....
It is MUCH harder to install the infrastructure (valves, sleeves, etc) once your plants have been growing a while.
You are probably not as reliable as you think. In my own garden, I'm planning for an irrigation system (I'd hoped this summer, but I don't think I'll make it) because even though I know a lot about plants and watch my garden very closely, constantly moving the hose around... I'm always battling unhappy plants! I miss one, it wilts. I forget, they die.
You'll eventually get old or busy or forgetful or go on a vacation. Your plants don't negotiate; they'll resent the neglect and look like hell... and if you think your neighbor is truly happy to water them while you are away, you've either been lied to or have an actual saint living nearby.
Dead plants are a terrible investment (same goes for unhappy, wilted, sick or stressed plants)
Healthy landscaping adds to property value (that's a whole 'nother blog post) and the value added will far exceed what it cost you to install the irrigation!
You can always save a little money by getting smaller plants.
You save nothing and risk your investment by scrimping on the irrigation. Invest in your investment - your property, your plants, and they'll pay you back.
Stressed plants get diseases and pests that the exact same plant (in the exact same place, etc) would not get if it were happy.
Irrigation "ET" (evapotranspiration) controllers these days can shut off if they detect rain - there are oodles of technological advances in these mini computers so one that was properly specified and programmed will out-perform even an excellent gardener's seasonal adjustments or your carefully considered efforts. They can be programmed for different soils and a myriad of conditions. Get one! See here from Hunter on their line-up of ET controllers.
WELO - California state law that requires water efficient irrigation be installed on new and renovated landscapes 500 sf or larger as of 1 December 2015 (those that are involved in a permit process will learn).
Listen, it isn't sexy or exciting to pay for the invisible stuff - the best irrigation systems are the ones you don't notice - there's no bling here except for total weirdos like me (and my colleagues!) who geek out on it. However, to impress your dinner guests, a healthy and happy landscape speaks volumes and will provide years of happy bling-y green.At the time of this writing, I am finalizing a slide deck for the "Lose Your Lawn" talk that I am giving in 4 days. If you found yourself here thanks to that talk, then I want you to know I appreciate your reading this, I wrote it for you!My blog posts come from real conversations with real clients, students, and trainees, so don't be surprised if you ask a question and find it answered in my blog later!In the Bay Area, I highly recommend asking the Urban Farmer Store for irrigation designer referrals or to get clarification on irrigation questions.
"drought tolerant" = misleading bull
2014 mid march 040
succulents wucols
I've had a few conversations recently that revealed to me what a dumb thing it is to call a plant "drought tolerant". Wikipedia gets this right technically, but leaves us without enough to apply the information: "Drought tolerance refers to the degree to which a plant is adapted to arid or drought conditions. Well, okay - so when we say a plant is drought tolerant, what the heck does that mean? It means that plant has some degree of adaptability to drought. But here's the thing - how much adaptability? How do I use this information? What does this plant do in response to drought conditions? Saying a plant is "drought tolerant" is like saying there is a temperature outside. Is it cold, warm or hot? See what I am getting at? "drought tolerant" only means that there is some degree to which the plant may tolerate (not die immediately) a shortage of water. More information is needed: enter WUCOLS. I won't bore you with the details and technical stuff behind WUCOLS, they do well enough - read through their website.
Not bored yet? Good! Now read through the rules on WELO, the California ordinance for water efficiency in the landscape. Bet you're bored now. The deal is that these classifications in WUCOLS mean something. Their water needs categories quantify how much water a plant wants in a particular region of California. This does not take into account sun/shade exposure, wind, soil type, microclimates, or any of the other factors involved in meeting a plant's water needs. It is not a perfect tool, but it is the best thing we have going. WUCOLS isn't the only resource, you can get information from nurseries and books also, but it is the most helpful hydrozoning tool I use. The other sources do not correspond to a quantity of water, and they don’t all use the same terminology.
In WUCOLS, the classifications are "very low", "low", "moderate", and "high". It may also say "inappropriate" or "unknown". This is pretty self-explanatory, but what is most interesting here is that these words correspond to a percentage of ETo. ETo is a reference point - a baseline of sorts. So a "high" water use classification means 70-90% of ETo which is based on the water needed to keep a 4" tall cool season turf VERY well watered and super lush, or to put it another way, the "high" water classification is 70-90% of a whole lot of water.
To illustrate the uselessness of using “drought tolerance” as a means of grouping plants, I indulged online - I pulled up an article on "drought tolerant" plants from Sunset magazine. Of their 12 plants, that I looked up in WUCOLS for my home town of Oakland, one was classified by WUCOLS as "very low", one was "moderate", and the rest were "low". So if you go by a judgement of “drought tolerance”, you could wind up with plants that are literally not allowed to be planted together per state law (MWELO) assuming the ordinance applies to your project. Even if it does not, that doesn’t make it a good idea to plant a low water use plant with a high one.
Additionally, Nassella tenuissima / Mexican Feathergrass is listed as an invasive plant by PlantRight and should not be used at all, but WUCOLS isn't about invasiveness, it is about water, and it was in that list of drought tolerant plants. Shame on Sunset! Not only should we keep plants with different water needs separate, we need to not install invasives, period..
Just incidentally, if you absolutely must use plants together that WUCOLS gives different water needs classifications to, then the classifications should be next door neighbors - so "low" and "moderate" is kinda okay (provided you irrigate and do your calculations for the higher amount), but "moderate" and "very low" is no bueno.
Next I went to the "drought tolerant" poster child: succulents. Low water use, right? Drought tolerant?! erm.... no. Again, WUCOLS demonstrates my point. In the plants WUCOLS lists as succulents, 3 classifications are included - very low, low, and moderate (screen shot is just of the alphabetical early birds, I didn't pick favorites here). So much for that assumption.
So really, drought tolerant is anything that will grow with less than 70% of a boatload of water if you include all that Sunset does.. That could still an incredible amount of water, folks. Granted, the lower classifications are pretty good and some plants truly do have a relatively dry footprint, but all plants need extra water during their establishment period, that is a post for another day. Oh - and about those drought tolerance adaptations emphasized in the first paragraph: a drought tolerant plant might go dormant, drop all or some of its leaves, wilt, or shrink in size in times of stress (stress being the drought they're tolerating) as a way of coping .... and if not watered in time, drought tolerant plants die. Tolerance is about not being dead yet - it has nothing to do with living well, being healthy, or looking good, it is about living to drink another day. Thanks for listening!
Daylilies in the Mail
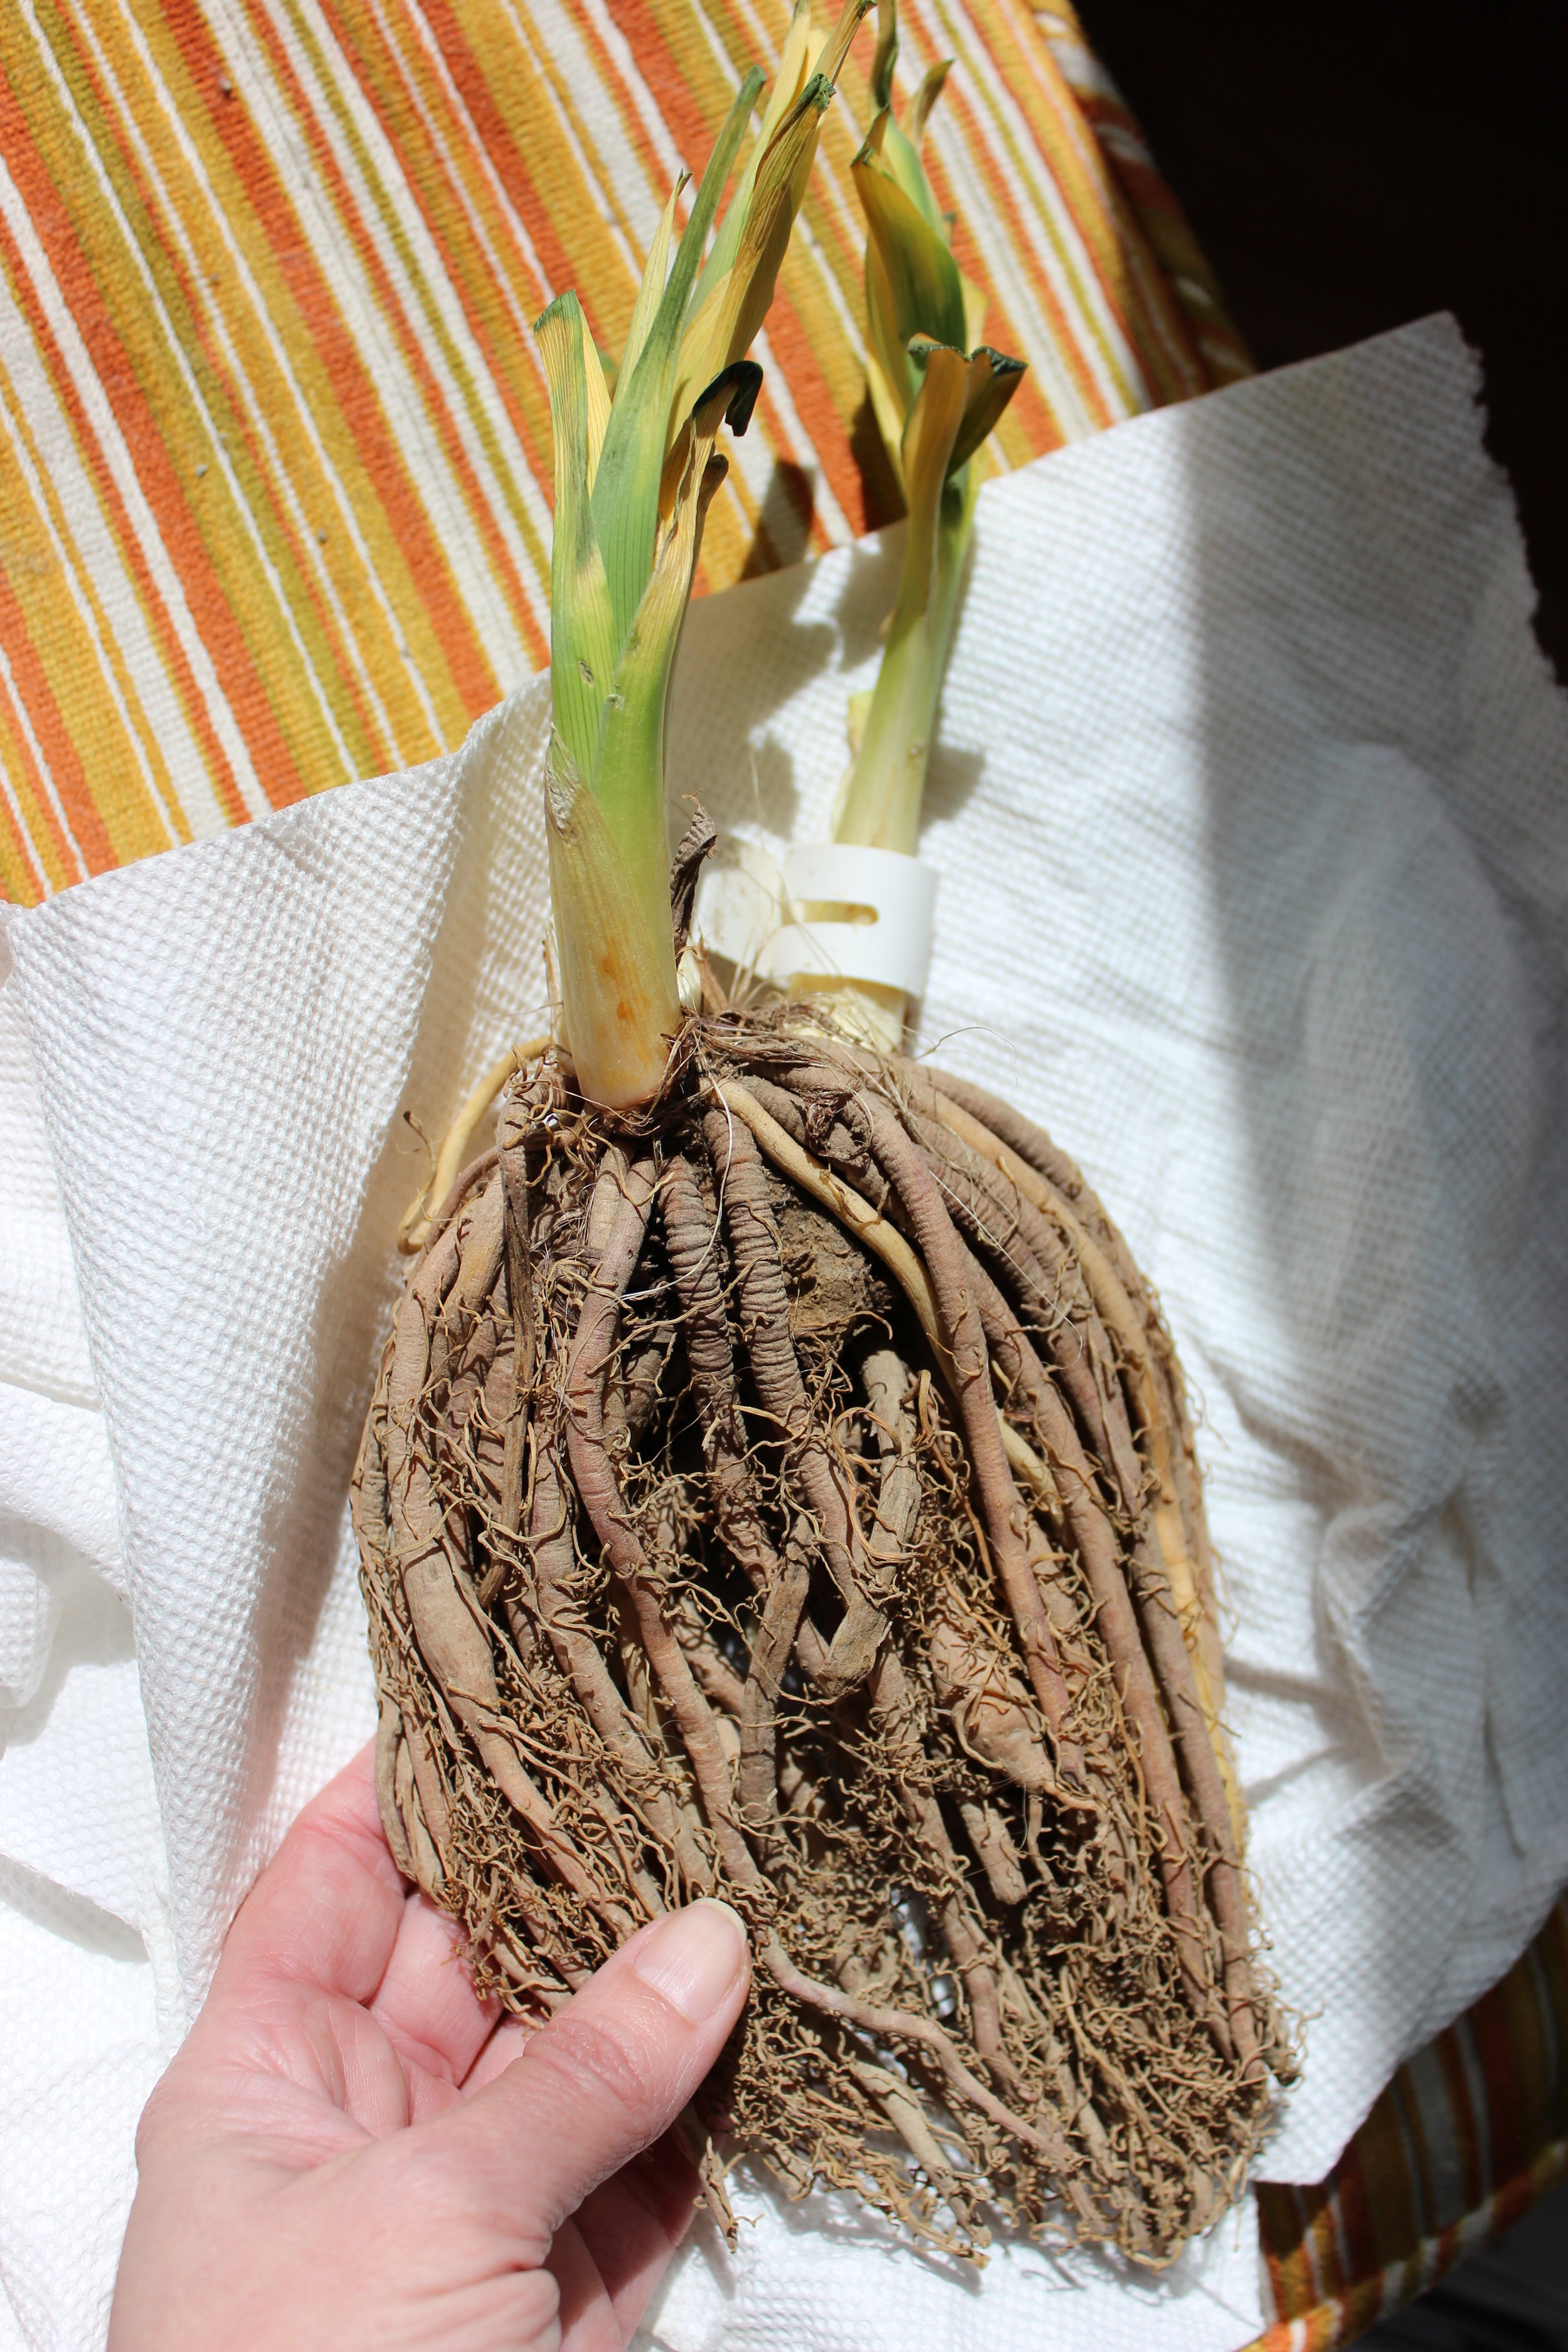
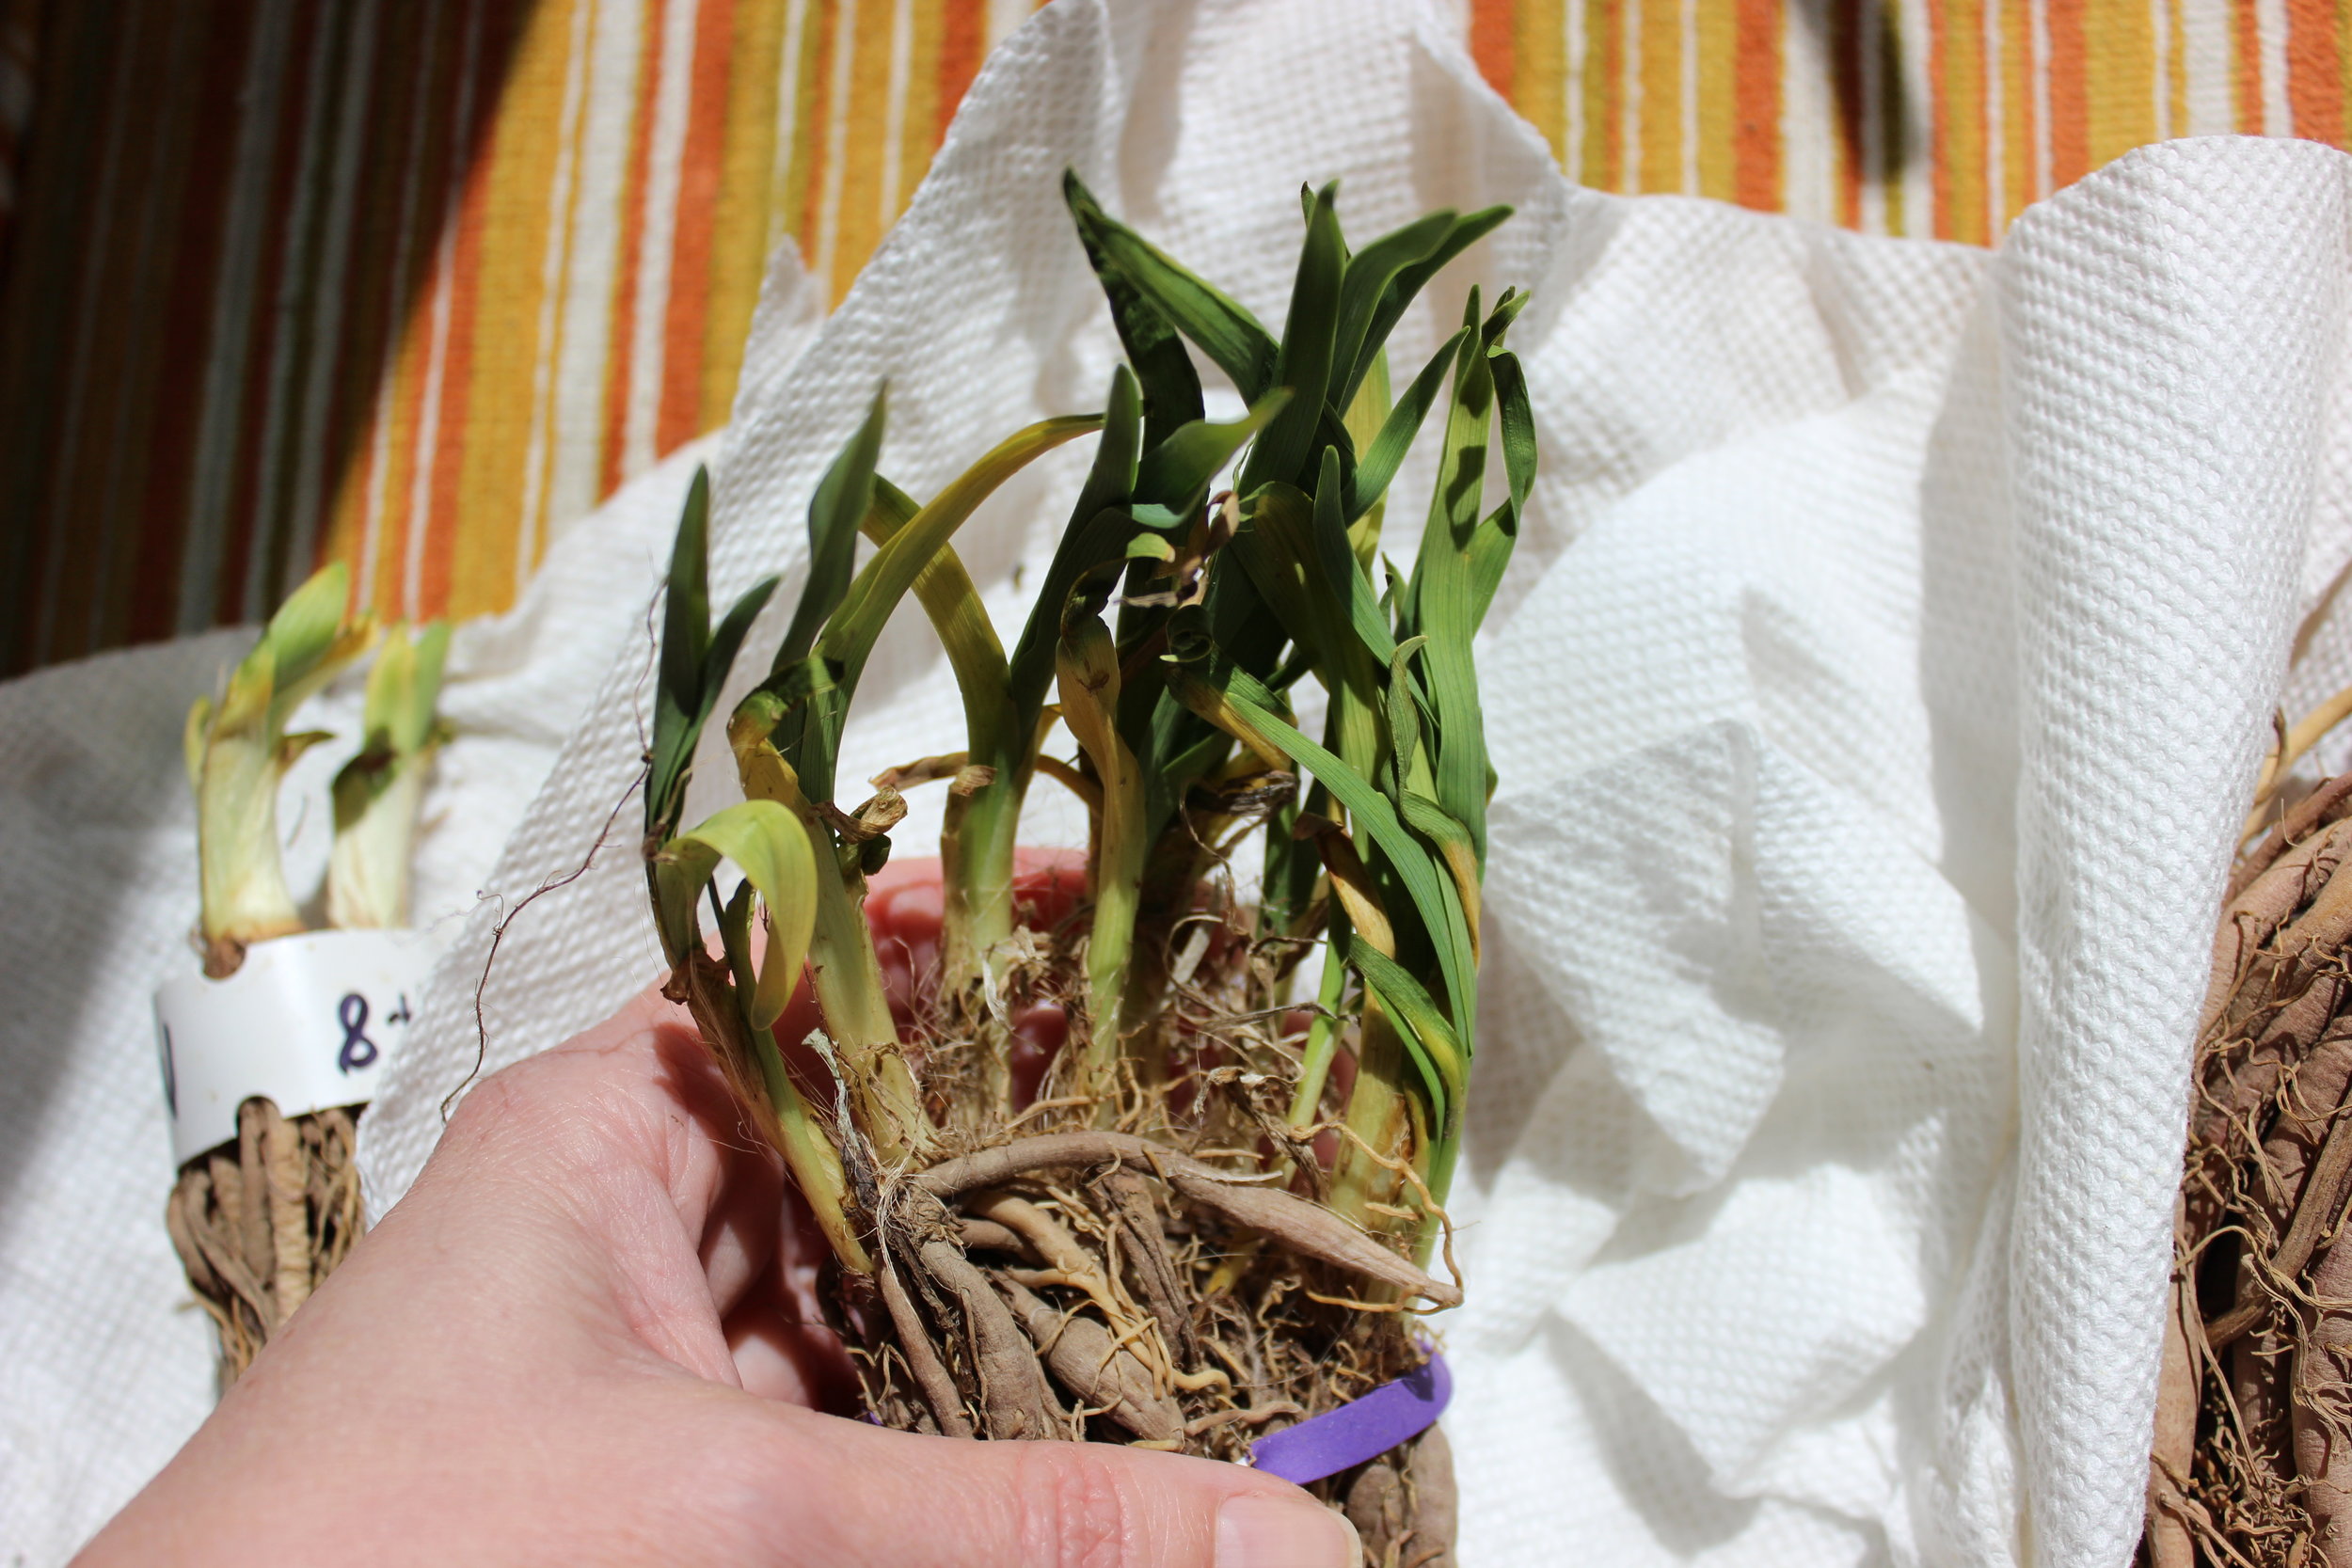
You know the stand-by sitcom joke that when dating someone new, you should let the crazy out only a little bit at a time? Well, I've been writing this blog a while, so here's a little piece of my crazy made just for you!Sometimes I get something stuck in my head like a bad craving and MUST have it. You know what I mean, yes? Ever want chocolate really Really REALLY badly? So much so that it felt like a biological need? Yeah, like that, but for colors, color palettes, plants, and so forth.Today, my mail brought me a daylily I've been coveting for years and could never obtain (darn you, Martha Stewart Magazine!). But, thankfully I now have Hemerocallis 'Milk Chocolate'. I've planted it in the garden and hope to grow it up big and fat. I bought it from the generous folks at North Country Daylilies in Buskirk, NY (now apparently gone). Hemerocallis 'Milk Chocolate' is the little guy all the way on the left in the photo above.See, the growers here in California who grow daylilies don't seem to grow this particular cultivar (or at least not list it online). Some growers list it but didn't actually have any or wouldn't return my calls and emails - after looking for this thing for years, I was thrilled when North Country said they had one. ONE. Not only that, they were willing to ship it to California - another stumbling block I've run into before. BUT, they sent me a 3 fan plant, more than most mail order companies would send.I bought 'Milk Chocolate', 'Third Witch' and 'Vatican City' to make the most of the shipping. I stole the images below from the American Hemerocallis Society (AHS) webpage:Milk Chocolate:Third Witch:Vatican City:North Country sent me the biggest danged plants, I am completely delighted. In NY where they are, the snow has just melted away and the dormant daylilies are beginning to stick their heads up. Out here in Northern California, it is warm and spring is old news.One of the ways I hone my professional knowledge is to order plants from mail order companies and see what happens - I look at accuracy, plant quality, packaging, and customer service (bonus: an excuse to buy plants). I've had some wonderful surprises as in this daylily order. I've also had some really unfortunate and problematic orders (I won't be ordering from Wayside or Easy to Grow Bulbs again) that surprised me the wrong way.I've found that generally the growers who love their plants and specialize in certain kinds of plants have the best stock. The big business companies send the smallest, least healthy plants, the most poorly packaged, and have the most errors in order accuracy. I once got a box of dead plants from Wayside and they never did return my inquiries. So, when something goes right like this, I like to crow about it.Do you see these roots on H. 'Vatican City' and the extra fans on 'Third Witch'?! Mail order plant droolworthiness:I have a few other daylilies that I will tell you about another time - that will be fun - there's more crazy to share there.Thanks for reading!
My Theory on Roots
You've heard that you should water trees deeply and infrequently, right? I take that approach a bit further and use it for everything - trees, perennials, roses, everything. I'm careful with my water anyway having grown up in Los Angeles during the 70's drought when we let our yellows mellow, removed or reduced lawns, and collected shower water.See, we're in for some serious growing pains while we struggle to understand and adjust to mandatory water restrictions now in 2015 - I don't need to repeat the advice, you already know it (ditch the lawn, add compost and mulch, etc). But what we need to be doing is more than just using less water, we need to use water more wisely - to help our plants fend for themselves better. I see water as a training tool and my plants as smart, but slow. They can't fetch and training them to do much of anything takes years.As of my last water bill, I'm down to 36 GPD (gallons per day) including landscaping. Before you bow in awe to this amazing feat, you should know that I irrigate my garden a little differently than most and I'm not watering anything I don't want to keep. Let the rest die, they're out of here anyway. Here's where I water differently: I bought a 15 gal. Magnolia 'Black Tulip' (that baby green tree in the background left-side). It is rated as having "moderate" water needs in Oakland by WUCOLS. Moderate isn't exactly water-wise, but I've got a theory..... and so far, so good. I planted the tree a year ago this month. At the same exact time, my client in Mill Valley had three planted (guess whose idea that was). Their landscape contractor did exactly what they usually do - they amended, fertilized, and watered the hell out of those trees. My client's trees bloomed and grew and leafed out beautifully, gained stature nicely. Mine didn't. Luckily for them, theirs are next to a lawn that I'm sure they'll keep as long as they can, where I have no lawn. Below is a better shot of mine last May (1 month after planting).I planted mine with a bit of compost, watered it in well that first day, and walked away. It looked fine for a while, then it got all stressed out and started dropping leaves. I watered it again, a nice soaking, and it threw out some new leaves. We did this all summer: I kept an eye on it, watering only when I found signs of stress in the leaves, but then not again until I saw more stress. It was nerve-wracking. The tree did not visibly thrive, and it sure as heck didn't get much bigger. I'm pretty sure it would slap me if it could.... but it survived. While it was dormant over winter and I held my breath to see how it would do come spring. This spring when it started blooming, I was delighted with how many (albeit smallish) flowers there were on my young tree, and now it is leafed-out for the season. I'll be doing the same this summer, soaking the presumably larger root-zone, but as seldom as possible. I'll also be adding more compost on top (not working it in, that's the worms' job) and maintaining a good layer of mulch over that.I believe that what I am doing will be better for my tree's long-term durability. I believe that I gave it reason to throw energy into its root system in search of water, and that I rewarded deep root growth instead of fast, exciting foliage and gains in stature. Over the winter, its root system likely continued to dive and while I watered, soaking further and further down but less and less often, we're working together to train this "moderate" water needs tree to survive more like a drought tolerant tree. Here it is today, not much bigger, but doing just fine:I don't water fast enough that it trickles off, doing by hand what irrigation designers call "cycle and soak", making sure that the water goes into the soil and nowhere else. I'm also taking advantage of the few light rains we had to water further than the rain itself went = deep watering every time.I can't tell others to do this, the tree looked like hell that first year of establishment and I think most people wouldn't watch closely enough nor would they enjoy the experience (even I was a bit nervous). We'll see how things go this summer, but I can tell you that I don't water much, maybe once a month? I avoid watering if it is overcast or cool outside. I look closely at my plants in the most stressful times - when it is blazing hot, sunny, and/or dry and windy. If I see stress, I'll water. If not, forget it. I'll keep you posted on how things go this summer.The most impressive thing, though, is what I noticed in putting together this post - look how much my roses LOVE this treatment - they get watered only when the tree gets watered and I have yet to see them look even a little stressed. You can see the change best between the second photo and the one above. They're the hybrid tea 'Stainless Steel' (my favorite). Here's the original one (now on the right in the photo above) blooming in my old garden in Alameda in 2010 and again in 2012:
BAD GARDENER!
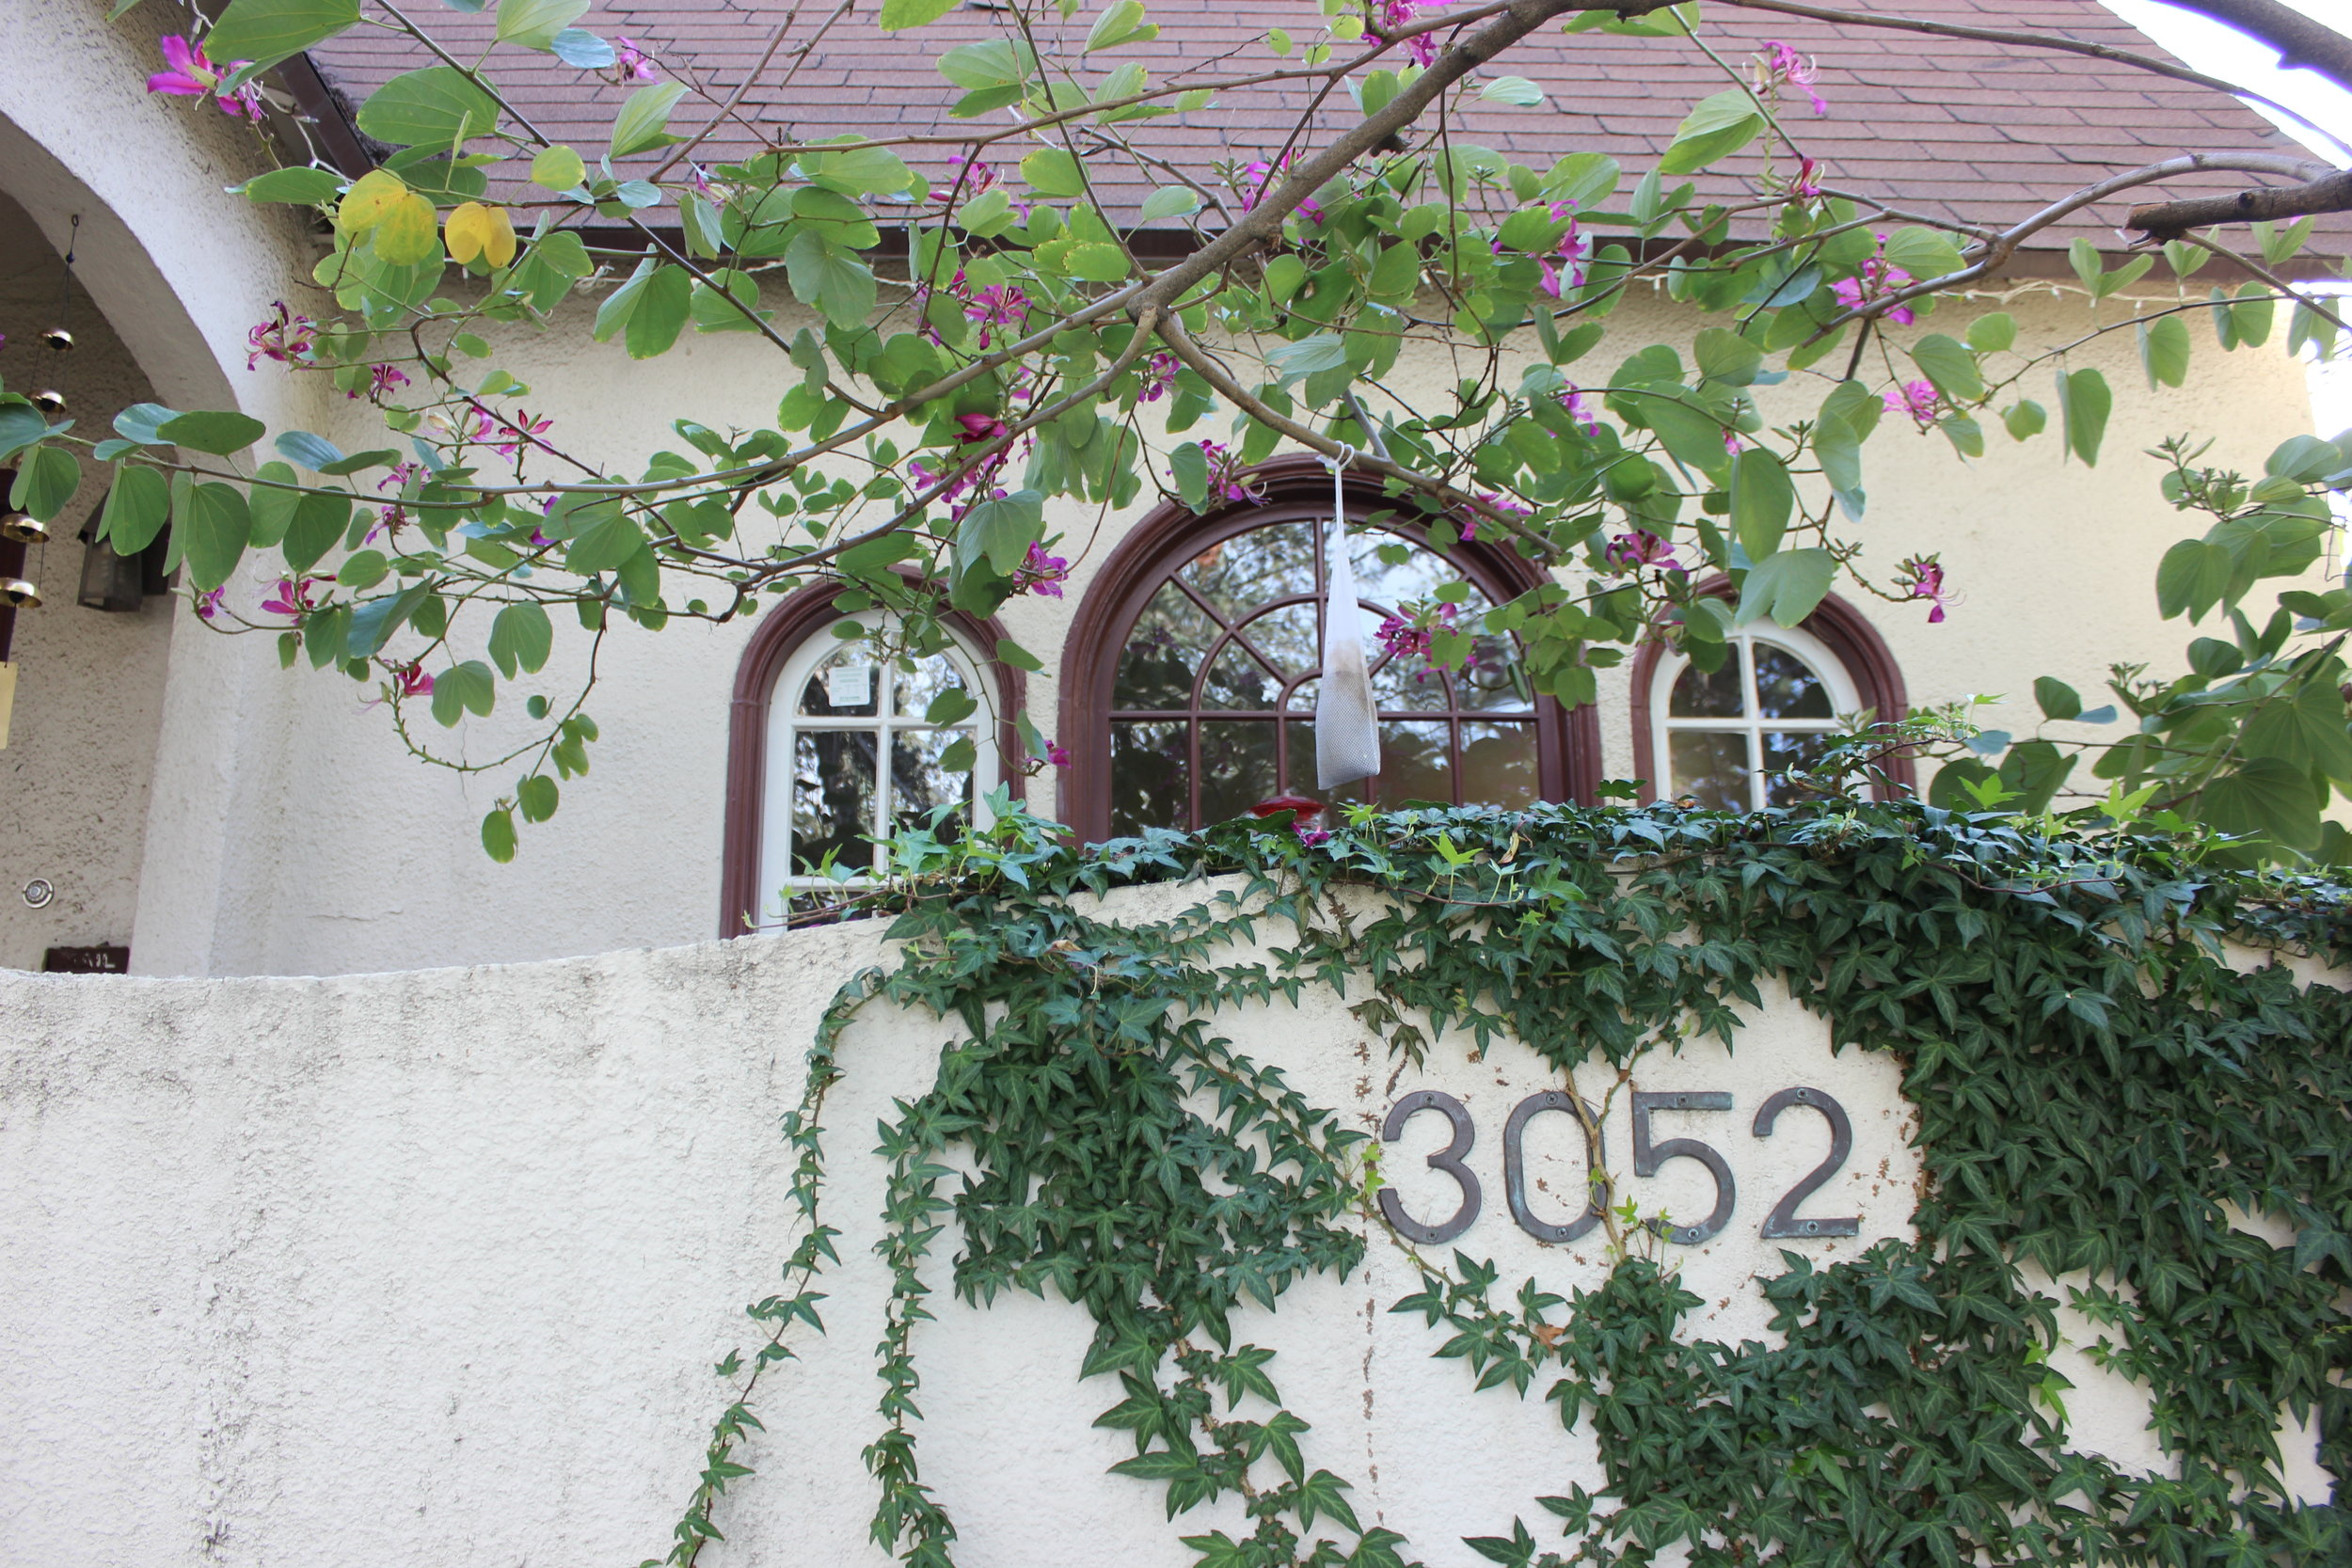
I've been keeping busy in what feels like a perfect storm of absolutely inexcusable (insert many cuss words) BAD "gardening". I don't know what the heck happened, but the stars aligned and I've been doing nothing but evaluating problems, recommending that gardeners get fired, and interviewing new gardeners. I have three current projects dealing with this at the same time, and today a project I haven't even started working on yet became the fourth.This morning's text from my new client brought such sad news. She had the most charming Hong Kong Orchid (Bauhinia blakeana) tree and came home from work to find that it was absolutely butchered by the "gardeners". They were not directed to prune the tree, and I have to tell you - this has happened to more than one client where someone has butchered a tree without approval or permission! My client loves this tree and I'm working on finding someone to help us in directing its recovery from the abuse.Below you'll see the few photos I have of the tree - I was so charmed by it, I can't figure out why I didn't get better photos.It used to overhang the front patio that the living room looks out on - is focused on - but now I'm told that you can't even see the tree from inside anymore. If you are sensitive to gorey pictures, now is the time to avert your eyes:I warned you, don't say I didn't.SO - what the hell? Thing is, any idiot can call him/herself a gardener. There's no training required, and most people are happy enough to have someone else do the mowing that they don't worry about it - how hard can it be? But what many don't think about until it is too late is that those specimen plants can be responsible for a good up-tick in your property's valuation. New trees don't add value, but healthy, mature ones totally do!I will post again soon about some of the other issues with gardeners - but for now, may I just list these few things that every property owner should know:An Arborist is an educated, certified person who is held to certain standards of care and who can be reported for not upholding those standards. Hiring a tree service company does not mean an Arborist will be involved in your project, nor does it mean you'll get qualified advice. If you have an important tree, make sure you protect it with advice and evaluations from someone qualified to give them.A Consulting Arborist can help you diagnose problems or evaluate a tree, the American Society of Consulting Arborists has a great web page that lets you search for one near you: ASCA. They aren't the folks with the clippers, but they can tell you if a tree is in good health and stuff like that.There is no specific qualification for someone to do pruning. However, some arborists do work in hands-on ways or work for companies that do. To find these kinds of people, check out the International Society of Arboriculture, or ISA. The difference being arboriCULTURE as opposed to arborIST.The moral of this story is that everyone who hires or works with a gardener or a landscape maintenance company should have the conversation about doing unauthorized work. This is a huge no-no, and I'd like to make a law about it, but until that happens, we've got to look out for the trees ourselves. Well, us and the Lorax anyway.
The Surprising Dunsmuir Estate
I am so excited to tell you that I've been asked to serve on an advisory board for the Dunsmuir Estate! I'm told that this is the first advisory board since the City of Oakland took over care of the property, so I feel truly honored.I was just over there last Friday because I made an effort to remember to visit during their insanely restricted hours (it is an effort, even bank employees would drool over these hours!). I work from home not very far from this place and even still, I can't seem to get over there while they're actually open.... never-mind the times they should be open (imho) but aren't, like weekdays squeezed between major holidays and weekends (I tried to go last Black Friday for example). BUT, that's not the point I'm here to make.This place is a gem in the rough. Anyone who has read my blog before knows how much I enjoy visiting historic estates and gardens, but this one eluded me until a few months ago. SO, without further delay - a few photos from last Friday to celebrate my budding relationship with the folks who are working so hard to keep the place up and promote it. I'm plain ole thrilled about it.So above you see the Main House and the entry, ducks, fountain, and gazebo (drought? what drought?)....... and two benches with gobs of personality...... a couple of shots that I think exemplify the magic of the character of the place....... but I'll leave you with a shot of my favorite thing, the pool and pool house. I could do a whole post just on this one item, and I probably will, but it is such a magical, beautifully proportioned thing, I wish I had drawings of it to study, find out what it is about the space that is so magical, apply those ratios to my own work (even though I don't design by mathematical formula, I just want to "get" it and be able to replicate it). I dearly hope that this can someday be restored, but in the meantime, I'll stare at it and imagine what it must have been like.
If I can make it...
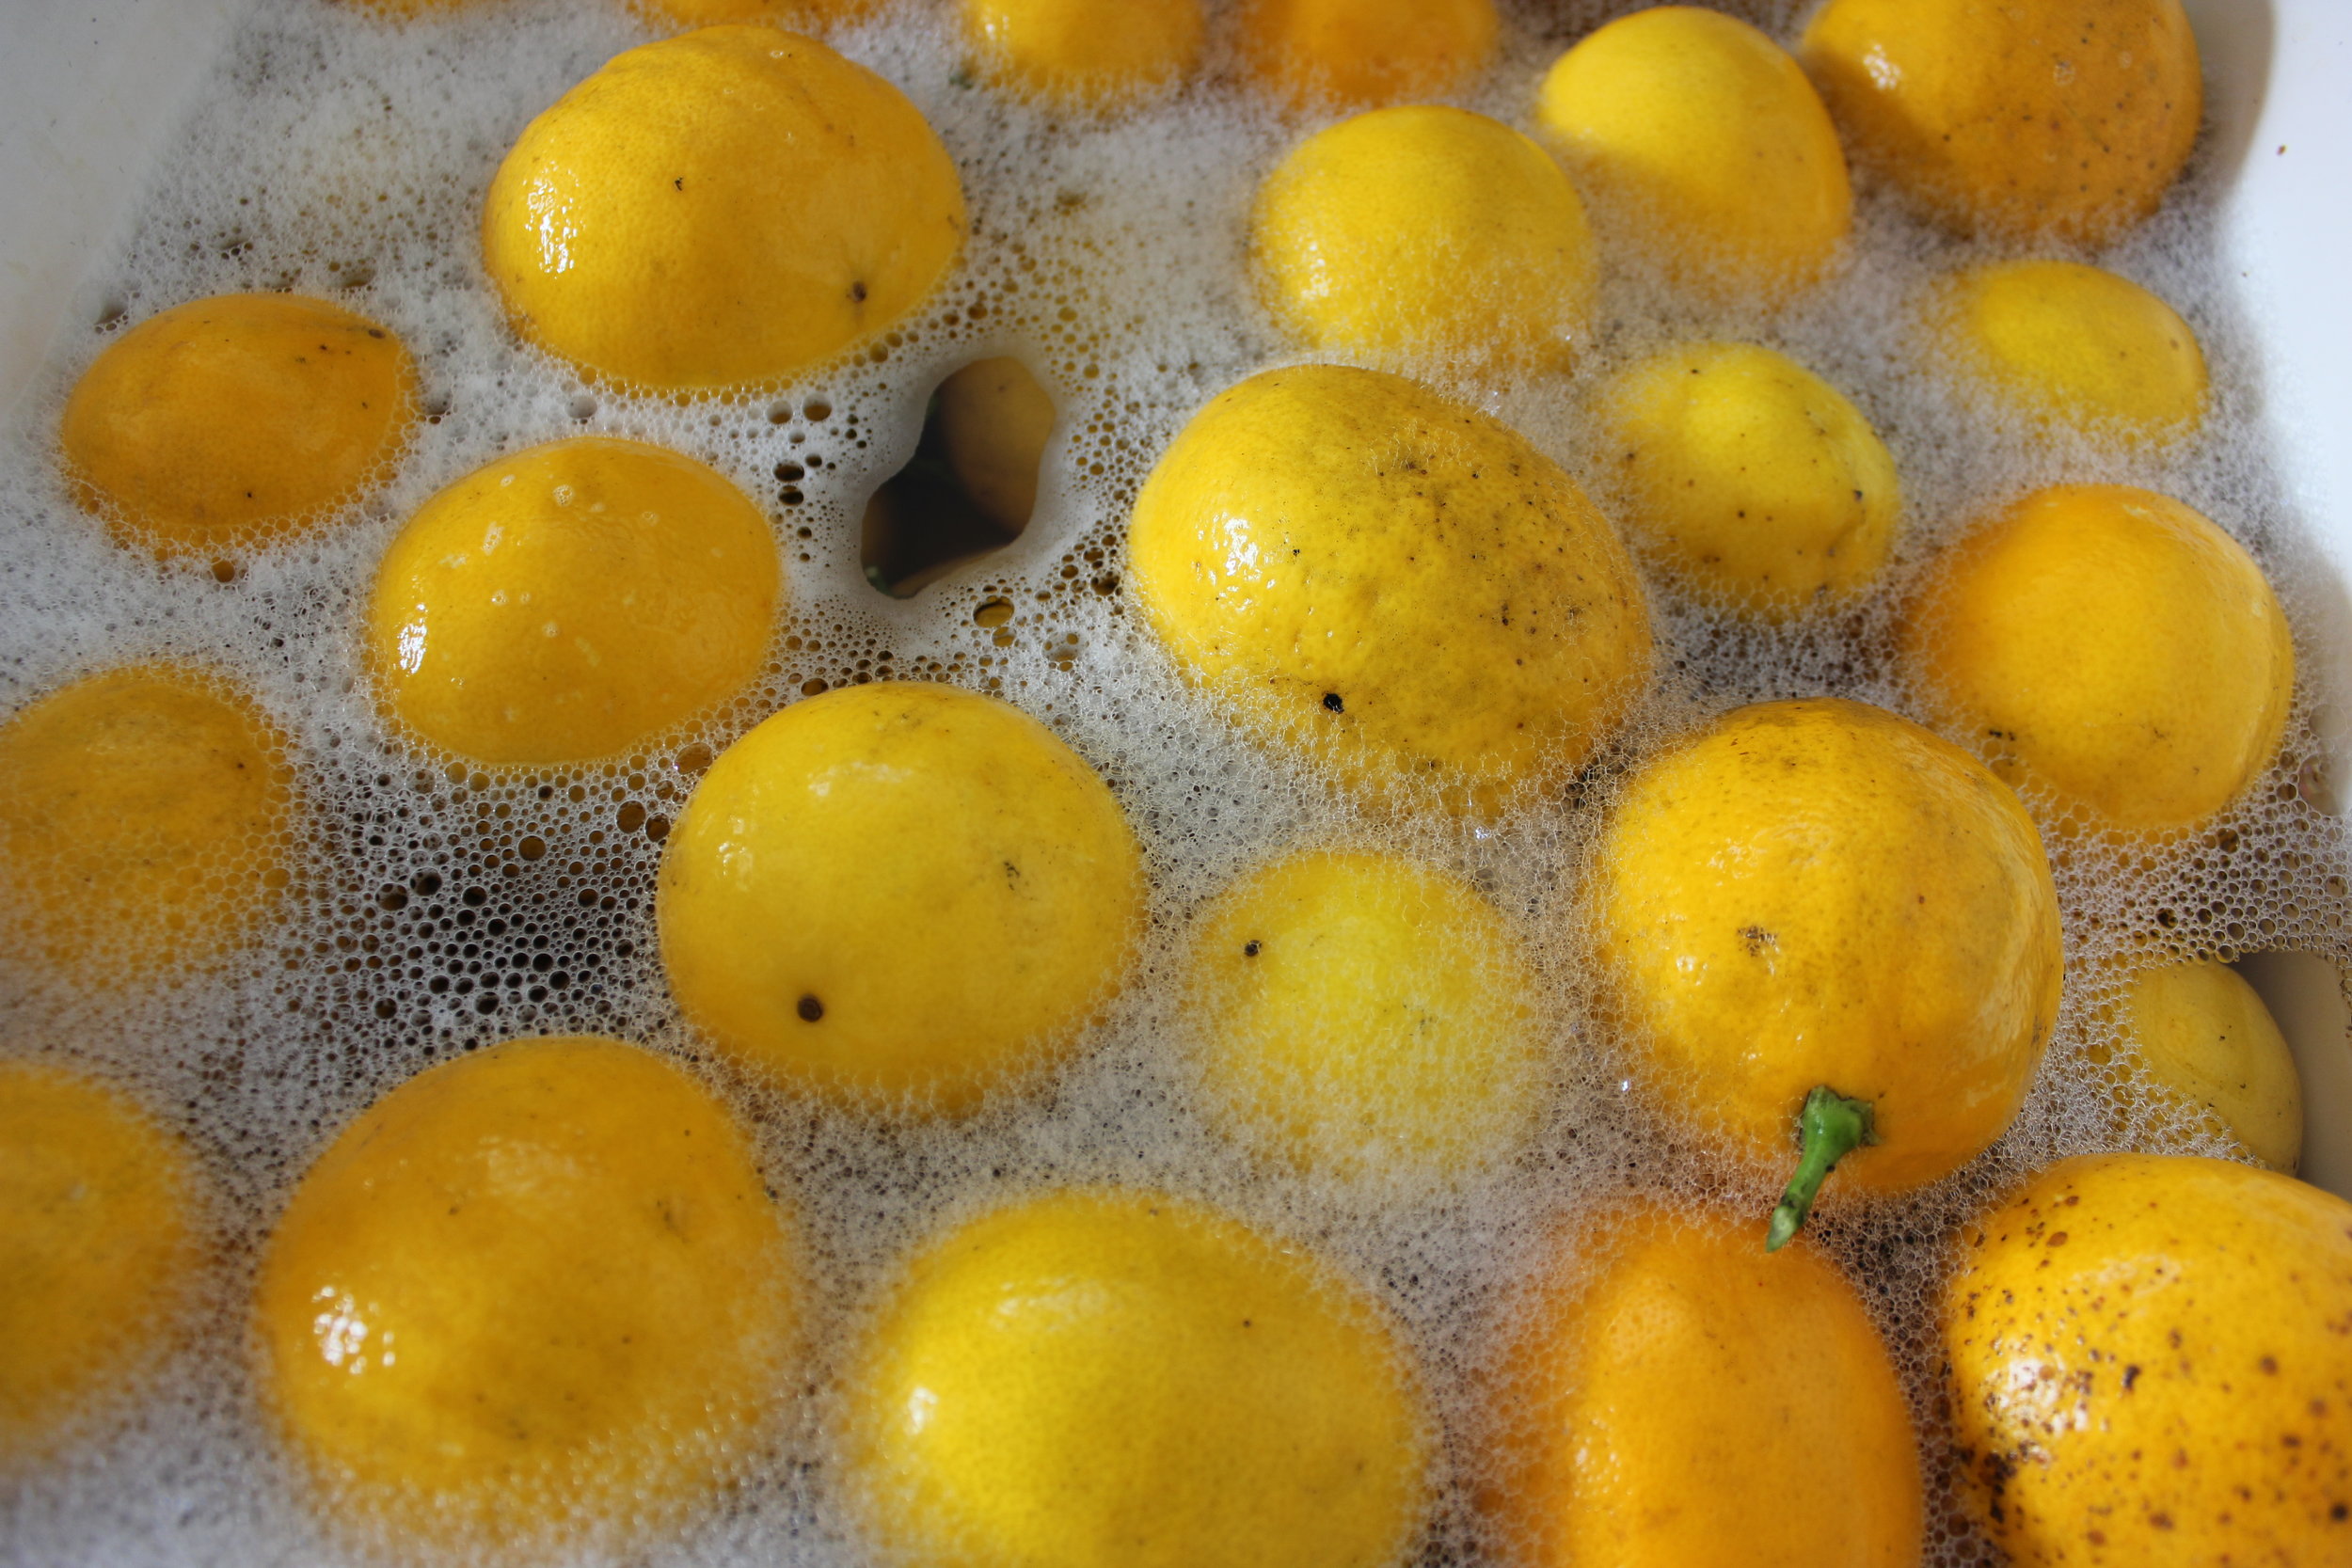
My Meyer lemon tree produced a harvest this year that was truly more than I could deal with. I have given away five (5!!) grocery store bags full of lemons, and it still has more fruit on it than I am prepared to use! The photo above was taken after I harvested those 5 bags I gave away. I am sorry I didn't think to take a photo before, I was so overwhelmed with the insanity of it all. One of the friends I gave lemons to has a serious talent for cooking and making preserves, so I was glad to unload a bunch with her. She's made marmalade, curd, and preserved lemons (which I'd never heard of). When I saw the preserved lemons last week, all gorgeous and perky in sexy tall jars, I was so envious! Why haven't I seen this before? I learned this morning.... I was at Berkeley Bowl West for spices and I saw a jar, about 8 oz of preserved Meyer lemons for $13. GAWD, that's insane. I asked her for her advice on making my own, and today I did it. Here's why that is noteworthy: I dislike cooking. I mean it, I honestly don't enjoy it. I'd rather eat a head of lettuce than make a salad. It's the same thing, but with less effort and fewer dishes. I've joked for a long time that I eat ingredients or I nuke food, but I don't make it. However, stuffing lemons in a jar is something I can do, and it was nice to make something so pretty that I hope will help me fake having cooked real food someday.So, following is what I did based on her advice and also review of other recipes online:I washed the lemons with a little dish soap and the scrubby side of a sponge. I started out using a veggie scrubber based on one blog's advice, but it released so much lemon smell into the air, I figured I was releasing too many oils and damaging the peel so I switched to the gentler sponge. Next, I separated out the beauties (above, aren't they gorgeous!?) from the fuglies. I preserved the beauts in the juice of the not-so-pretty ones. They were beautiful on the inside, and that's all that matters!Next, I made a huge mess. I took pint and a half size Ball jars, sterilized them with the lids (not the rings you screw on, just the lids with that sealant around the edge) in the oven on a cookie sheet at 220 degrees for 10 minutes. I sliced the stems off the tops of the perfect lemons, flipped them over and quartered them but not cutting all the way through.I put 1 tbsp kosher salt in each, and smashed them into jars as densely as I could with some lemon wedges to fill in extra space. As I filled each jar, I added black peppercorns, cloves, cinnamon sticks, and bay leaves in various amounts and combinations. I juiced the ugly lemons and poured the juice over the top, taking care to add enough juice to cover all the fruit..... which started to float and made me mad, because I was told to cover the fruit with the juice, and they were bobbing up out of it .... then I added a skim of olive oil over the top, slapped on a lid and the screw-top ring thingy, and took pictures.My friends' preserved lemons didn't have salt sitting on the bottom like I do, I don't know how she managed that.... but whatever.On the right there, you'll see some preserved oranges. That is an experiment and I'll let you know how it goes. I've been told I can crack one of these open in a month and dice the fruit into ice cream, over fish, roast it with chicken, into a salad (hahaha!!), pretty much anything I want. A word of caution I will repeat from another site is not to add salt if you're using salt preserved lemons in your cooking as they'll bring enough with them.Stay tuned to see if the danged things are edible in about a month!
San Gabriel Garden's Preliminary Planting Palettes
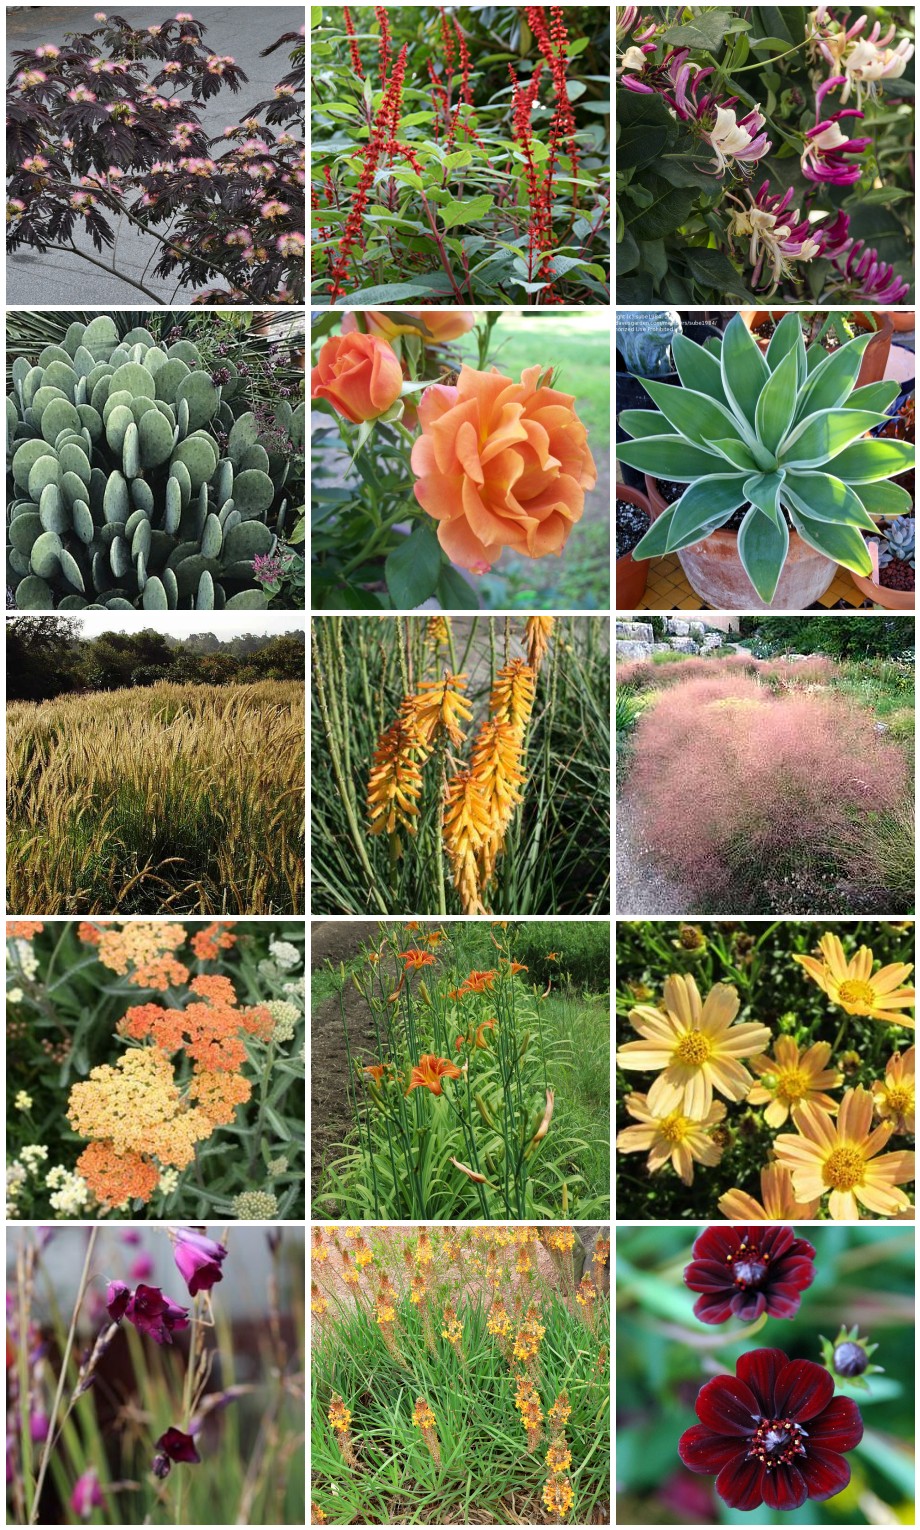
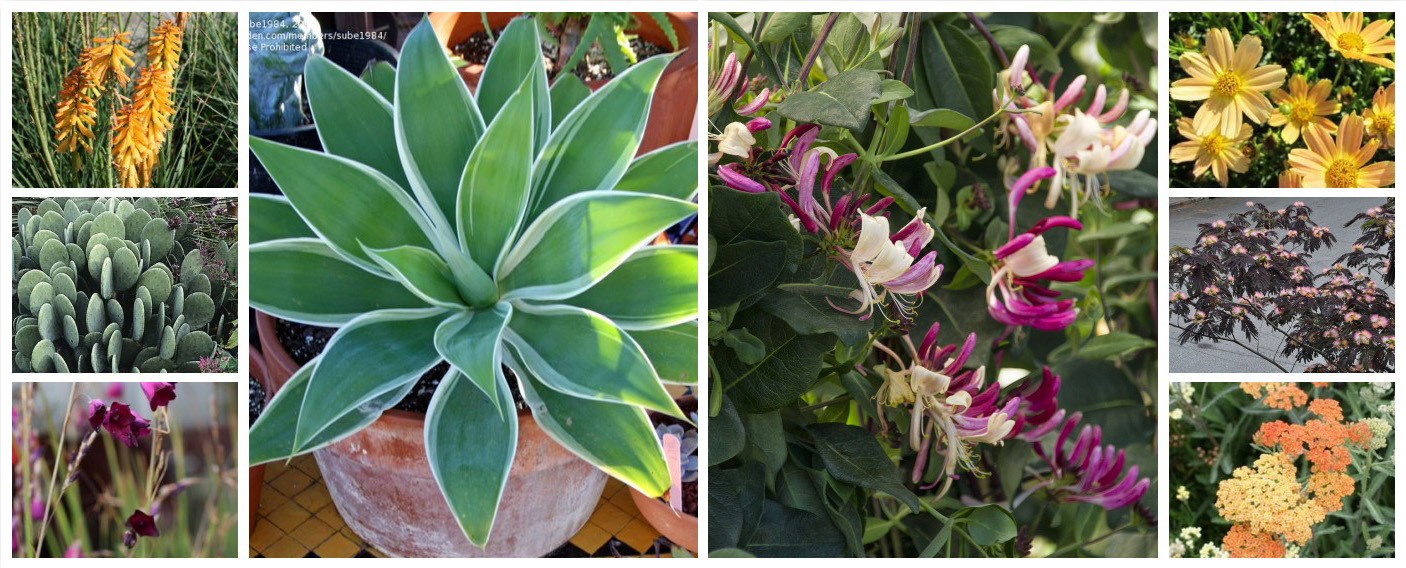
Back here, I talked about the conceptual design process, where I developed and sent over design concepts with a memo full of notes to the Owners. I sent all this via email because they live in Southern California and I live in Northern California, about a 6 hour drive away, so in-person meetings aren't always feasible. I also know the Owners pretty well - the husband is an Architect I have worked with, and the wife has a background in Interior Design - so I trusted that they'd be able to read the memo alongside the concepts and make an informed selection of their favorite. They did exactly that, sending me back comments on their preferred designs and I will now start to draft the designs for use in preparing construction drawings (so hang tight...)The next thing to do is develop the Schematic Design. In Schematic Design, I will make sure that the Conceptual Design evolves to have elements represented at actual size while I strive to hold true to the concept and incorporate their comments. For example, I will make sure that any paths are an appropriate width, furnishings are represented at their real measurements, gates, paving patterns, fencing, materials, etc will begin to be discussed, but I won't change the overall intent. I'll try to remember to share that when it is accomplished.... for now, one of the elements that needs discussion is a planting palette. In every phase of design, I imagine the feel of the place, and few things have more impact on that than the plants!What I'm trying to get at here is that in addition to designing for plants that will thrive in the same sun exposure, watering practices, soil type, climate zone, etc there's an importance to gathering plants that want to be seen together. The plants bring more than just leaves and color, they bring personality (and seasonality!) to the place. The plants and the concepts (at least for me, others may work differently) are not separate discussions, but both part of a larger vision. For this project, I made a huge list of plants I thought would work in San Gabriel as well as plants I thought the Owners would like. I imagined the designs as real spaces, re-imagining them repeatedly with different planting palettes until I had edited the lists down into a concept for the planting palette.Now, this does not represent the layout of the planting palette, and any plant geek can see that I've got some hydrozoning to do (putting low water use plants together and irrigating separately from higher water needing plants). That will happen in future phases, but for now, I am playing with a planting palette as a preliminary concept. For the rear garden, I chose lots of green foliage plants with what I equated to a "Hollywood / tropical" palette with many plants that could also grow in Texas (the Owners are from Texas, which is where I know them from). I did the same exercise for the front, but without the Hollywood / tropical aspect to it. Don't ask me why, that's just the direction it went.The front garden and the rear garden for this project are imagined with different vibes, but that doesn't mean that we can't use some of the same plants in both and we should! Having the two be completely distinct runs the risk of making their property seem disjointed. Take a look at the preliminary palette for the front garden (above) in contrast with the preliminary palette for the rear (below):They seem very different at first, but both have the same Honeysuckle vine in common and the same Agave. Each of the little square photos shows each plant at the same size, and of course we also aren't demonstrating how much of each plant there will be, nor giving a complete idea of their forms.... their impact in real life based only on visual impact could look much more like this for the front:and like this for the rear:See how they relate but take the same impact plants in different design directions? isn't that trippy?! I'll repeat this exercise with materials and furnishings, and the hope is that the whole mess will come together and become more than the sum of its parts.Years ago, when I worked on a pro-bono project with this Owner and had a conversation where he explained to me that the building he had designed had to be white. It wouldn't be the same building if it was not white (I was vehemently against it being white, I thought it was unsympathetic to the landscape). We had what must have been an amusing and fervent "discussion" for any flies on any nearby walls, and in the end, he convinced me. The color was not just a tacked-on thing at the end, it was integral to the spirit of his design. What I'm describing here is that lesson brought forward in my career and applied to my own work. In designing the outdoor environment and making connections to indoor spaces and people, one shrub does not always do the same job as another, and plants are not so interchangeable as one might hope. So stay tuned for the results - between me and the Owners, their home, and the process of refining the design, the end result is always a little bit of a surprise. I will be excited to see how the process progresses with them, and then to see it installed?! holy heck, I can't wait.
Design beginning with a PEN?!
My folks visited me about six months ago or so. While reading my draft portfolio booklet, dad started laughing. He'd read where I stated that I start every design with a pen. 'No you don't, you have a drawing tablet! You draw in the computer!' says my dad. No, I don't, but I thought it was a funny assumption and so here we are talking about it.Here's the thing - using technology is lovely when you know what you want it to do, but when you have no idea, when you're imagining stuff, using Photoshop with a tablet and stylus is not the most direct route from the brain. You have to push buttons, set layers, import files, etc. Forget THAT! For me, using a pen is the shortest distance between creative thought and seeing it with your eyes (on the page).Take for example a current design project in Southern California, it is for the residence of an Architect I worked with years ago:I typically sit in a coffee shop and doodle for a while while studying site photos to really wrap my head around the issues of the site and try out various ways of shaping the space, fitting in uses, etc. I use a printed base plan under tracing paper, my favorite Japanese ballpoint pens, and a latte (in reverse order). The first round is not to scale, exploring idea after idea, small about the size of an index card.Sometimes I do studies that try to fit certain ideas to the site regardless of anything, and these usually look pretty nuts, especially when I don't re-draw the parts I've decided against:After generating several concepts, I refine a few ideas into what I still call conceptual design, and I limit myself to 3-4 per area max. In this case, there's a front garden and a rear garden. Even now, nothing is really measured, it is all eyeballed and still very sketchy. Notes around the edges help me remember the images I had in my mind's eye for plants and other materials. I have to make some assumptions about the clients' lifestyle, and sometimes I suggest things they have not thought of - like what if they said they want the rear garden to be for kids' play but the front is actually a better size for it....(like in this garden).... the interview process can provide a lot of information, but you really can't explore all the possibilities in an interview or two, and it helps to see ideas drawn when discussing them.At this point, I sometimes send it to the client for input. Below are the finalists for the front garden:and here (below) are the finalists for the rear garden:Some clients enjoy working at this sketchy loose level, and this client is definitely one of them. I'm honored to be designing the home landscape for his family, I hold his abilities in the architecture world in high regard and I know he and his wife have great taste. However, there are clients for whom it is more appropriate to narrow things down to one or two ideas and do a much more formal, complete presentation. I like both approaches, but for sure, this one allows for the client to have much more input at the very early stages.SO - which will they choose? We'll see.
Seasonal Planting Overload
A new client's project calls for seasonal plantings in two important pots sitting atop columns flanking the front walkway. I hope to be able to show you the changes we make to the planting palette in the rest of the garden, not sure when, but tonight I have seasonal plantings on the brain.I don't get asked for seasonal plantings very often, so I dove into all the bazillions of options - so many plants, so many cultivars of each! Do you know how many Violas there are? Heucheras? Ipomoea, Coleus, Petunia, and so forth!!? I wound up with 60 photos in short order and had to figure out how to organize it so the Owner (or I) wouldn't have a stroke from too many options. Below are 36 of the 60 I saved right off the bat, you can see how the editing process becomes king. Some are my own photos, some from various growers, many came from Proven Winners (credit where it is due!) which is a large commercial grower that supplies pretty much every nursery I know:There are many constraints in narrowing this down: changes pending in the rest of the garden, soil volume in the planters, and the intention of swapping the plants out seasonally. Additionally, whatever we plant has to look good when it is new, add color coordinated with a TBD planting palette, and be showier than the succulents they have now which blend-in too much with their surroundings. The most limiting of these is the soil volume - not much soil volume = not big plants and not very many. I know, we've all seen photos of amazing stuff in teensy pots, but this is usually the result of growers' careful (read: fertilized like crazy under perfect greenhouse conditions) management and not what we might expect at home.I assume you're familiar with the "recipe" for container plantings? Some say you need "spillers", "fillers", and "thrillers". That's great if you have room for all that diversity and you want mixed plantings. I am not so sure these planters will look so good with too many different things; the soil is only 13" across and 9" deep. They're beautiful planters, just not very big.I came up with a strategy - after I saved all those photos. My strategy with most planting palettes is to gather in lists and photos everything I think will work and then edit until only a few favorites remain. I often print photos of everything and arrange them all over my desk, developing groupings of favorites and rejects, moving photos between these groups often until I've covered all the bases - seasonal interest, form, leaf color and texture, etc. Further edits seek to eliminate anything that clutters the vision, and viola! ... until I show it to my Client ...So tonight, to stave-off the aforementioned stroke, I limited the plants to 3 options: two plant combos, one plant that will fill-in, and bulbs planted under something else. I further limited the options to annuals (except the bulbs) and to color groupings I named "Chartreuse Juice" (a small sample of the options above) and "Lavender Carmel" (a small sample of the options below). They seemed to separate themselves out naturally and fit in with the two plant palette options I am proposing for the rest of the garden.Given that the planters are only big enough for one or two kinds of plants at a time, that will be the next step with the Client - what looks good together? What can stand on its own? I still have waaay too many options, but I know my favorite combinations, and the outliers will be held back so we both don't need ambulances by the end of our meeting.(and yes, I had entirely too much fun with Big Huge Labs making these mosaics)
Test, don't guess
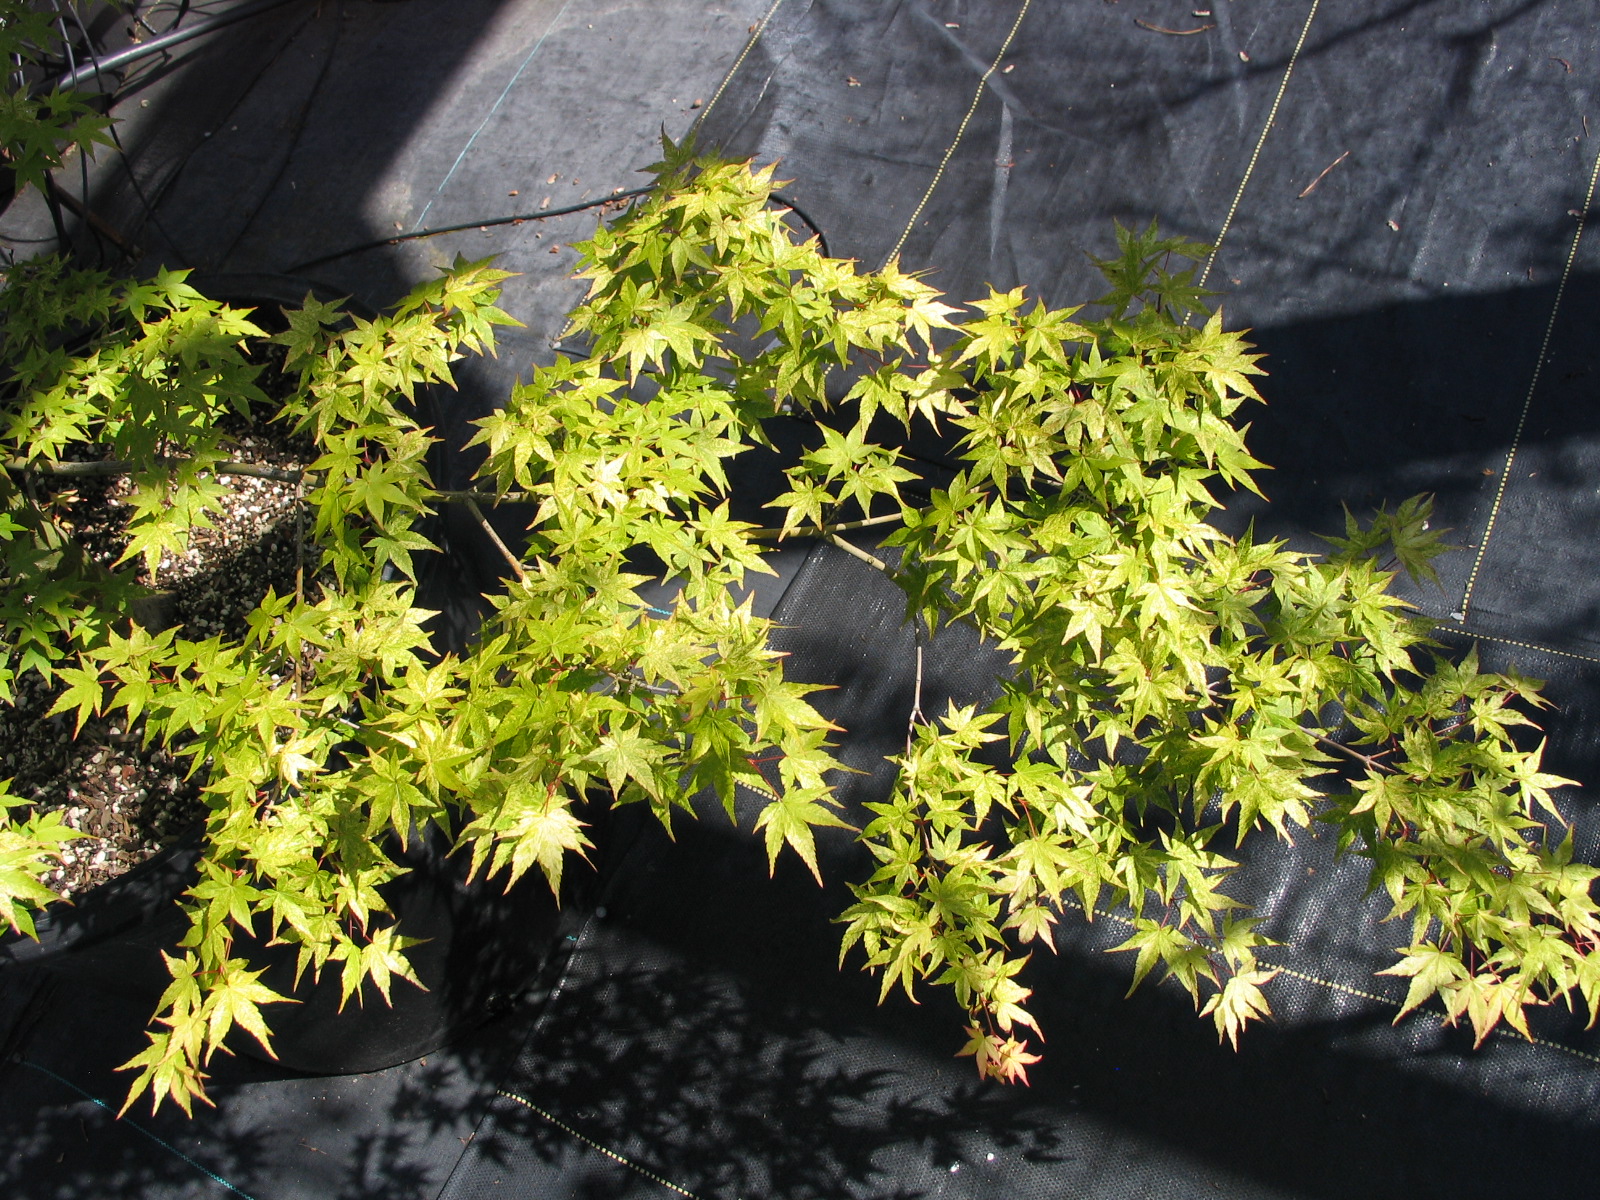
I have a handful of stories from professional practice where soil or plant pathology testing should have been performed but wasn't. I personally believe that soil should always be tested before any fertilizer or amendment is added, and follow-up testing should be done every couple of years to see how the soil health has changed. Not testing soil or sick plants before spraying or amending the soil is like prescribing medication without knowing what disease you are treating. You wouldn't do that to your body, so why do we do this to our biggest investments (your home or commercial property) ?!Thankfully, getting lab tests done is not difficult if you take the few minutes needed to do it right. Most soil and plant pathology labs are easy to work with, they'll tell you what to do and how to send it in, and will provide you with a report explaining their findings. Bammo - diagnosis! Proper treatment! Hooray!Now for my cautionary tale:Years ago I was working for a firm in San Francisco and we had a client with a mature beloved Japanese Maple. It had a nice shape, and was reportedly absolutely beautiful in the fall. Their project involved building an underground garage underneath this tree which required that we dig the tree out, box it, crane it off-site, and have it cared for while the garden was re-made in a new design on the roof deck of this garage. The tree would be the centerpiece for the new design, and I thought how lovely that they were willing to spend tens of thousands of dollars to have it salvaged and brought back when a new tree would be so much cheaper.Before we started demolition, the client called and said that the tree wasn't as leafy (this was mid-summer) as it had been the year before. We called a couple of arborists out to the site who took a good look at it, tested the trunk with a densiometer, and decided that it needed a little more water - we had just gotten through a few unusually warm weeks, so we all thought no big deal. The gardener was asked to provide it with some nice deep watering and we waited to see how it would respond. It repaid us with a flush of tender new leaves and we delighted in this result.I wish I could remember how this next step was decided on - we asked the gardener to fertilize it. The gardener was a well-meaning fella who had done a good job so far. His English was not great, but nobody had a problem with that. He fertilized the tree and within a week, WHOOMP! Naked tree. It dropped every single leaf. We could not understand why - it was just recovering! We finally sorted out that the gardener had mis-understood the label on the fertilizer package and used 10x the recommended amount! That tree was sitting in a toxic wasteland of salts and chemicals. Rather than wait for his next visit, I was dispatched to put soaker hoses around it and try to water the fertilizer out of the soil. I left those soaker hoses on for hours, they were coiled around and around under the entire dripline of the tree. We had the gardener follow-up, soaking the soil thoroughly on his next couple of visits, and we hoped that the excess fertilizer had been literally washed away.You can imagine how glad we were when it repaid us with a second flush of new leaves.... only there was something different.... these leaves were smaller, slower, not quite right. Nobody knew what to do; we just kept watch and hoped for the best. About a week later, it was dead. Dead-dead. All those new leaves fell off and you could feel that it had passed all the way on.This was such a disappointment for the Owners and for us - after-all, here we were, a team of arborists, landscape architects, and the well-meaning gardener. It sure looked like we killed it. This is when we did the first intelligent thing: we had the tree and the soil tested. We took samples of the leaves, the branches, some root clippings, and the soil, and sent it all off for analysis. Care to guess what we learned?That poor tree had a raging infection of some kind of pathogen with a long name I've long since forgotten, and the lab said that this infection had likely been there for a couple of years already to be this bad. The tree was doomed from the start; our screwups just pushed it over the edge. In a way, this nightmare saved the Owners a bunch of money, but that didn't make anyone feel any better. We'd spent so many billable hours trying to figure it out, they ended up wasting a lot of time and money paying us to professionally accidentally kill their beloved tree.So you know, the lab that we used was Soil and Plant Lab. They are my favorite lab because their people are helpful and knowledgeable and their reports are thorough and easy to understand. It isn't so expensive to do, and one test can save not only your money, but your peace of mind and the health of your investment.BTW, I took the photos at Momiji Nursery in Santa Rosa back in 2006 when I was working on this project. They sell beautiful Japanese Maples.Thank you for reading, as always, I look forward to your comments!J
Artichokes' Awkward Phase (so what?!)
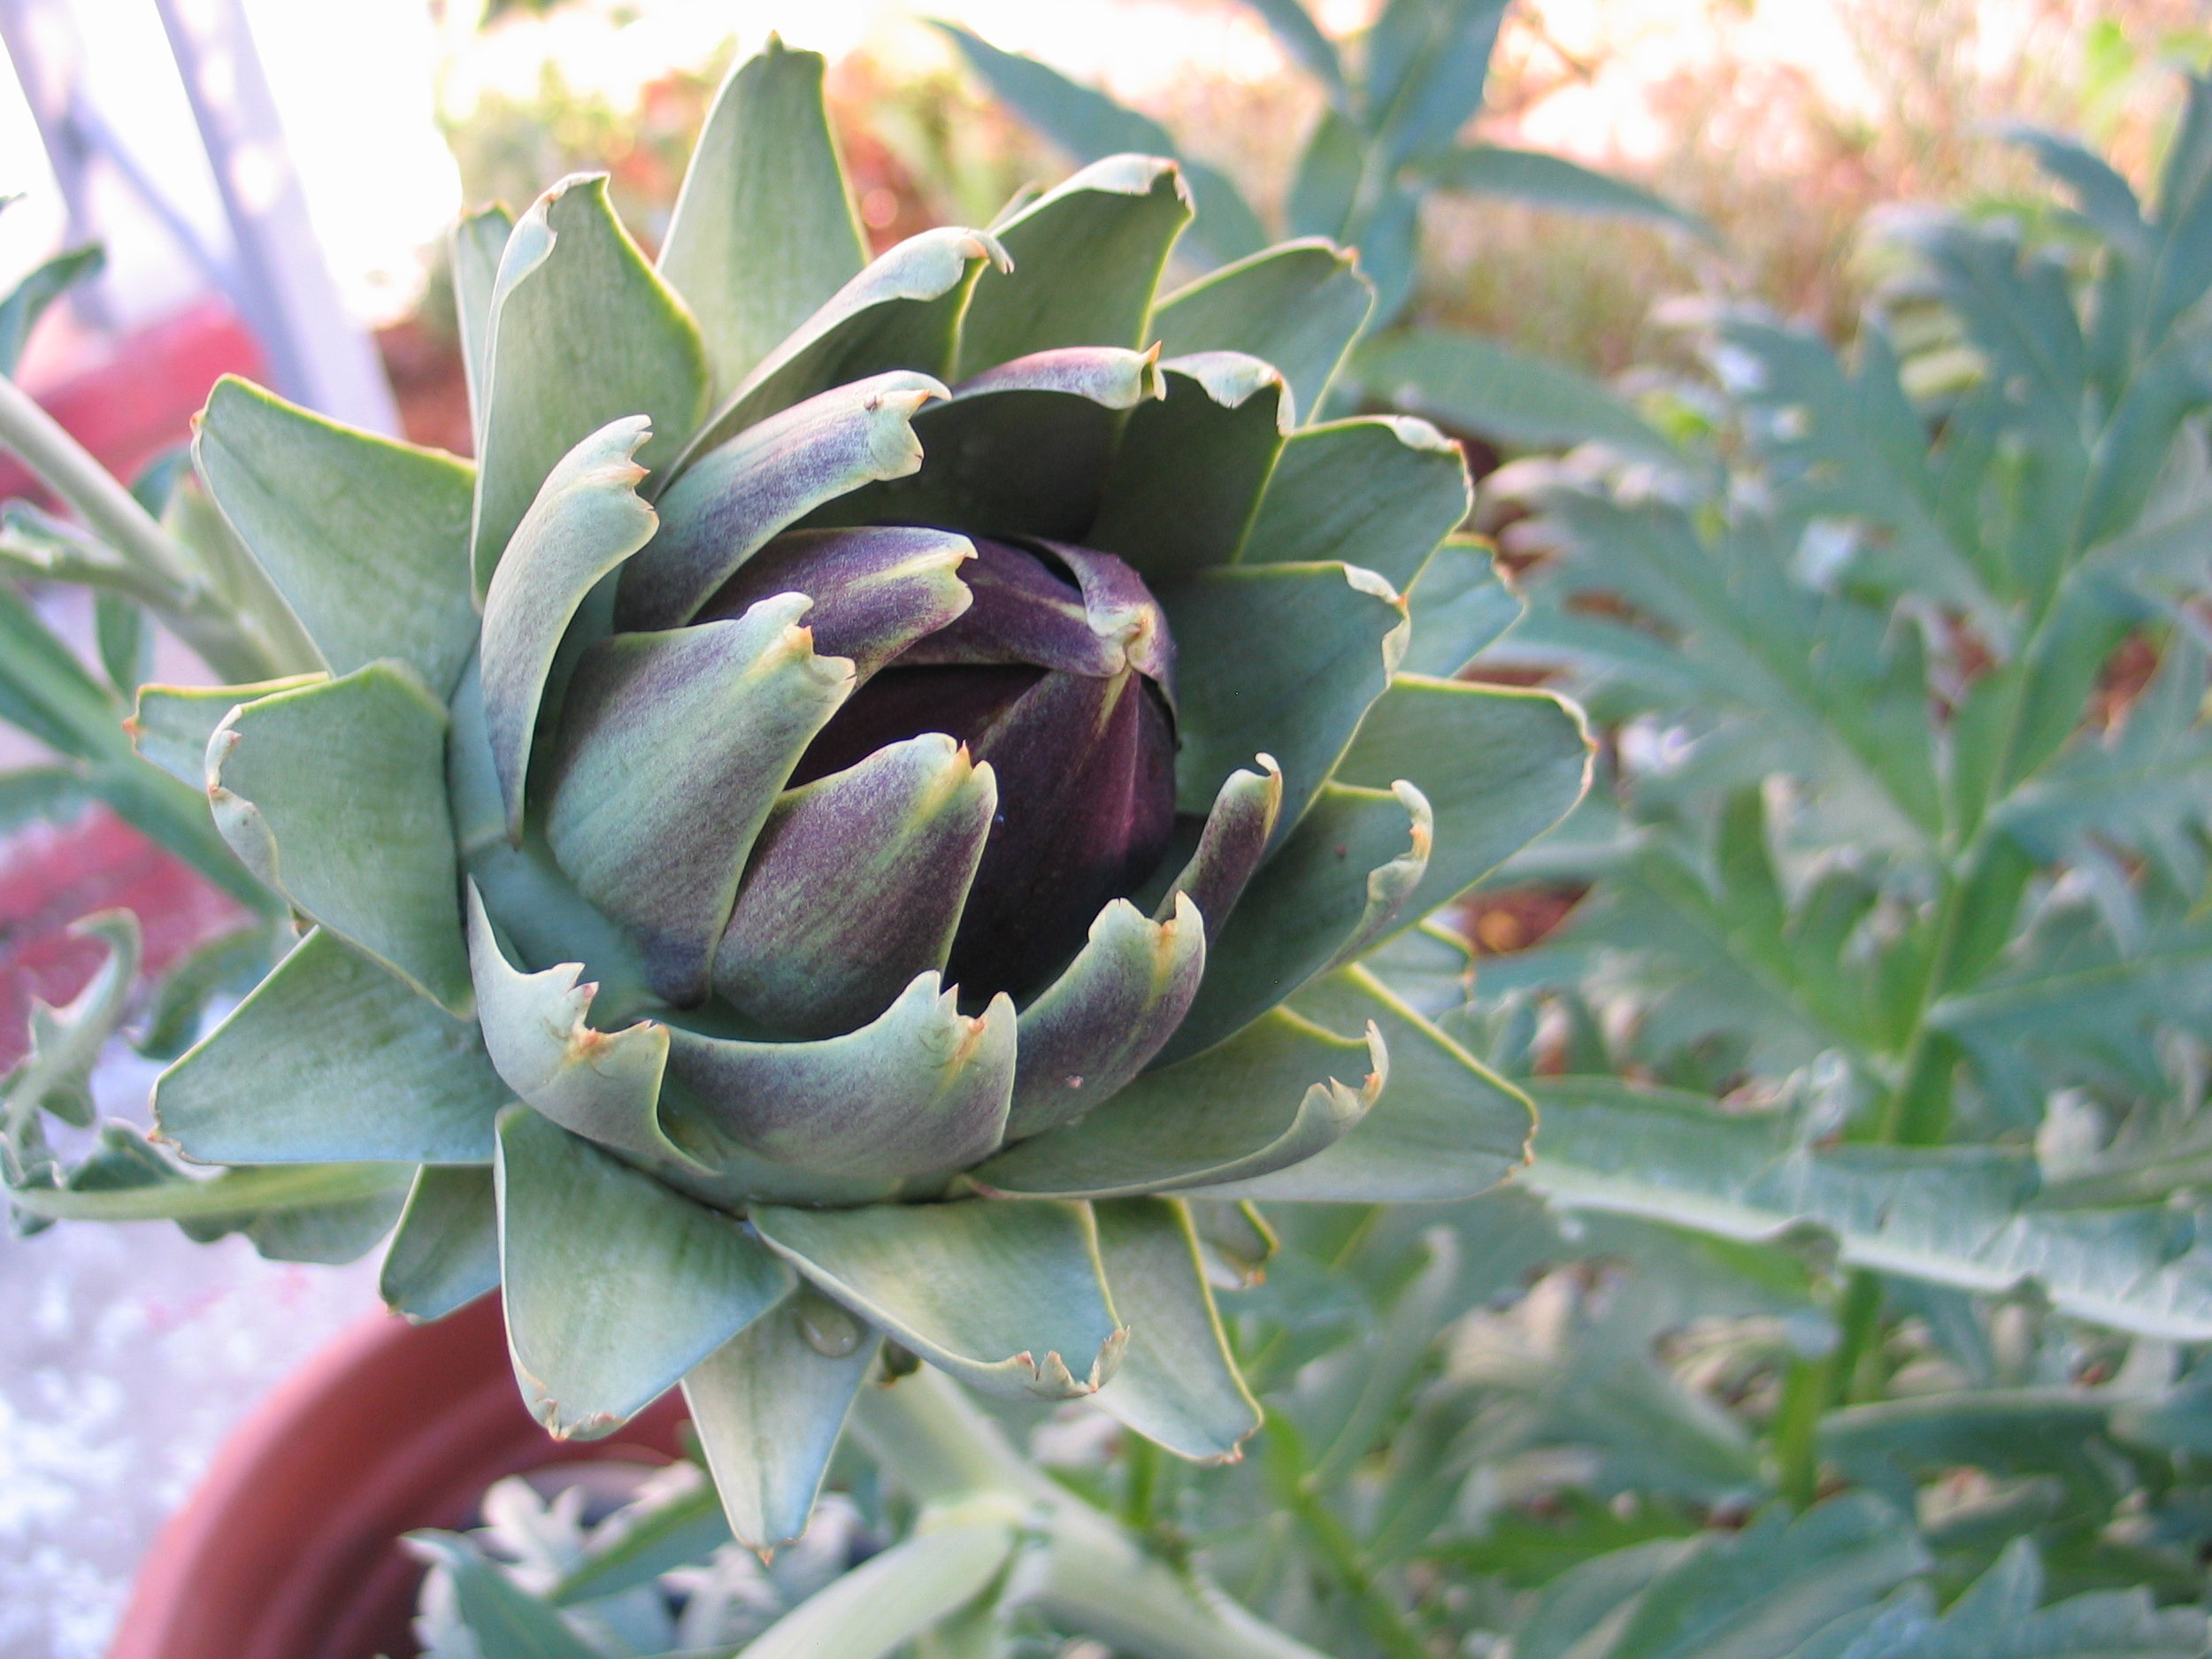
Artichoke plants can be real stunners. Their soft, enormous, sculptural bluish foliage is a real treat in a garden, especially in contrast with more subdued looking plants. These big dudes can make a real statement. One of my practices as a professional (which sounds better than 'I can't go to a nursery without buying something') is test growing plants and watching what happens over time. This summer I trialed Zinnias, Artichokes, several ferns, Marigolds, Scabiosa, Cosmos, Calendula, several roses, Gardenias, Heucheras, a few grasses, Daphne, a handful of Penstemons, a Magnolia, an Albizia, Sweet peas, and Lupines among others (this list is the survivors).The Artichokes, though, held a lesson. Googling Artichokes didn't tell me much about them. I found oodles of photos of the flower buds (the bit we eat) and foliage, tons of recipes and so forth... I found websites about how to grow them, where to get them, I even watched a video about growing them, but in my searches and plodding through books, I did not find anything about their life cycle. The best information I found was in Golden Gate Gardening, which talks about how to grow them in decent detail, tells you what to do, but does not give a complete picture of what the plant is doing while you're busy taking care of it.So, darling readers - here are my chokes from their glorious youth through that first awkward phase:May 7th: Here they are a few weeks after I put them in the ground - I bought three 4" pots of them and also three clearance rack 2" pots of dying plants. All of them grew so FAST! There really isn't much point in spending a lot on an artichoke plant, the little sad ones will do just fine if you get them in the ground where they really want to be. Sorry, I did not record when I planted them nor did I take photos of the sad little dudes.July 8th: Two months later, I've got several flower buds starting (above).July 28th: I let a few flowers open just to follow what they do. Out of the six plants I grew, despite being in partial shade, I had more artichokes than I could possibly eat.Aug 1st: I had taken the chokes off one of the plants (delicious) and it repaid me by doing this. It is a sad looking stemmy misshapen thing. Welcome to the Awkward Phase. I know they're perennial, some say they're semi-perennial, living only 5-6 years, others claim they can live much longer. I don't give a rat's patoot when getting a replacement plant can cost less than buying an artichoke for dinner and they grow so well.September 25th: The stems and leaves continued to fade and look like total crapola (read: turn brown and sticky) until about mid-september when the next growing season's leaves began popping up at the base of the plant. I left the flower on to watch it go to seed, and seed it did! I was tracking these big globs of brown fluffy seeds into the house and they were blowing around the yard. Rather than let artichoke babies take over, I took this opportunity to finally break the old stems off most of the plants at their bases and chuck them in the green waste bin, I left one alone to do its thing for another two weeks, when I bought a new camera.... .... and in Mid-October, my new camera helped me get a better photo of the fluffy seeds on one plant and new foliage on another.So what is my point? Artichokes are cool. What is even cooler is how dynamic they are. Many people don't have the patience to let a plant do awkward unsightly things in their garden, and that's okay - but you can't really understand your plants unless you understand their lives. Books don't do enough, web-searches will give you tons of beautiful photos, but nothing compares to growing something and being observant.Thank you!!
Italian Garden in the fall
I was just sent two new photos of my project in Italy (mentioned before HERE) now that it is fall. The garden looks fantastic, which is a real testament to the Owners taking such wonderful care of it! That is such an important aspect of any garden's success, and I'm delighted to share these images with you:
Graphics Bootcamp - better for my students or me?
I taught a new class (new to me) this month at UC Berkeley Extension: Graphics Bootcamp, it finished up this past weekend. It is two full 8 hour days of instruction held on two consecutive Saturdays. Since I hadn't taught this before, I had a lot of preparation to do which was fun to pull together. I did most of my planning at my favorite coffee shop, Julie's in Alameda, so I could focus. Being at Julie's begins a whole other story for another time (check back next month - early October). First I looked through my favorite books on landscape graphics:From left to right above, that is an old edition of Drawing the Landscape by Chip Sullivan, an old edition of Landscape Graphics by Grant Reid, my 3-ring binder of images and drawings (kickin' it old school with the binder), the relatively new book Freehand Drawing and Discovery by one of my favorite people James Richards, Drawing and Designing with Confidence by Mike Lin, the current (Sept 2014) copy of Landscape Architecture Magazine put out by the ASLA that had some nice concept sketches in it, and my big pile of notes, exercises, and general mayhem (in the orange folder) see below:Then I watched about 12 hours of how to videos on YouTube. I borrowed exercises from the books, made some up, tried all of them against a timer, wrote the syllabus and my own lesson plan list, gathered inspiring links and images on Pinterest and stuffed a black and decker toolbox full of colored pencils, pens, pastels, markers, and so forth. I steeped myself in beautiful drawings for about a month. I was surrounded with color and texture and started to realize that the pressure of doing everything faster while I was working for others, the drive to take everything to the computer, to use technology, had allowed me to set up some uncreative habits.Now with class done, I don't want to use the renderings I am about to send to a client - renderings I did in Photoshop that will probably suffice, but did not necessarily take less time than if I'd done the work by hand. I believe that I can do the renderings faster by hand, and they will be more interesting. The only drawback is that there are more steps - in Photoshop I sit here entering information on the computer, and then my work is instantly available to be emailed because it is already digital. There are no trips to the local print store, no scanning an oversize sheet, none of that. What it lacks, and maybe this is the fault of my Photoshop skills, is a certain amount of soul. Don't get me wrong; I have a Wacom drawing tablet that allows me to make a drawing on Photoshop look like it is hand-drawn, but there's still something about touching markers and colored pencils to real paper that adds an intangible bit of heart.I've heard the adage that 'if you want to learn, teach', and I suppose I knew that I would learn a great deal by teaching a new subject. However, what I did not expect was how completely inspired and excited I would become in the process. You can expect that the next project I post will have hand-drawn graphics to go with it.
Desert Botanical Garden in Phoenix
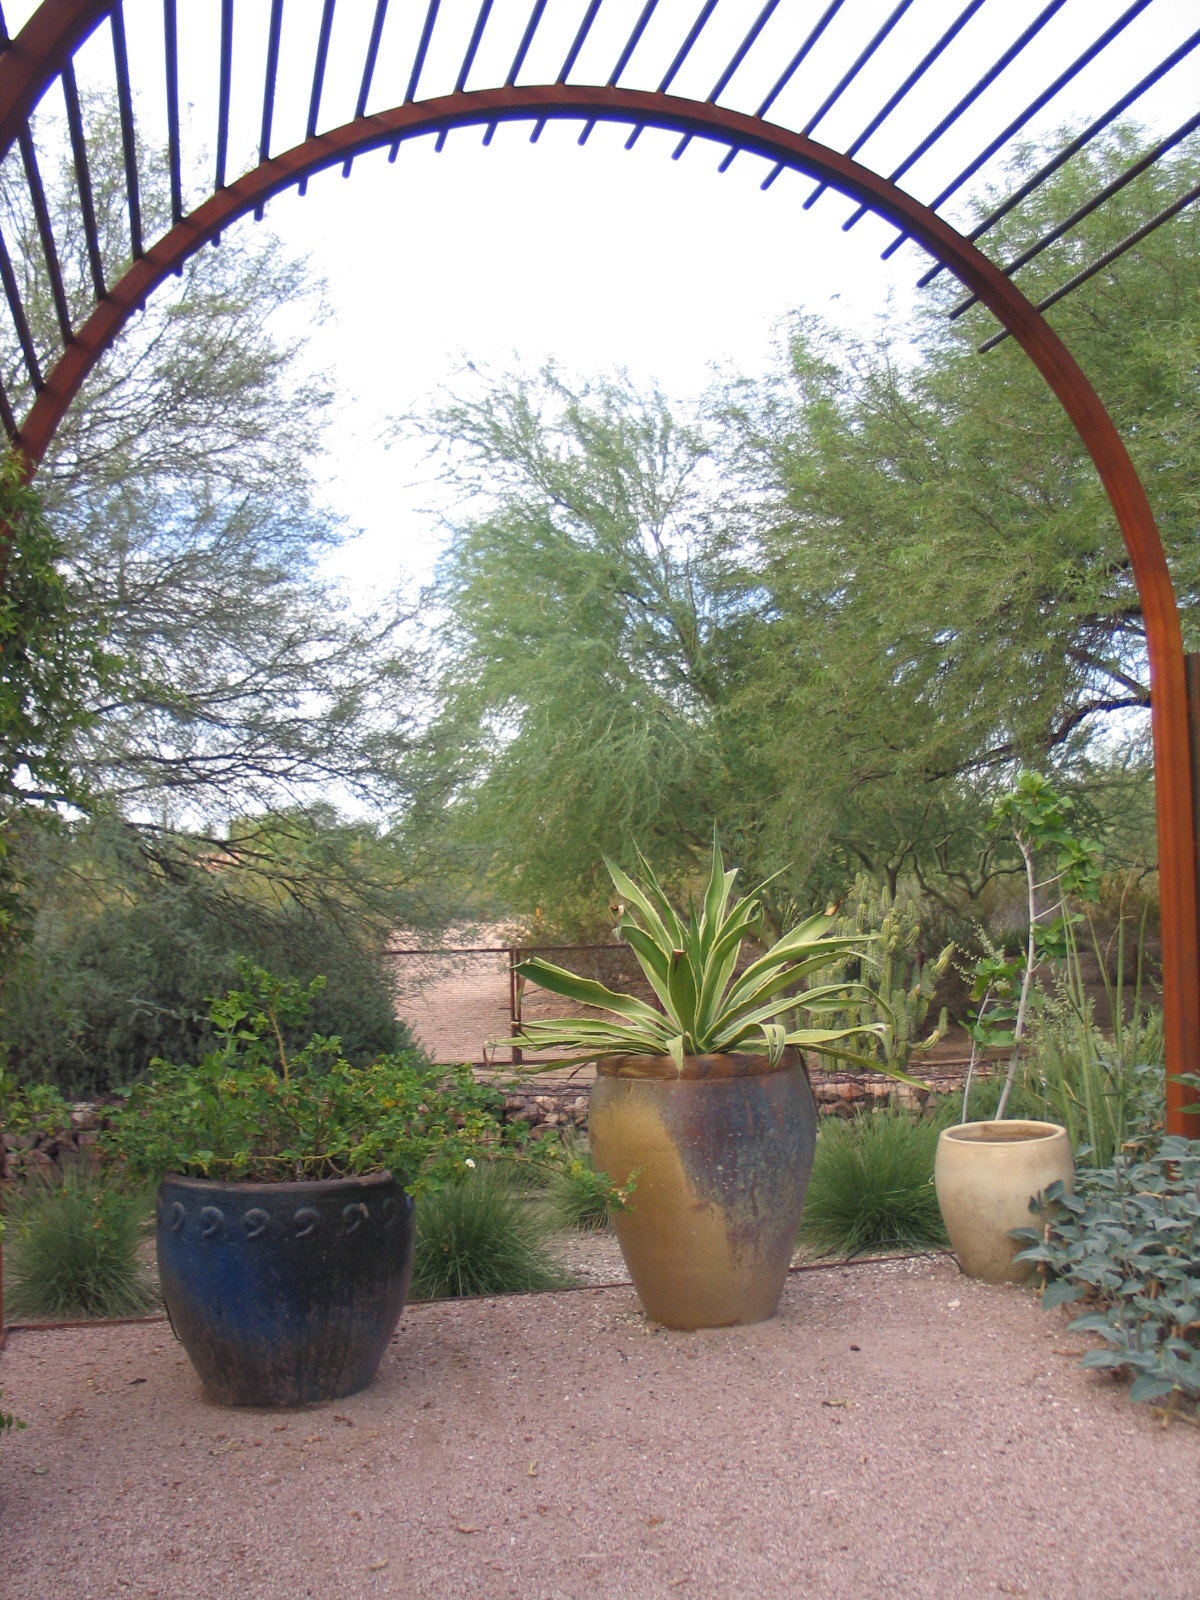
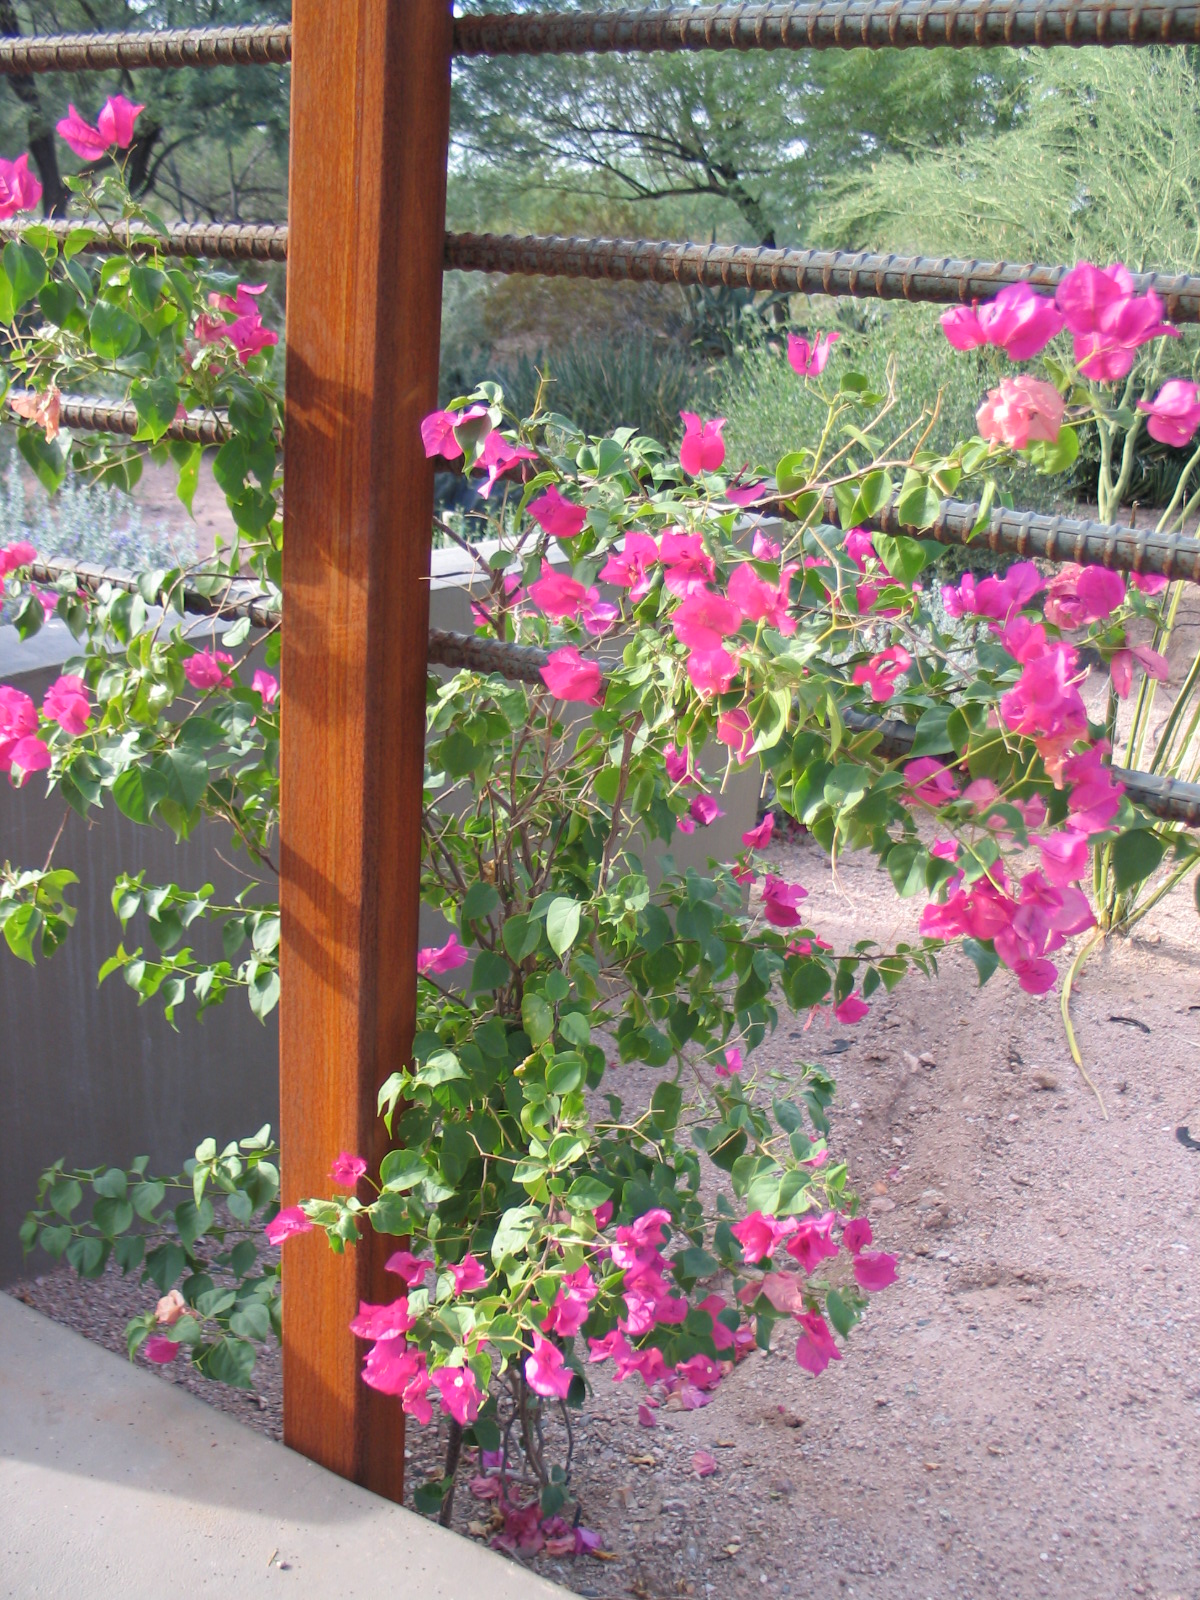
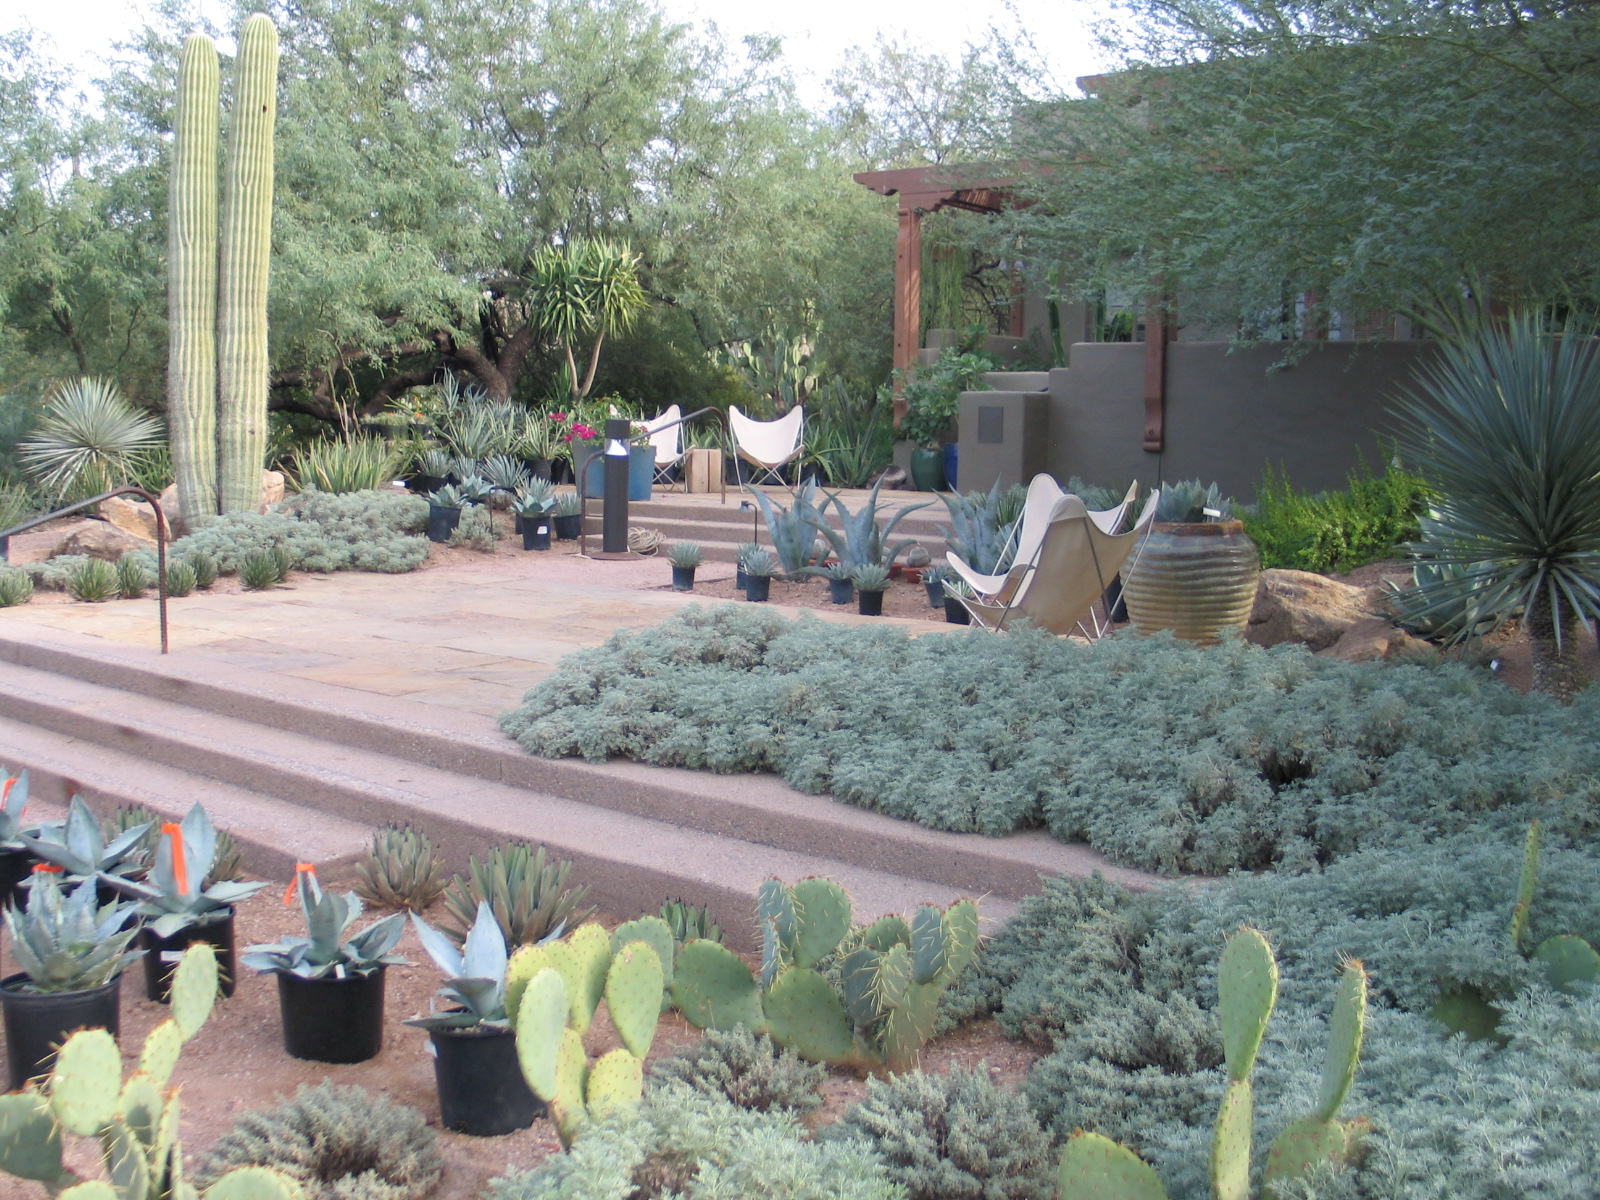
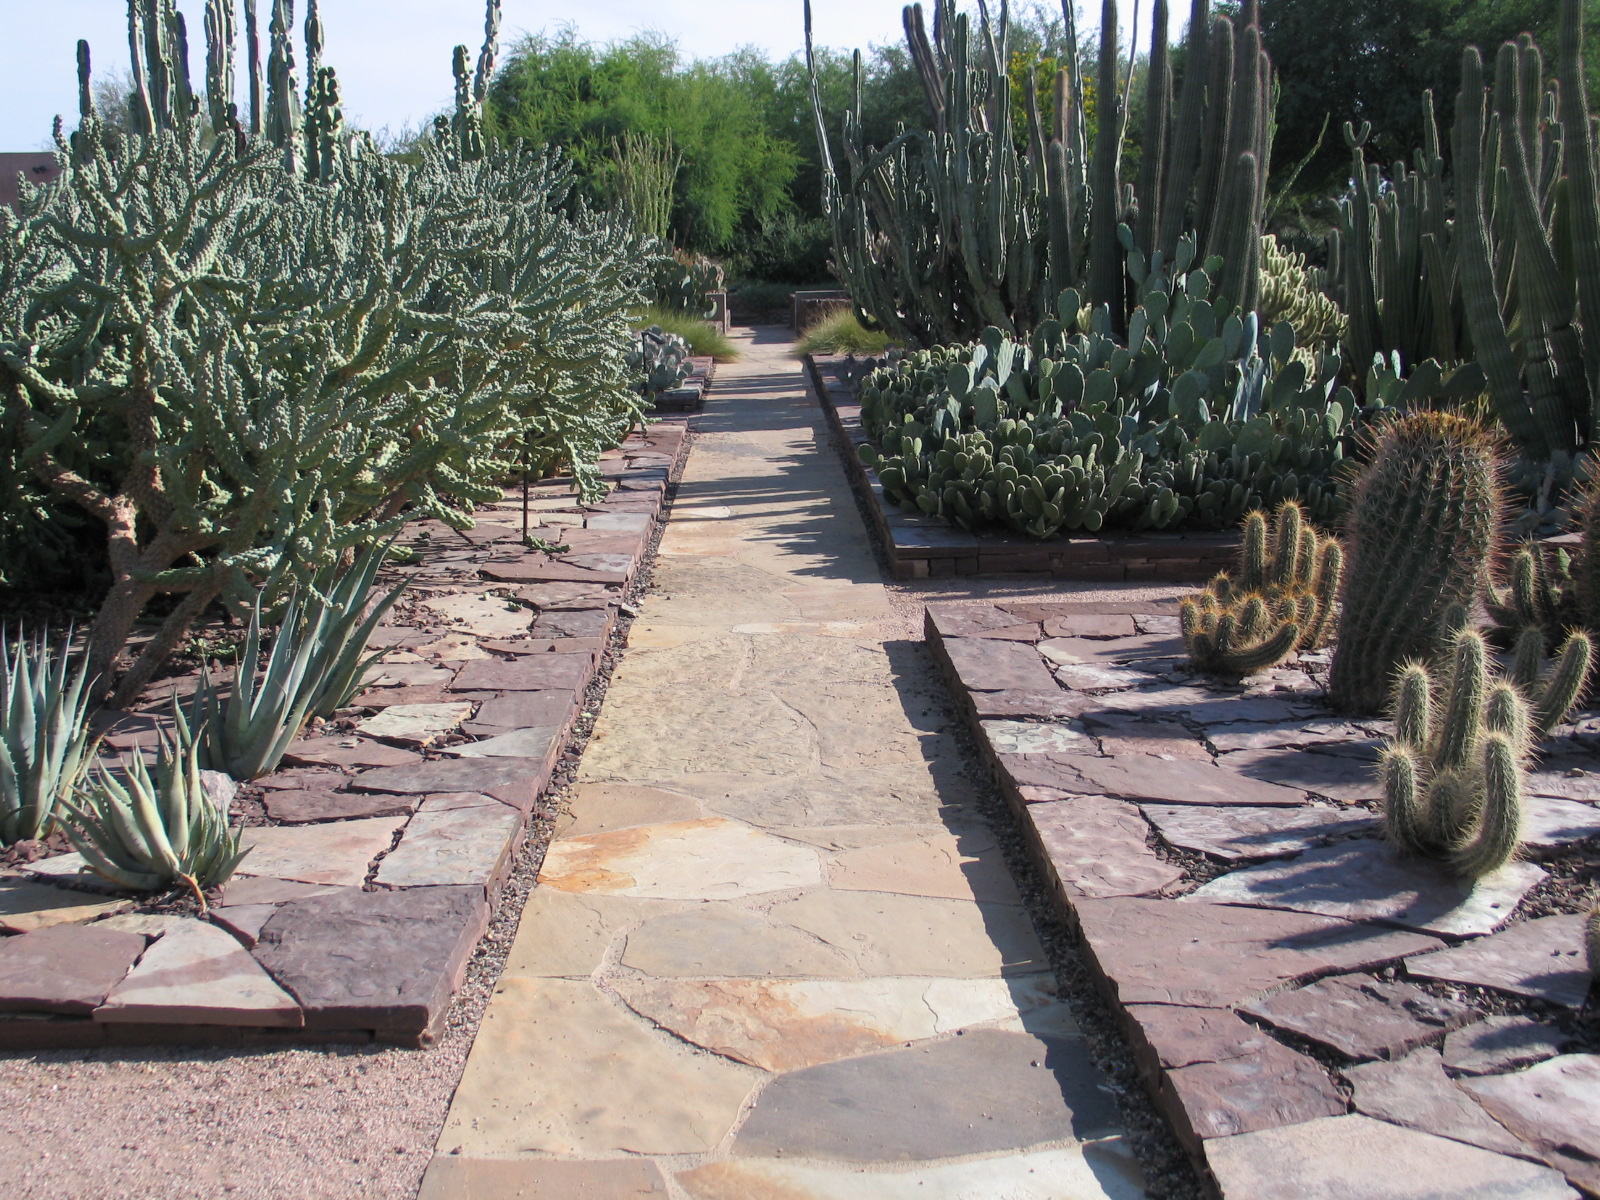
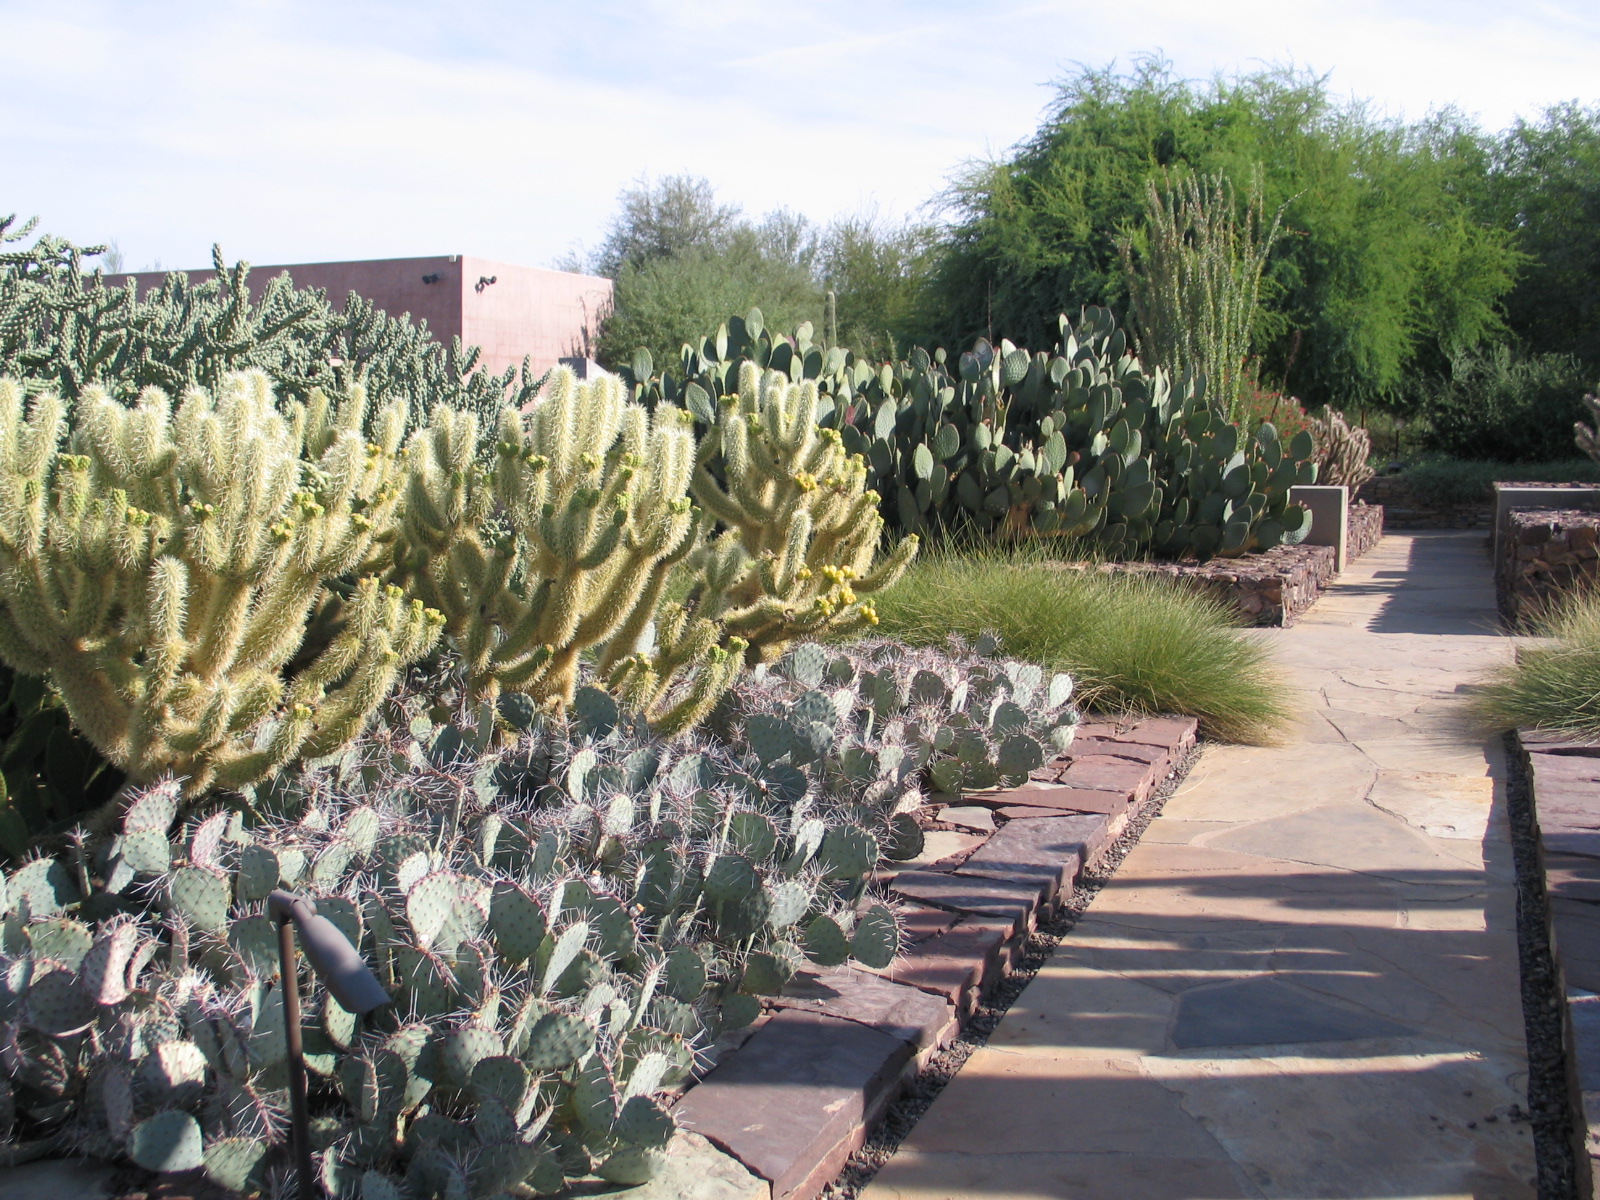
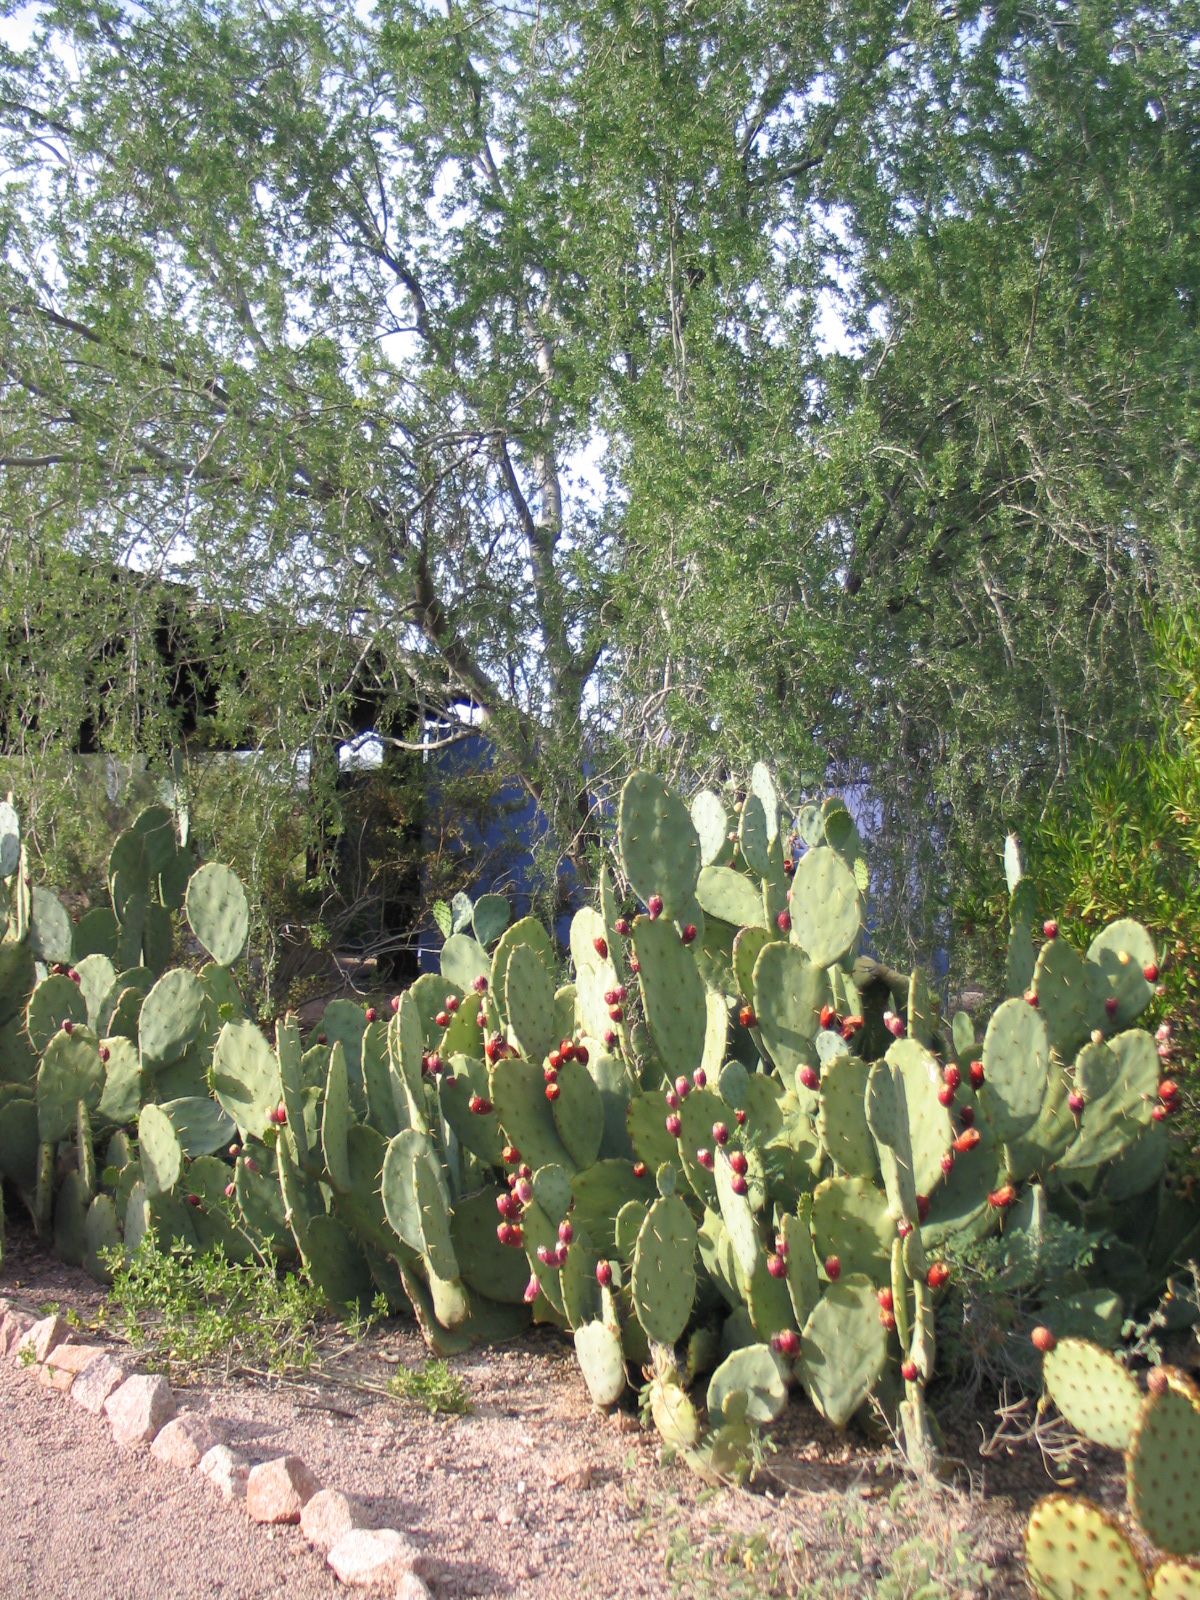
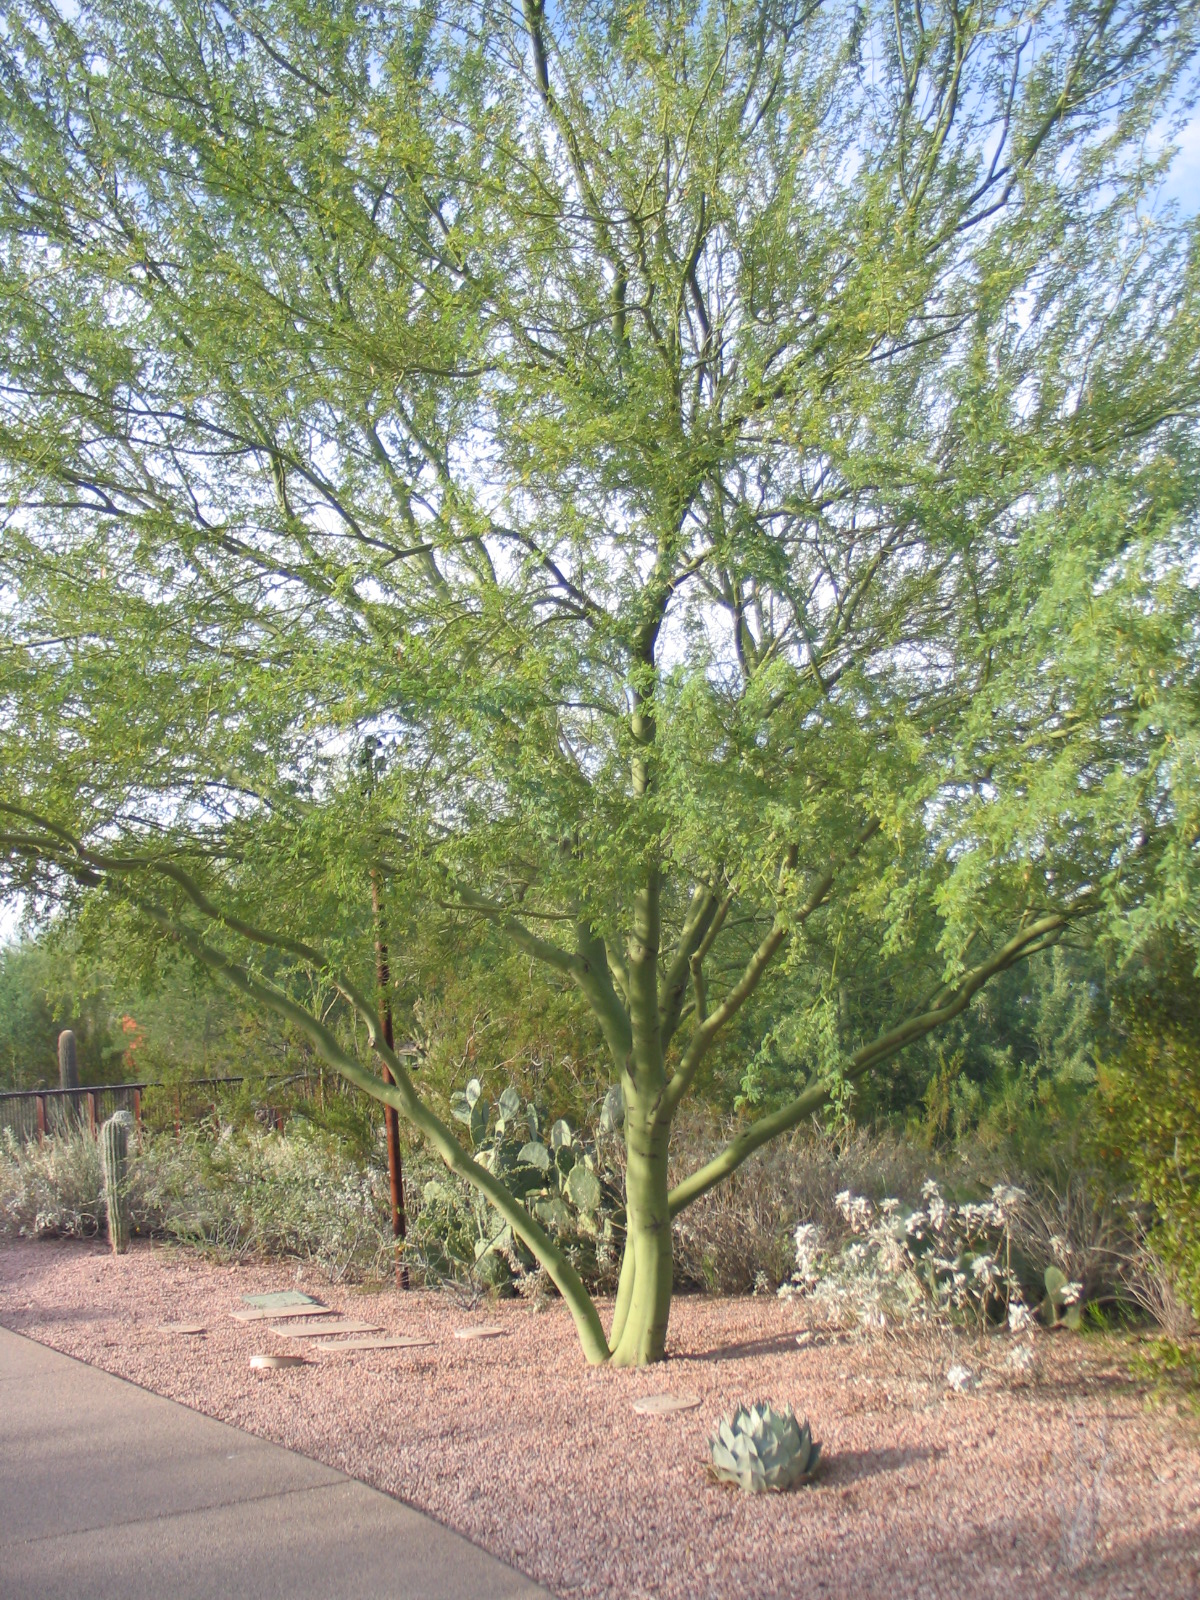
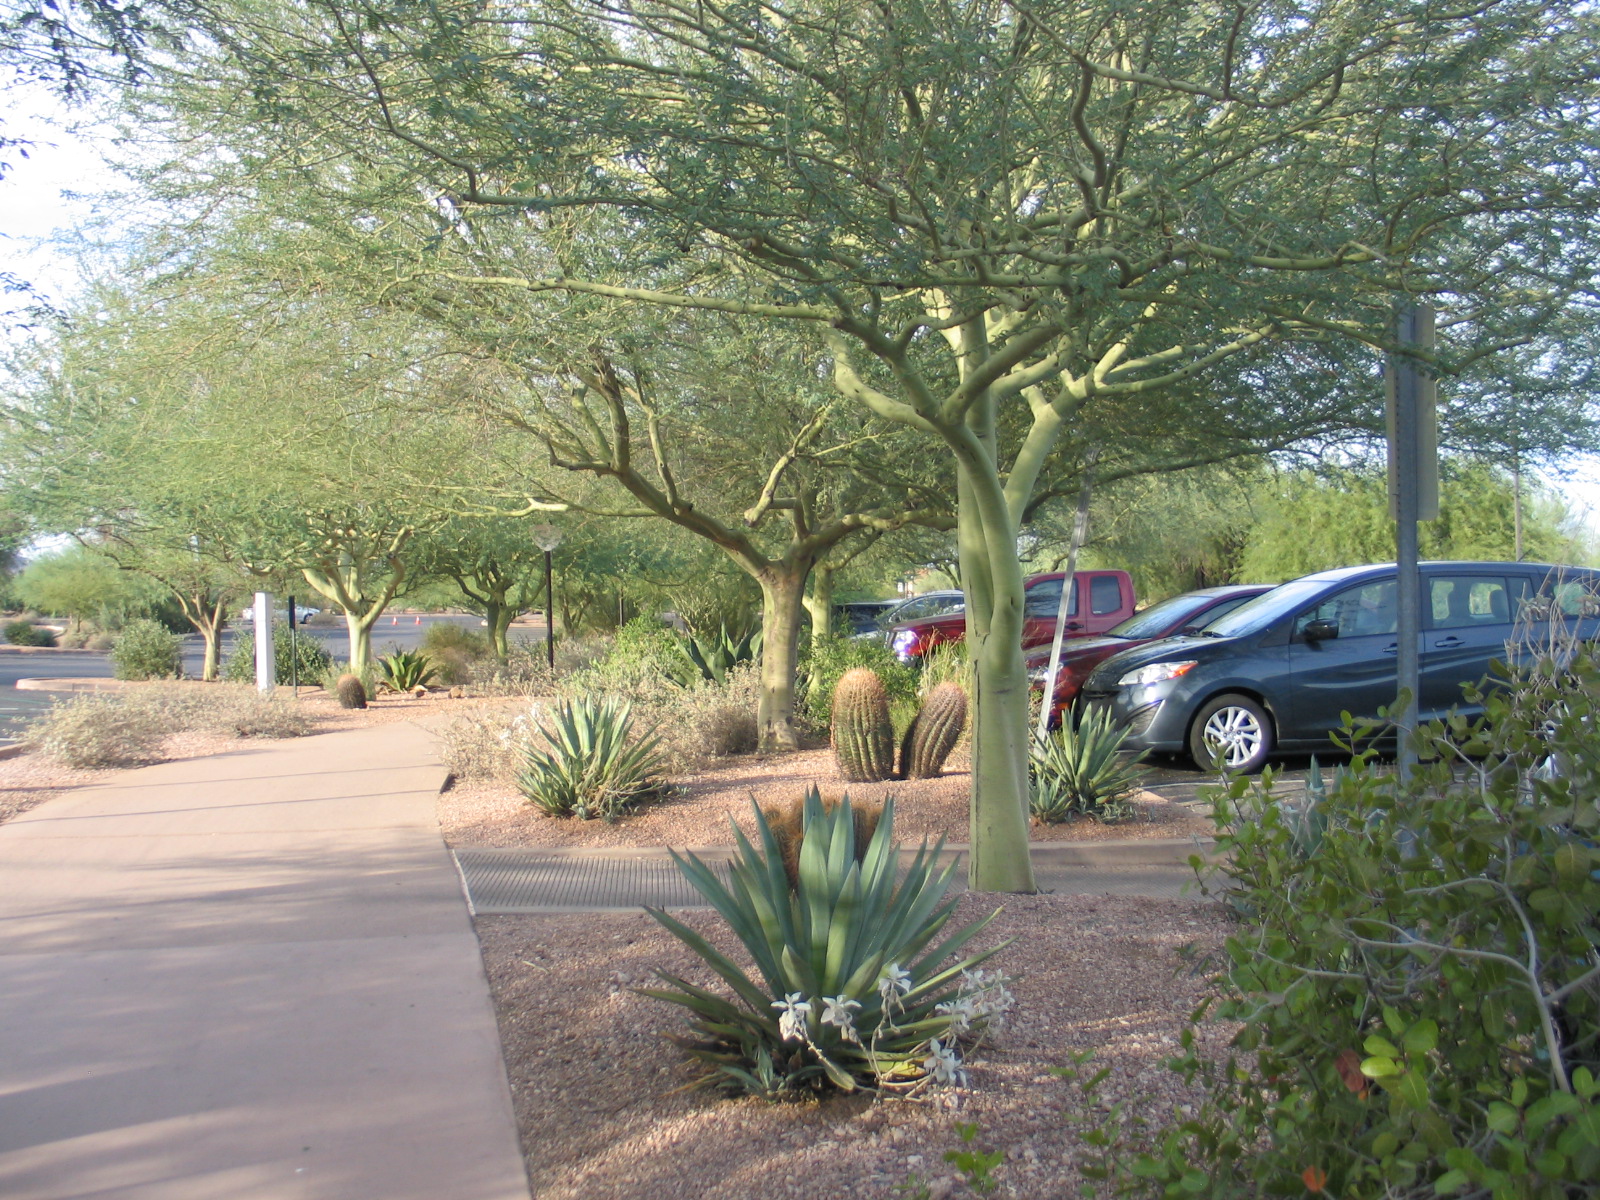
Two years ago this month I visited the Desert Botanical Garden in Phoenix, Az. Even though I was in Phoenix for the ASLA conference, I think I was more excited about visiting this garden than anything else. This year, they're celebraing their 75th anniversary - SEVENTY FIVE YEARS!The Desert Botanical Garden, despite being in the desert, has beauty, drama, softness, and life. There's a word that I hate (it starts with a "x" and ends in "scaping") that makes most people imagine a particular layout and use of plant materials that just makes my head hurt. Things have changed, though, and design of water wise planting has evolved!The folks at the Desert Botanical Garden have done a beautiful job with the materials they use. Most of the arbors, gates, trellises, and things like that are made with raw steel and rebar. They've oxidized into being gorgeous rusted pieces that are both crisp in their design and rustic in their finish. Next up is the use of concrete - oh yes, concrete is wonderful stuff! This board-formed concrete wall with the wood bench attached to it is so nicely detailed! There's this lovely seat wall with a green stone inlay that becomes a very discrete water feature at the other end. The water aspect of this would be easy to overlook, it is not showy or loud. Water, of course, is important for many reasons, but a big gurgling fountain would be out of place here. Tempting, but not appropriate.I only recall one other water feature, also a nice quiet, appropriate piece.Nearby were some very cool butterfly chairs with white slipcovers - they even looked refreshing - which caused me to realize that even if you don't sit or touch the water, the visual cue of taking a break is still a powerful (refreshing) force.Above you can get a real feel for the place - materials retain their integrity; for example, stone is used like stone, and it isn't just veneer. The colors belong here, and boldness is introduced sparingly. Here, the planting not only steals the show, it IS the show thanks to strategic restraint in all the other materials. Take a peek at the next several images - notice how the materials are used honestly, With color and a sense of place in mind, here are more of my favorites: Last, but not least I leave you with the parking lot (that's right, the parking lot) and a bunny with two quail (the quail blend, just behind the bunny to the right, in front of the succulents).Botanical gardens and arboreta are a big influence in my life and someday I hope to work on another one. In fact, I really should buy a lottery ticket because if I ever won, I'd buy some land and .... oh, do I have ideas!
Filoli Again, in August Again
I've talked enough about Filoli - so I'll just post the photos from last weekend: 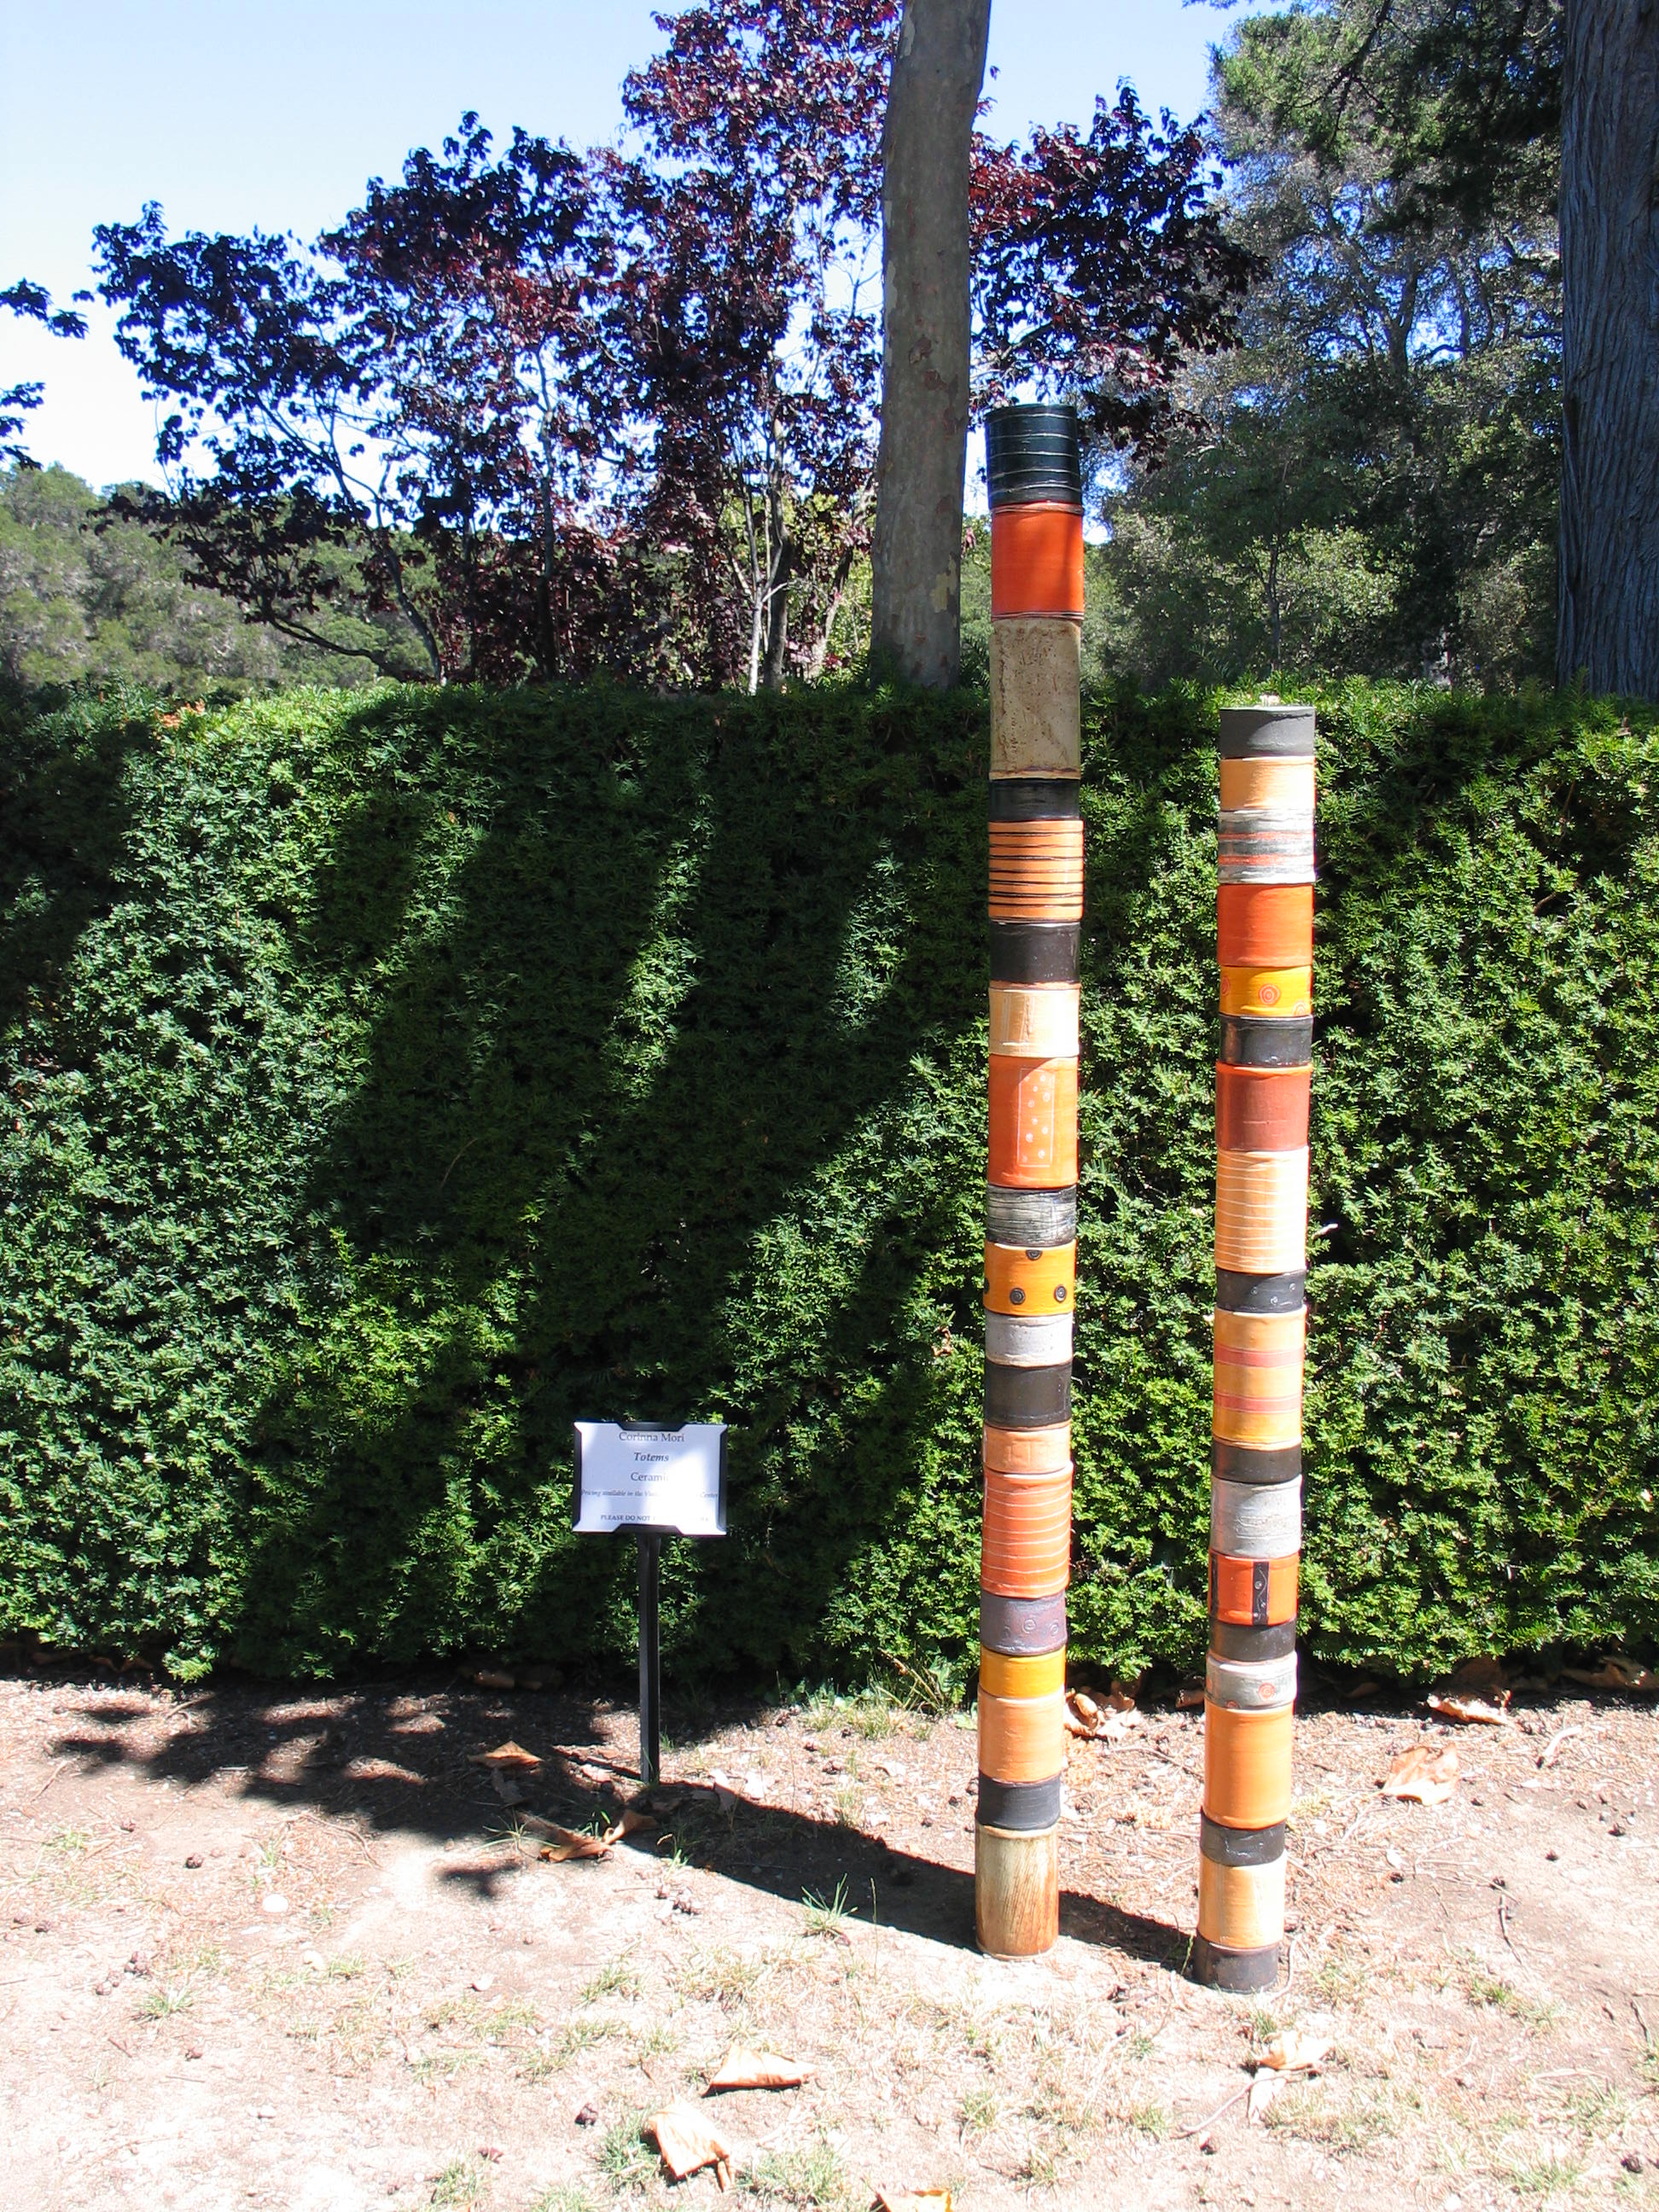
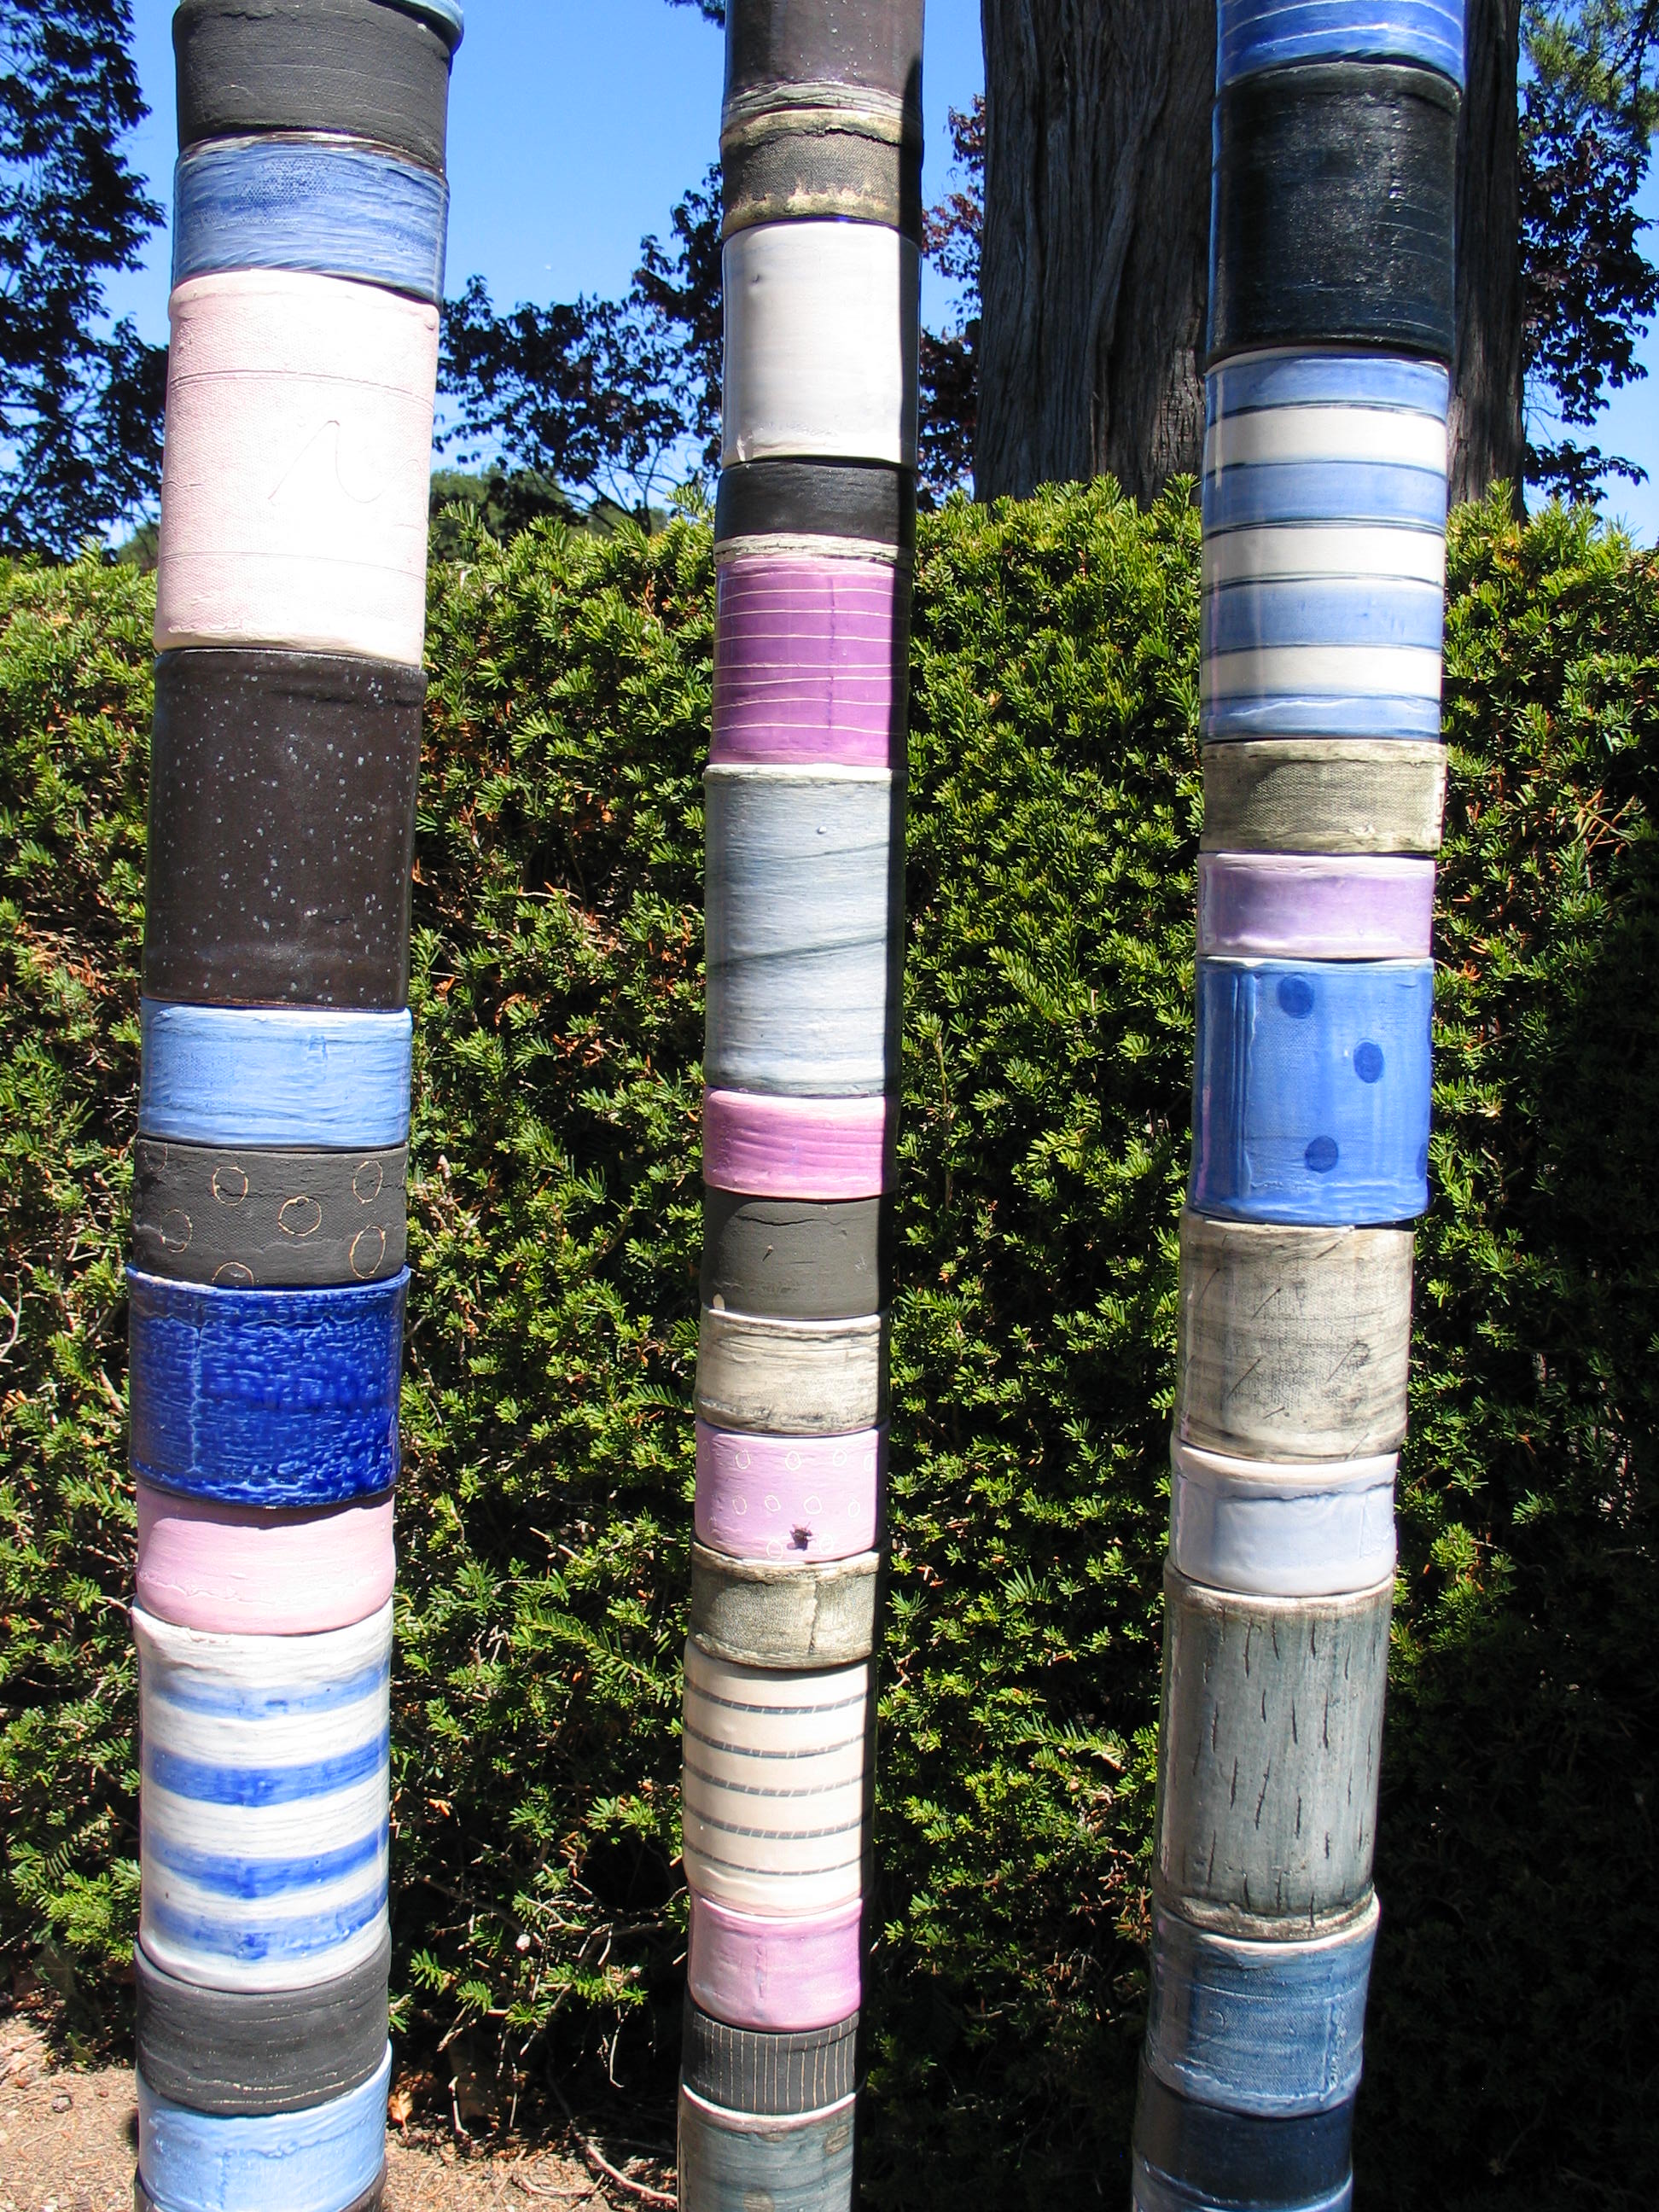
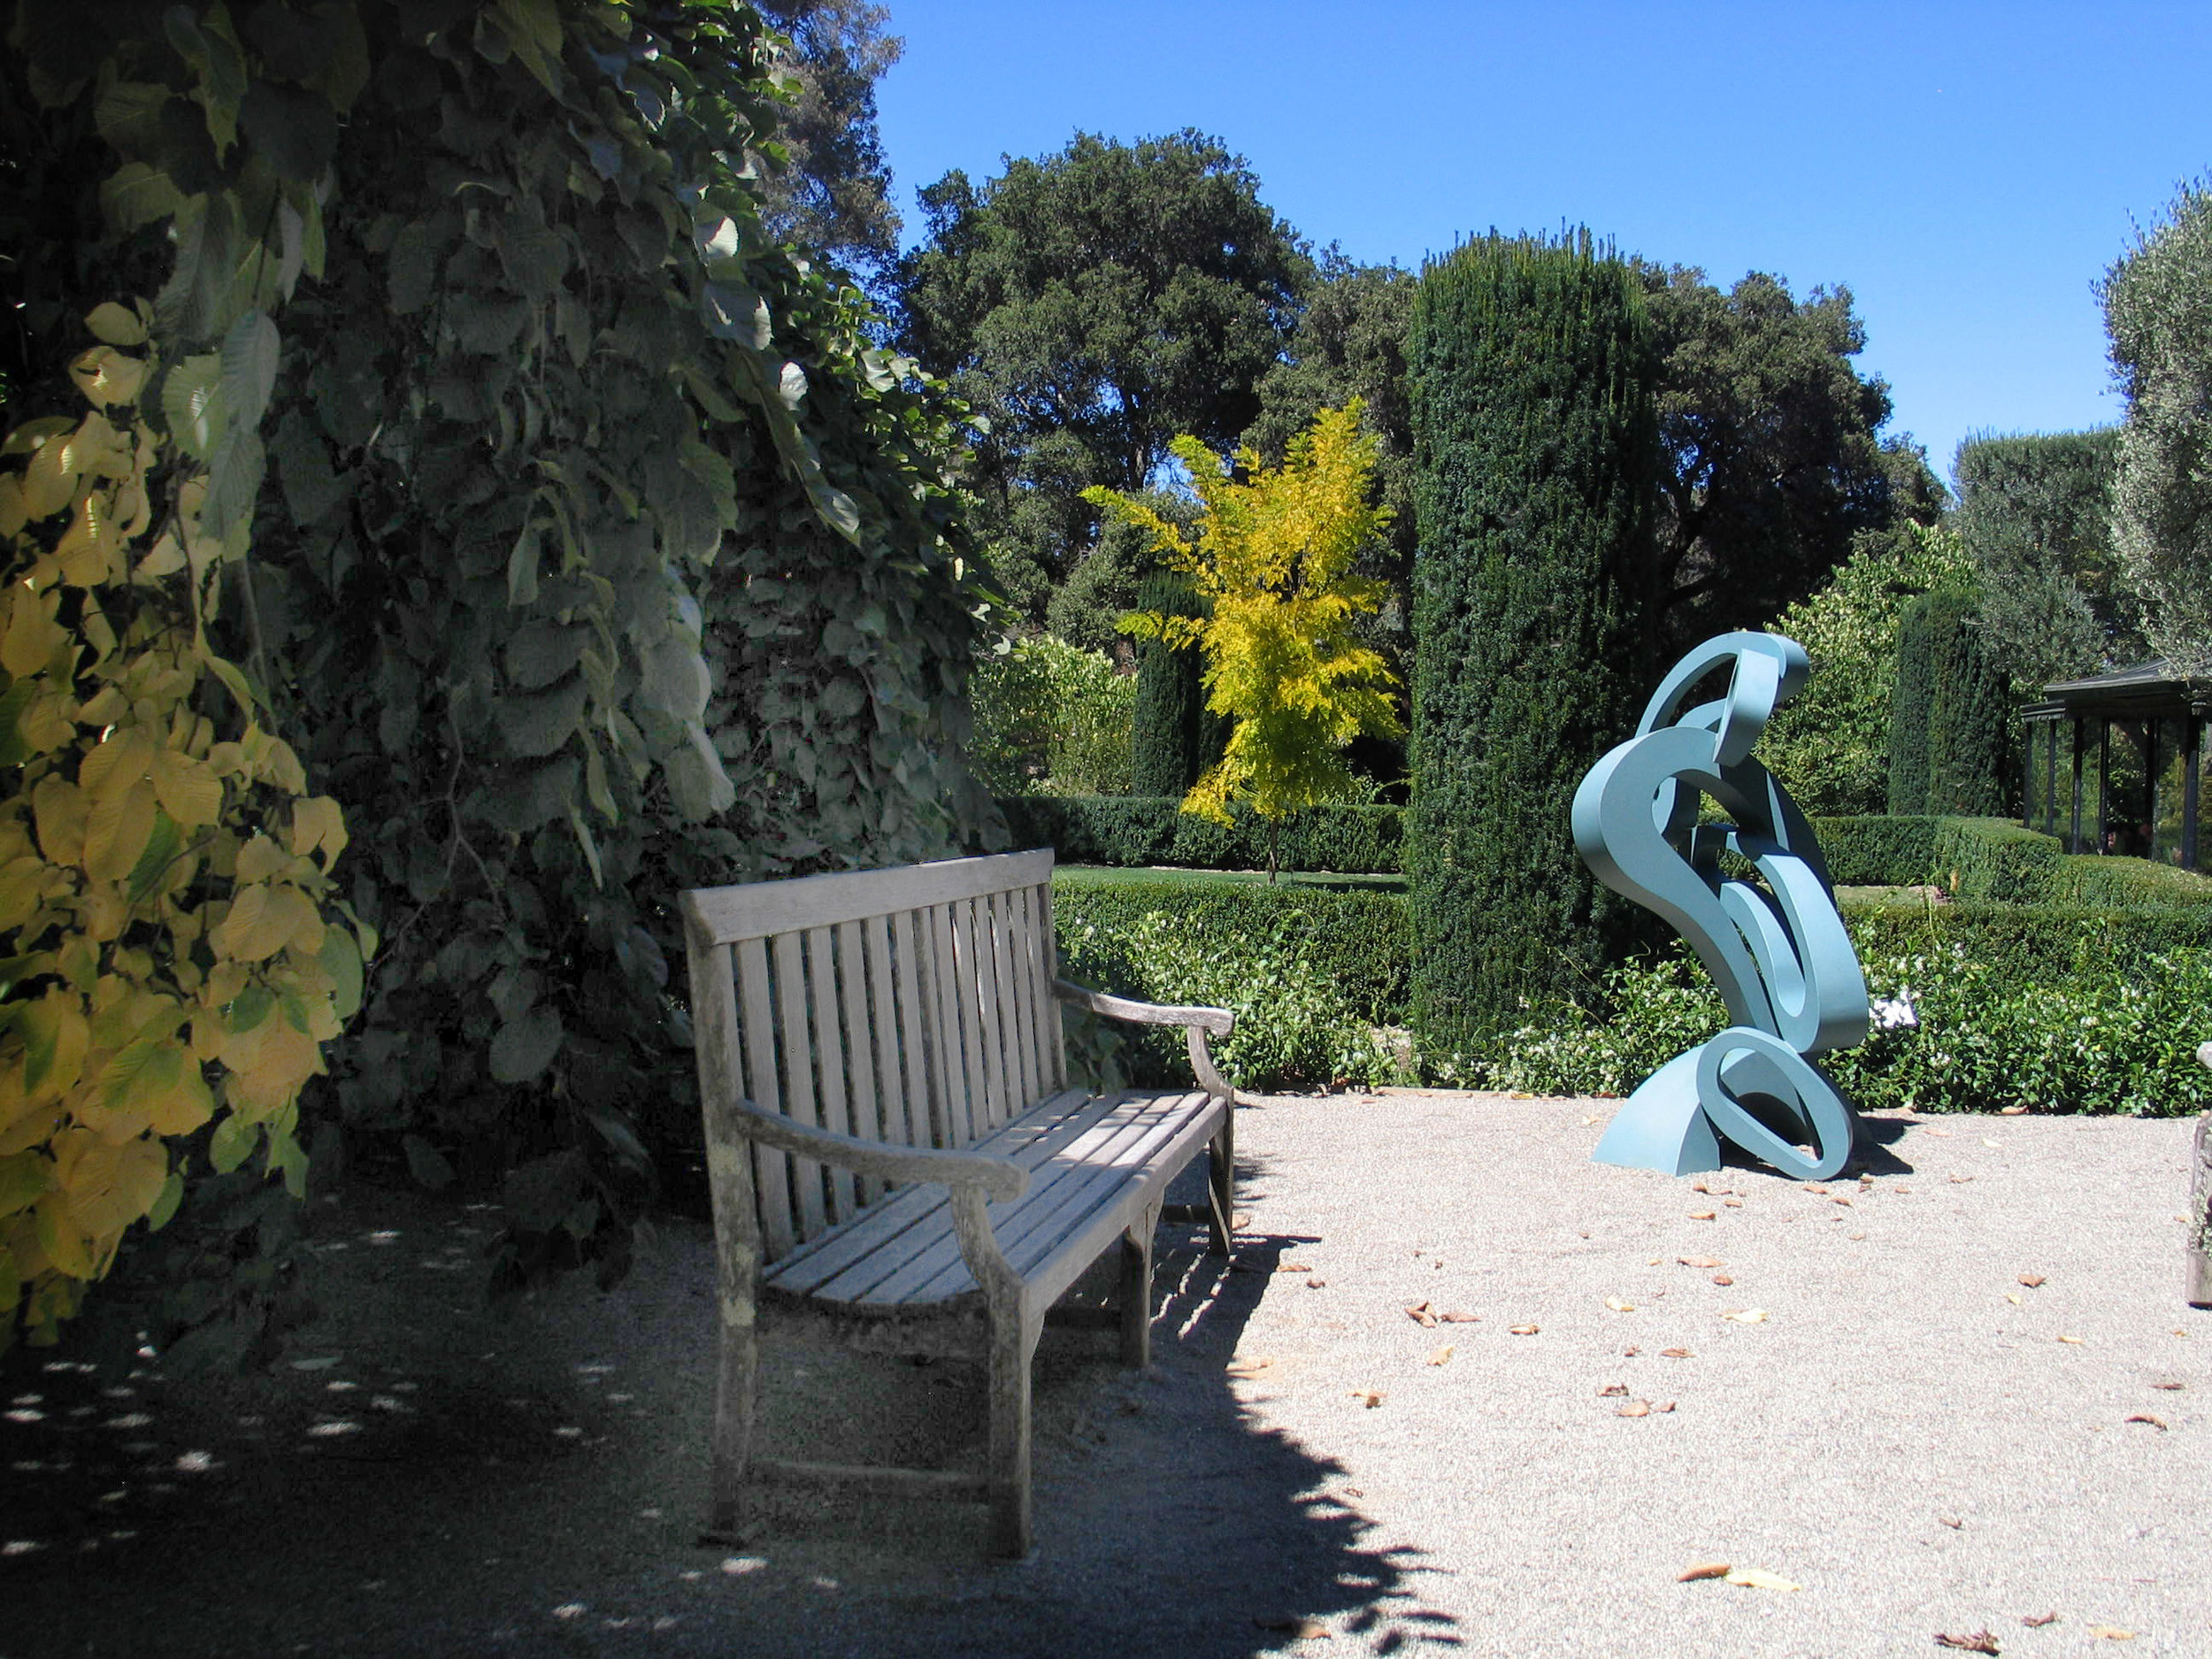
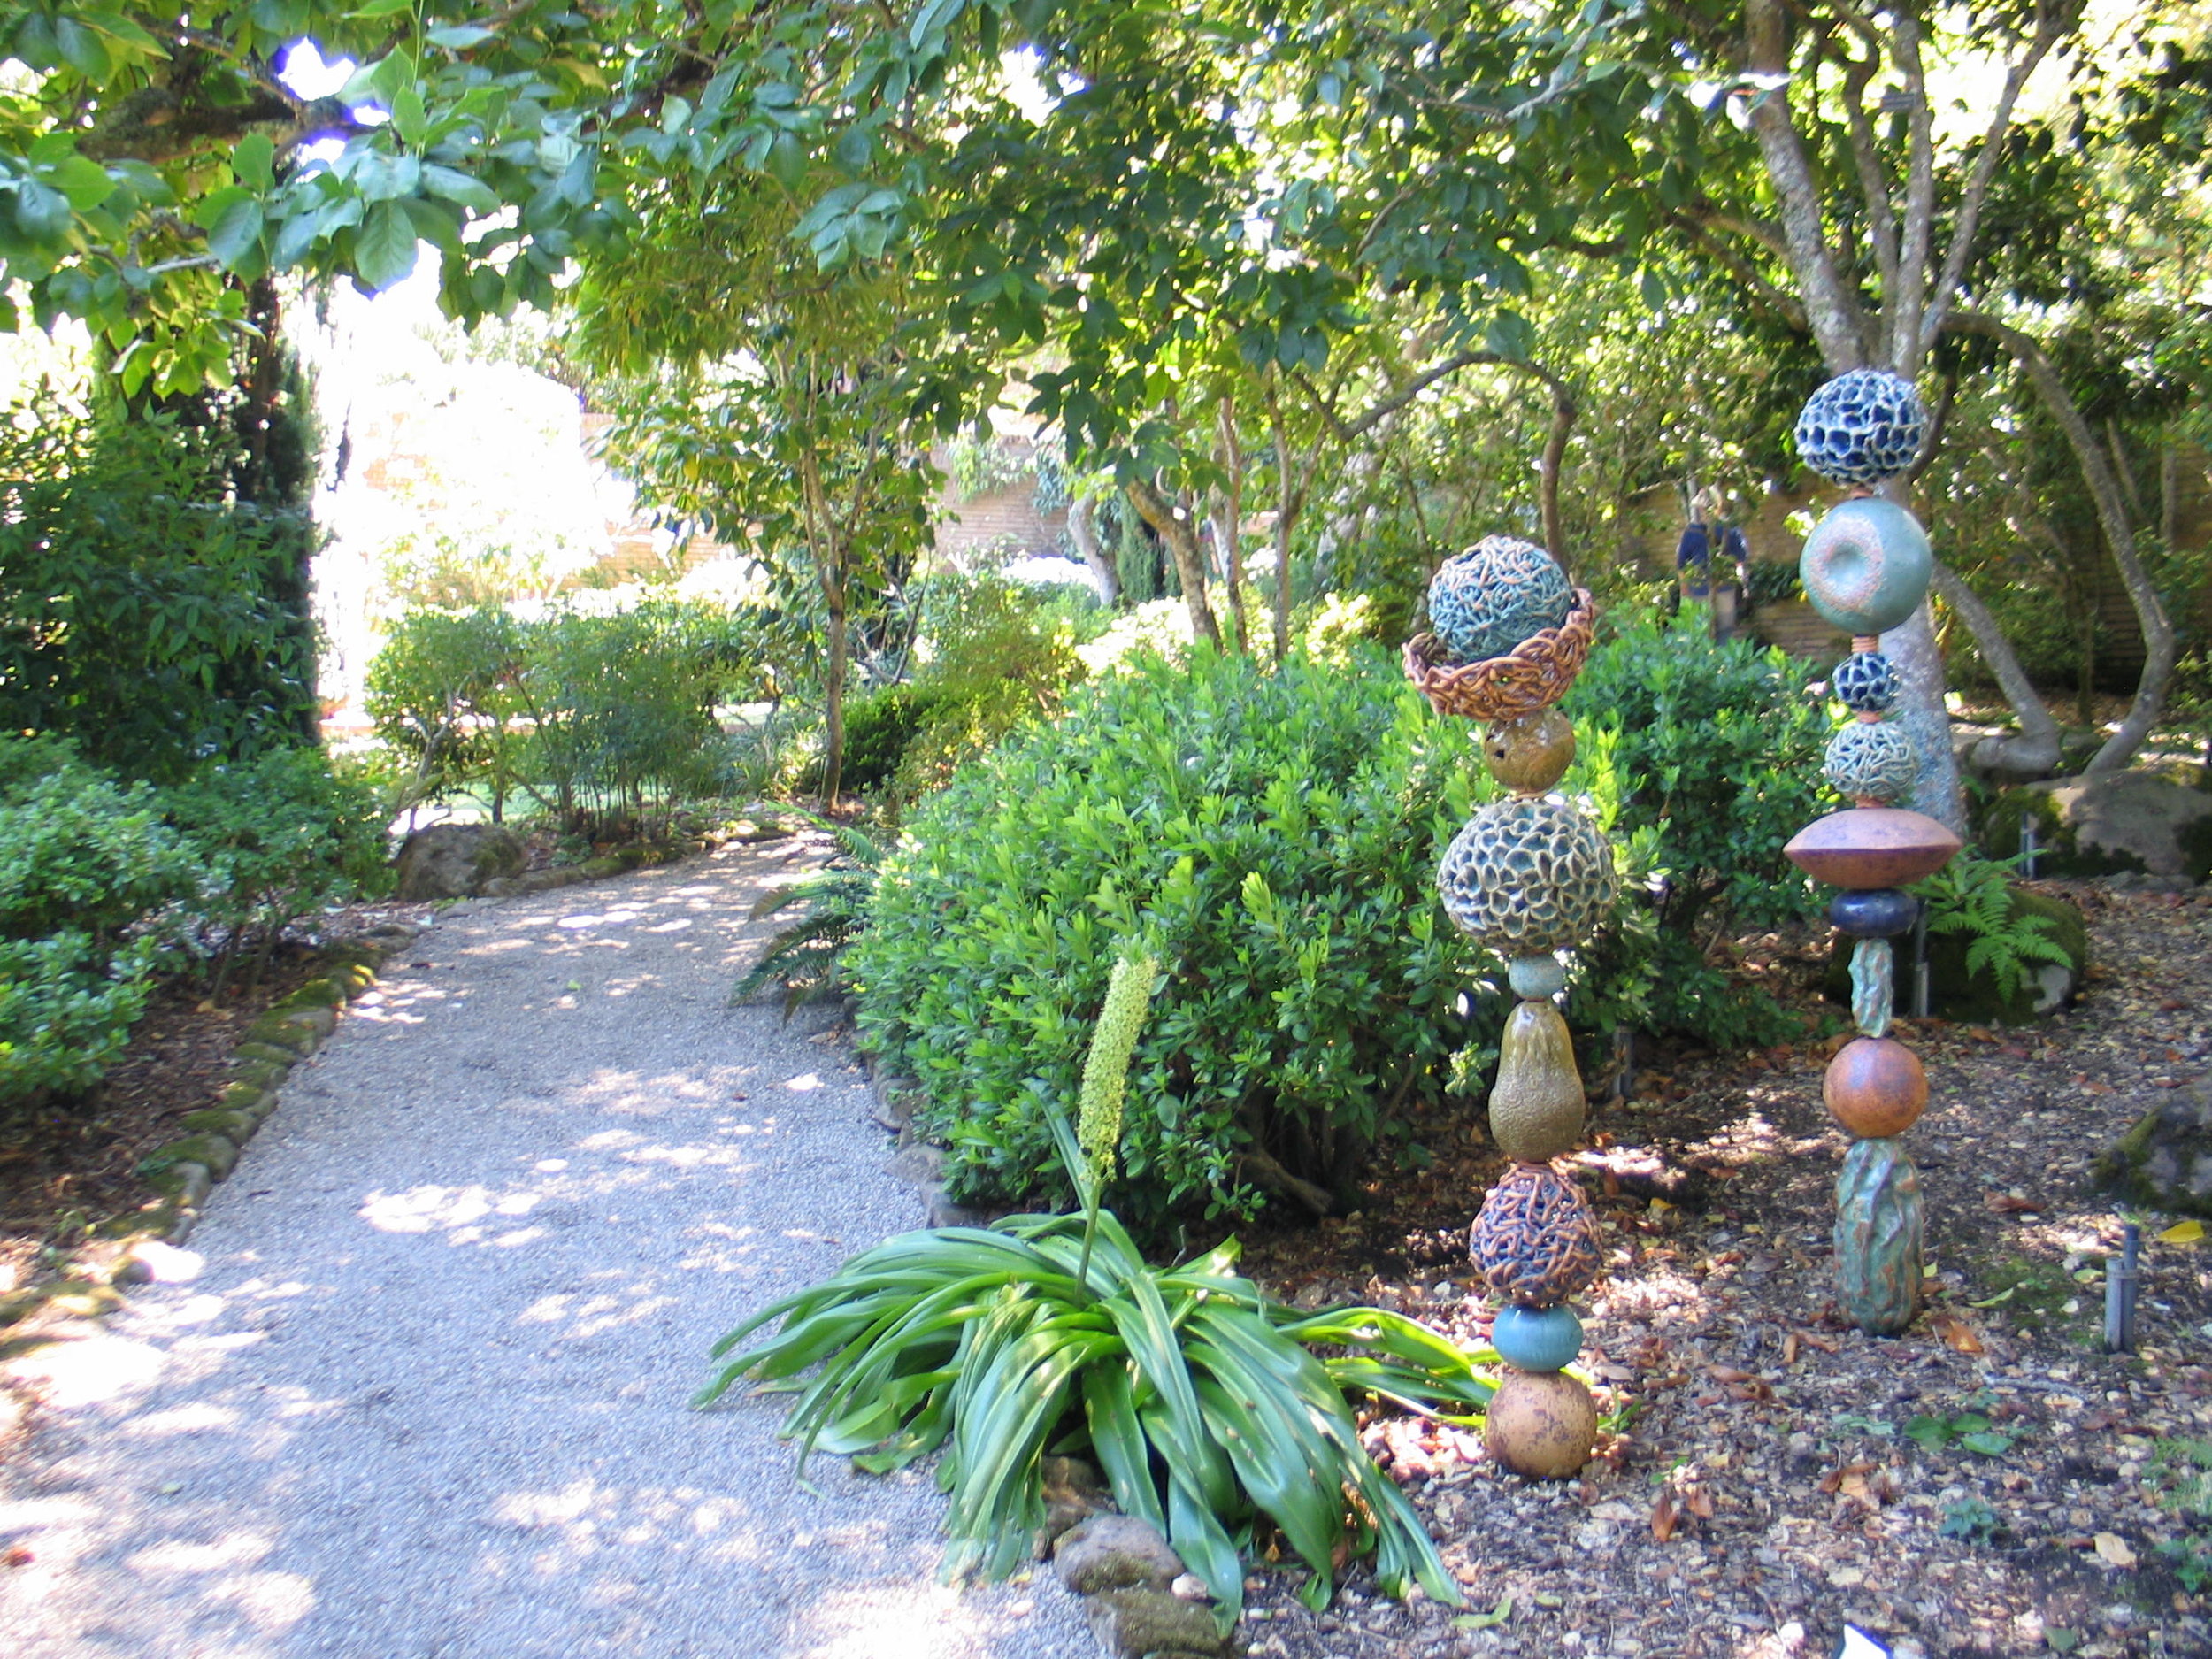
Something I did not know was that they had a ton of sculptures installed - with price lists in the gift shop, apparently. I like the new additions.
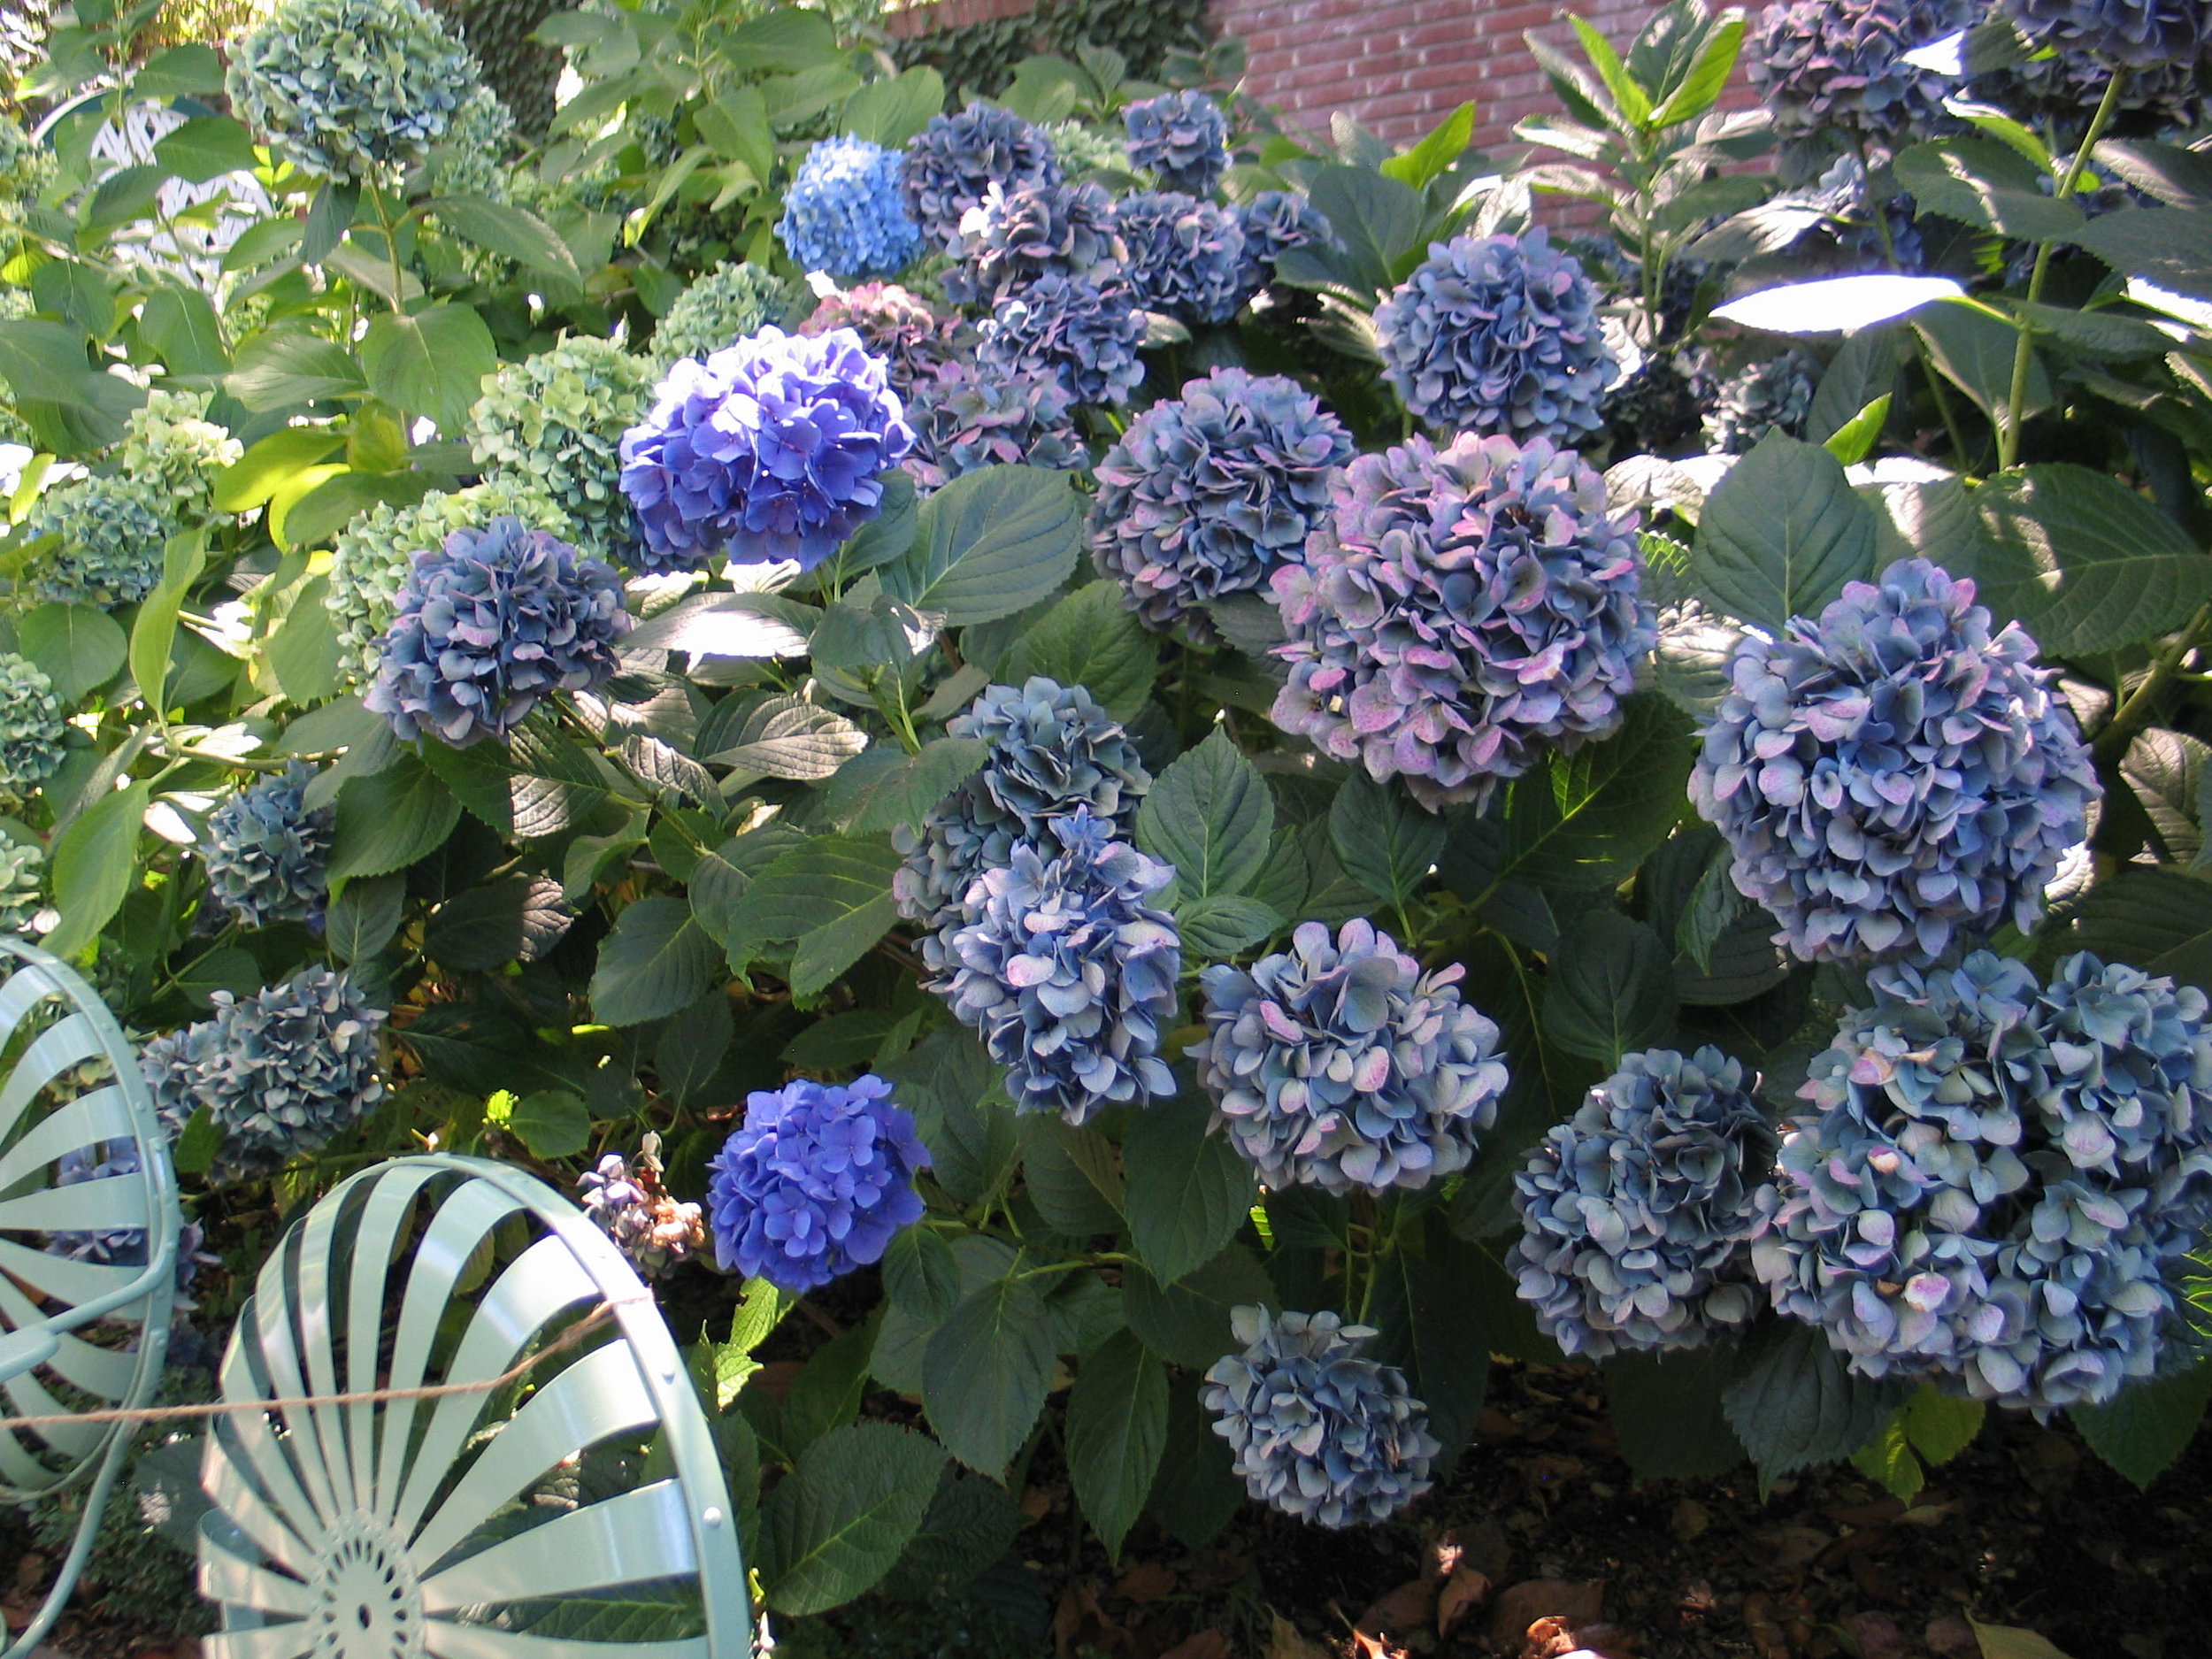
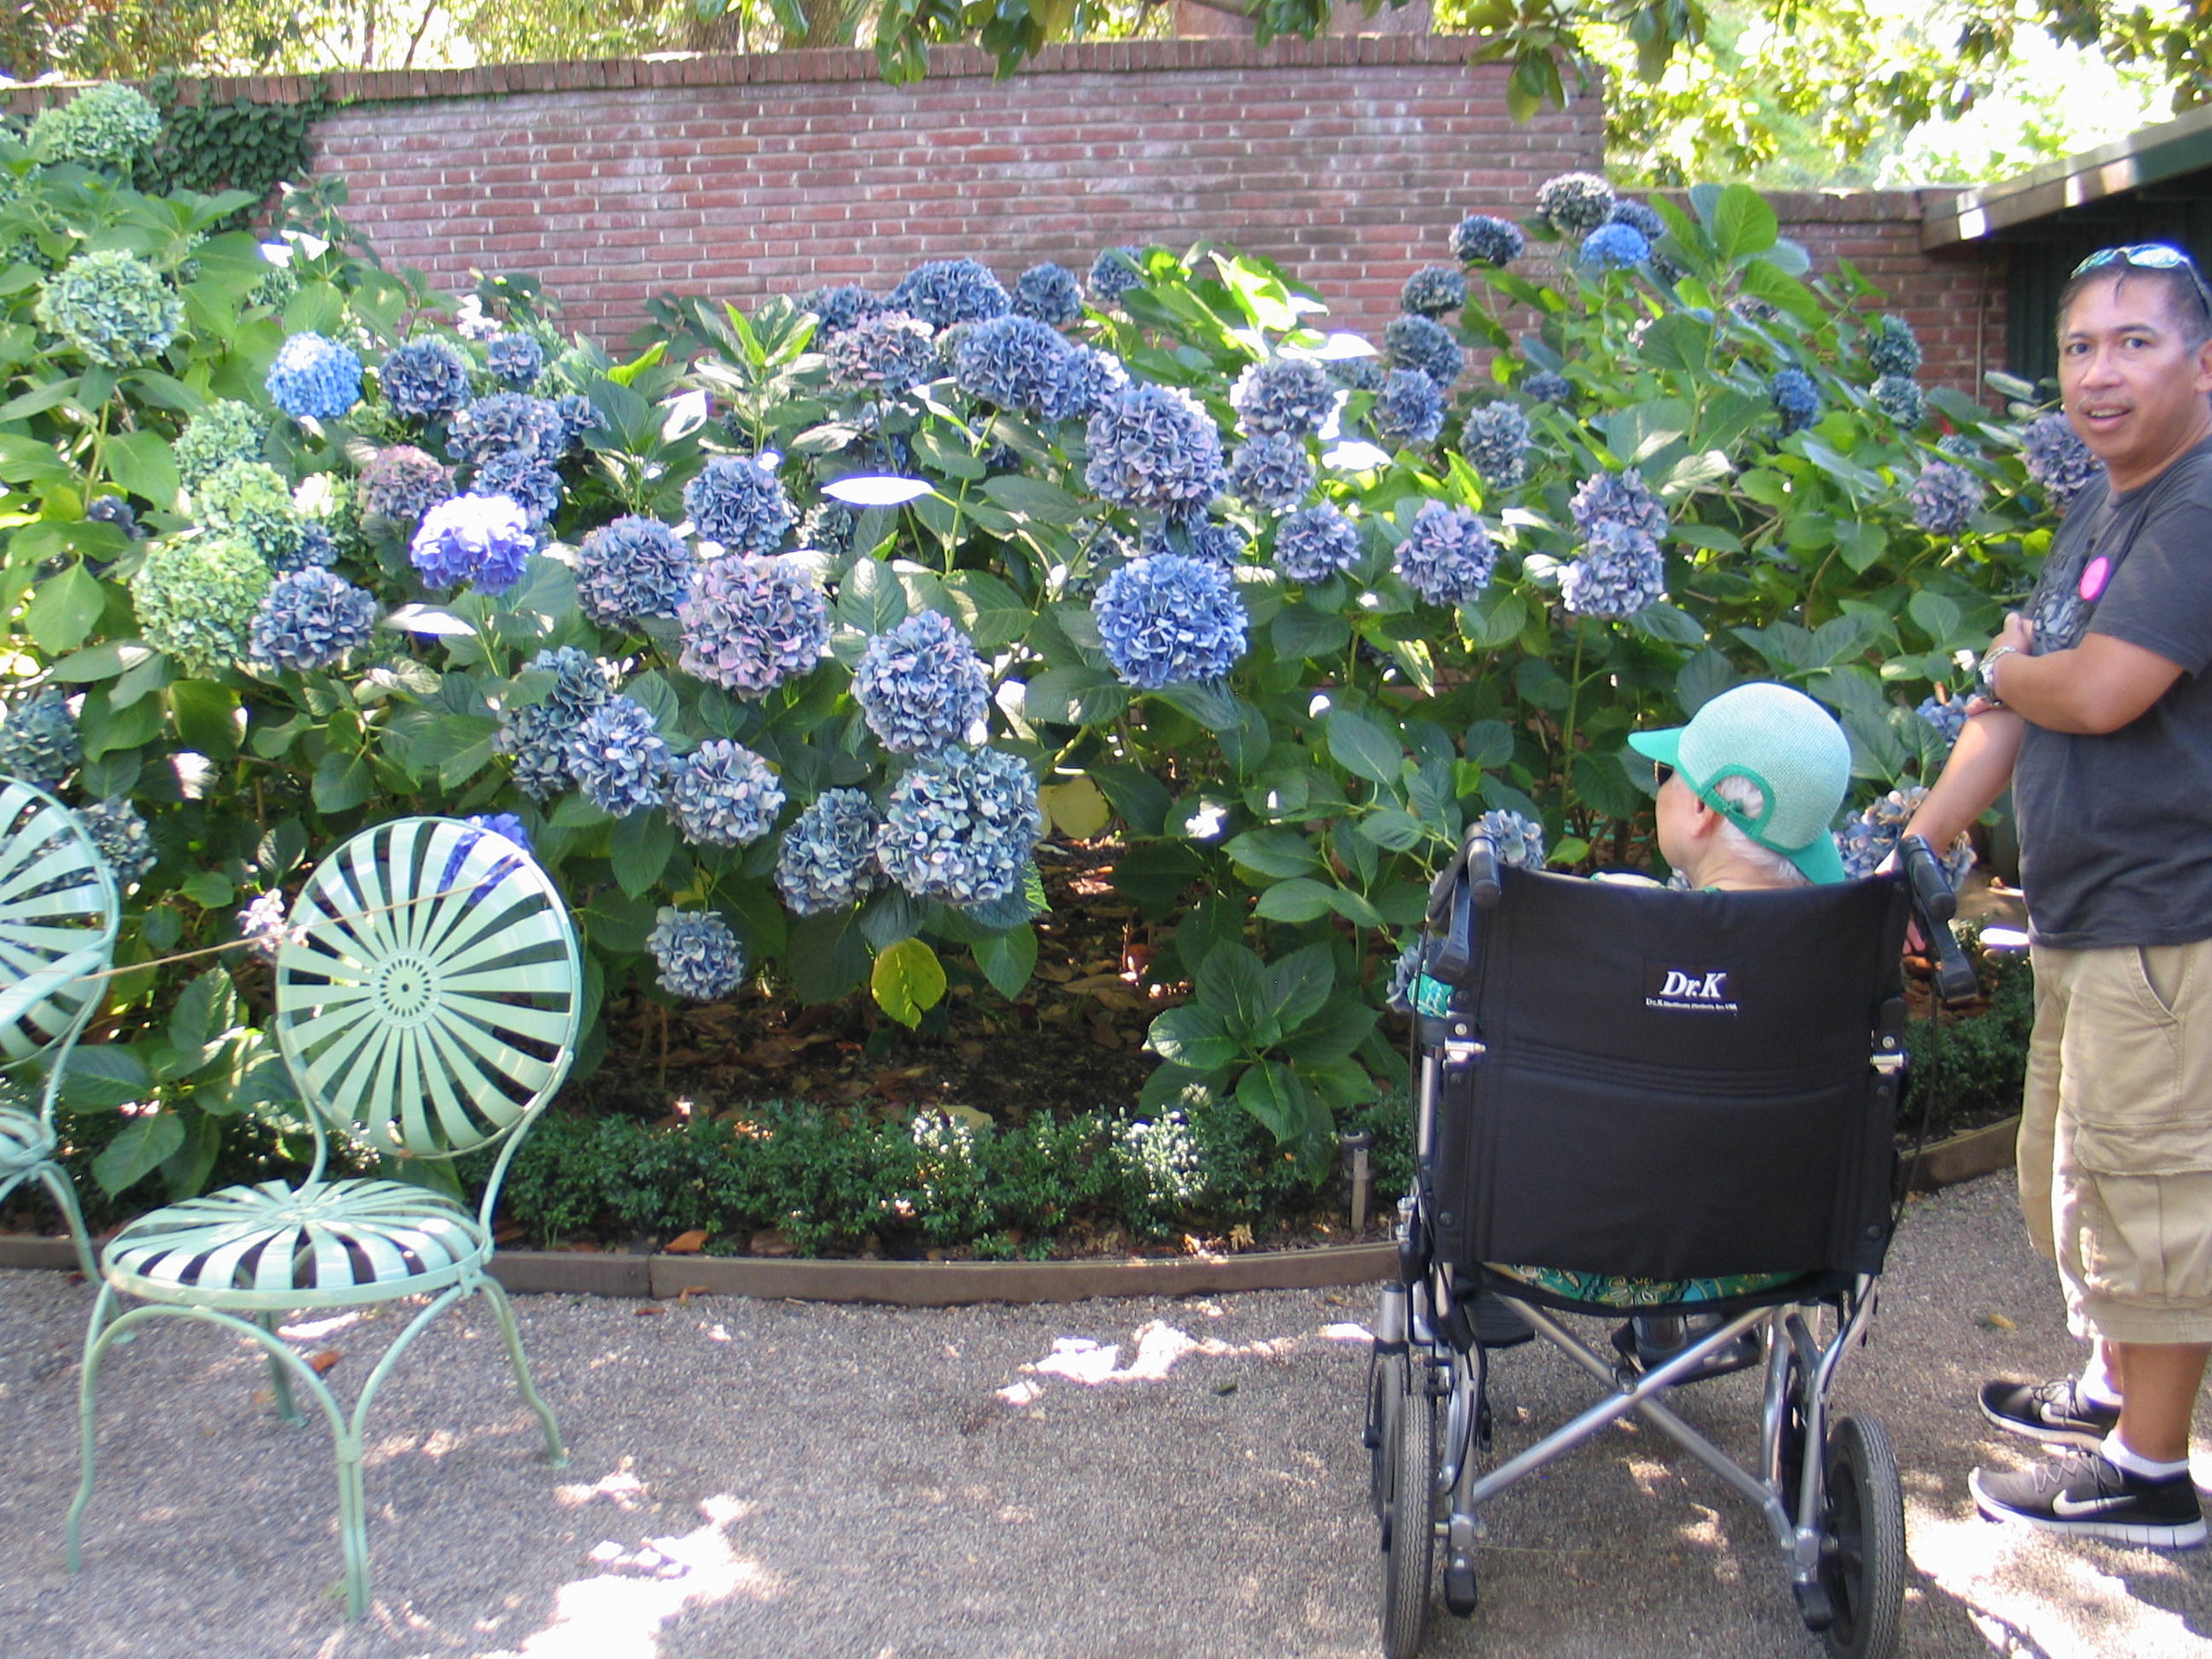 I love catching people in my photos right when they're wondering if they can possibly escape before I click the shutter. Sorry, I was too quick this time, but holy crap - lookit those Hydrangeas!
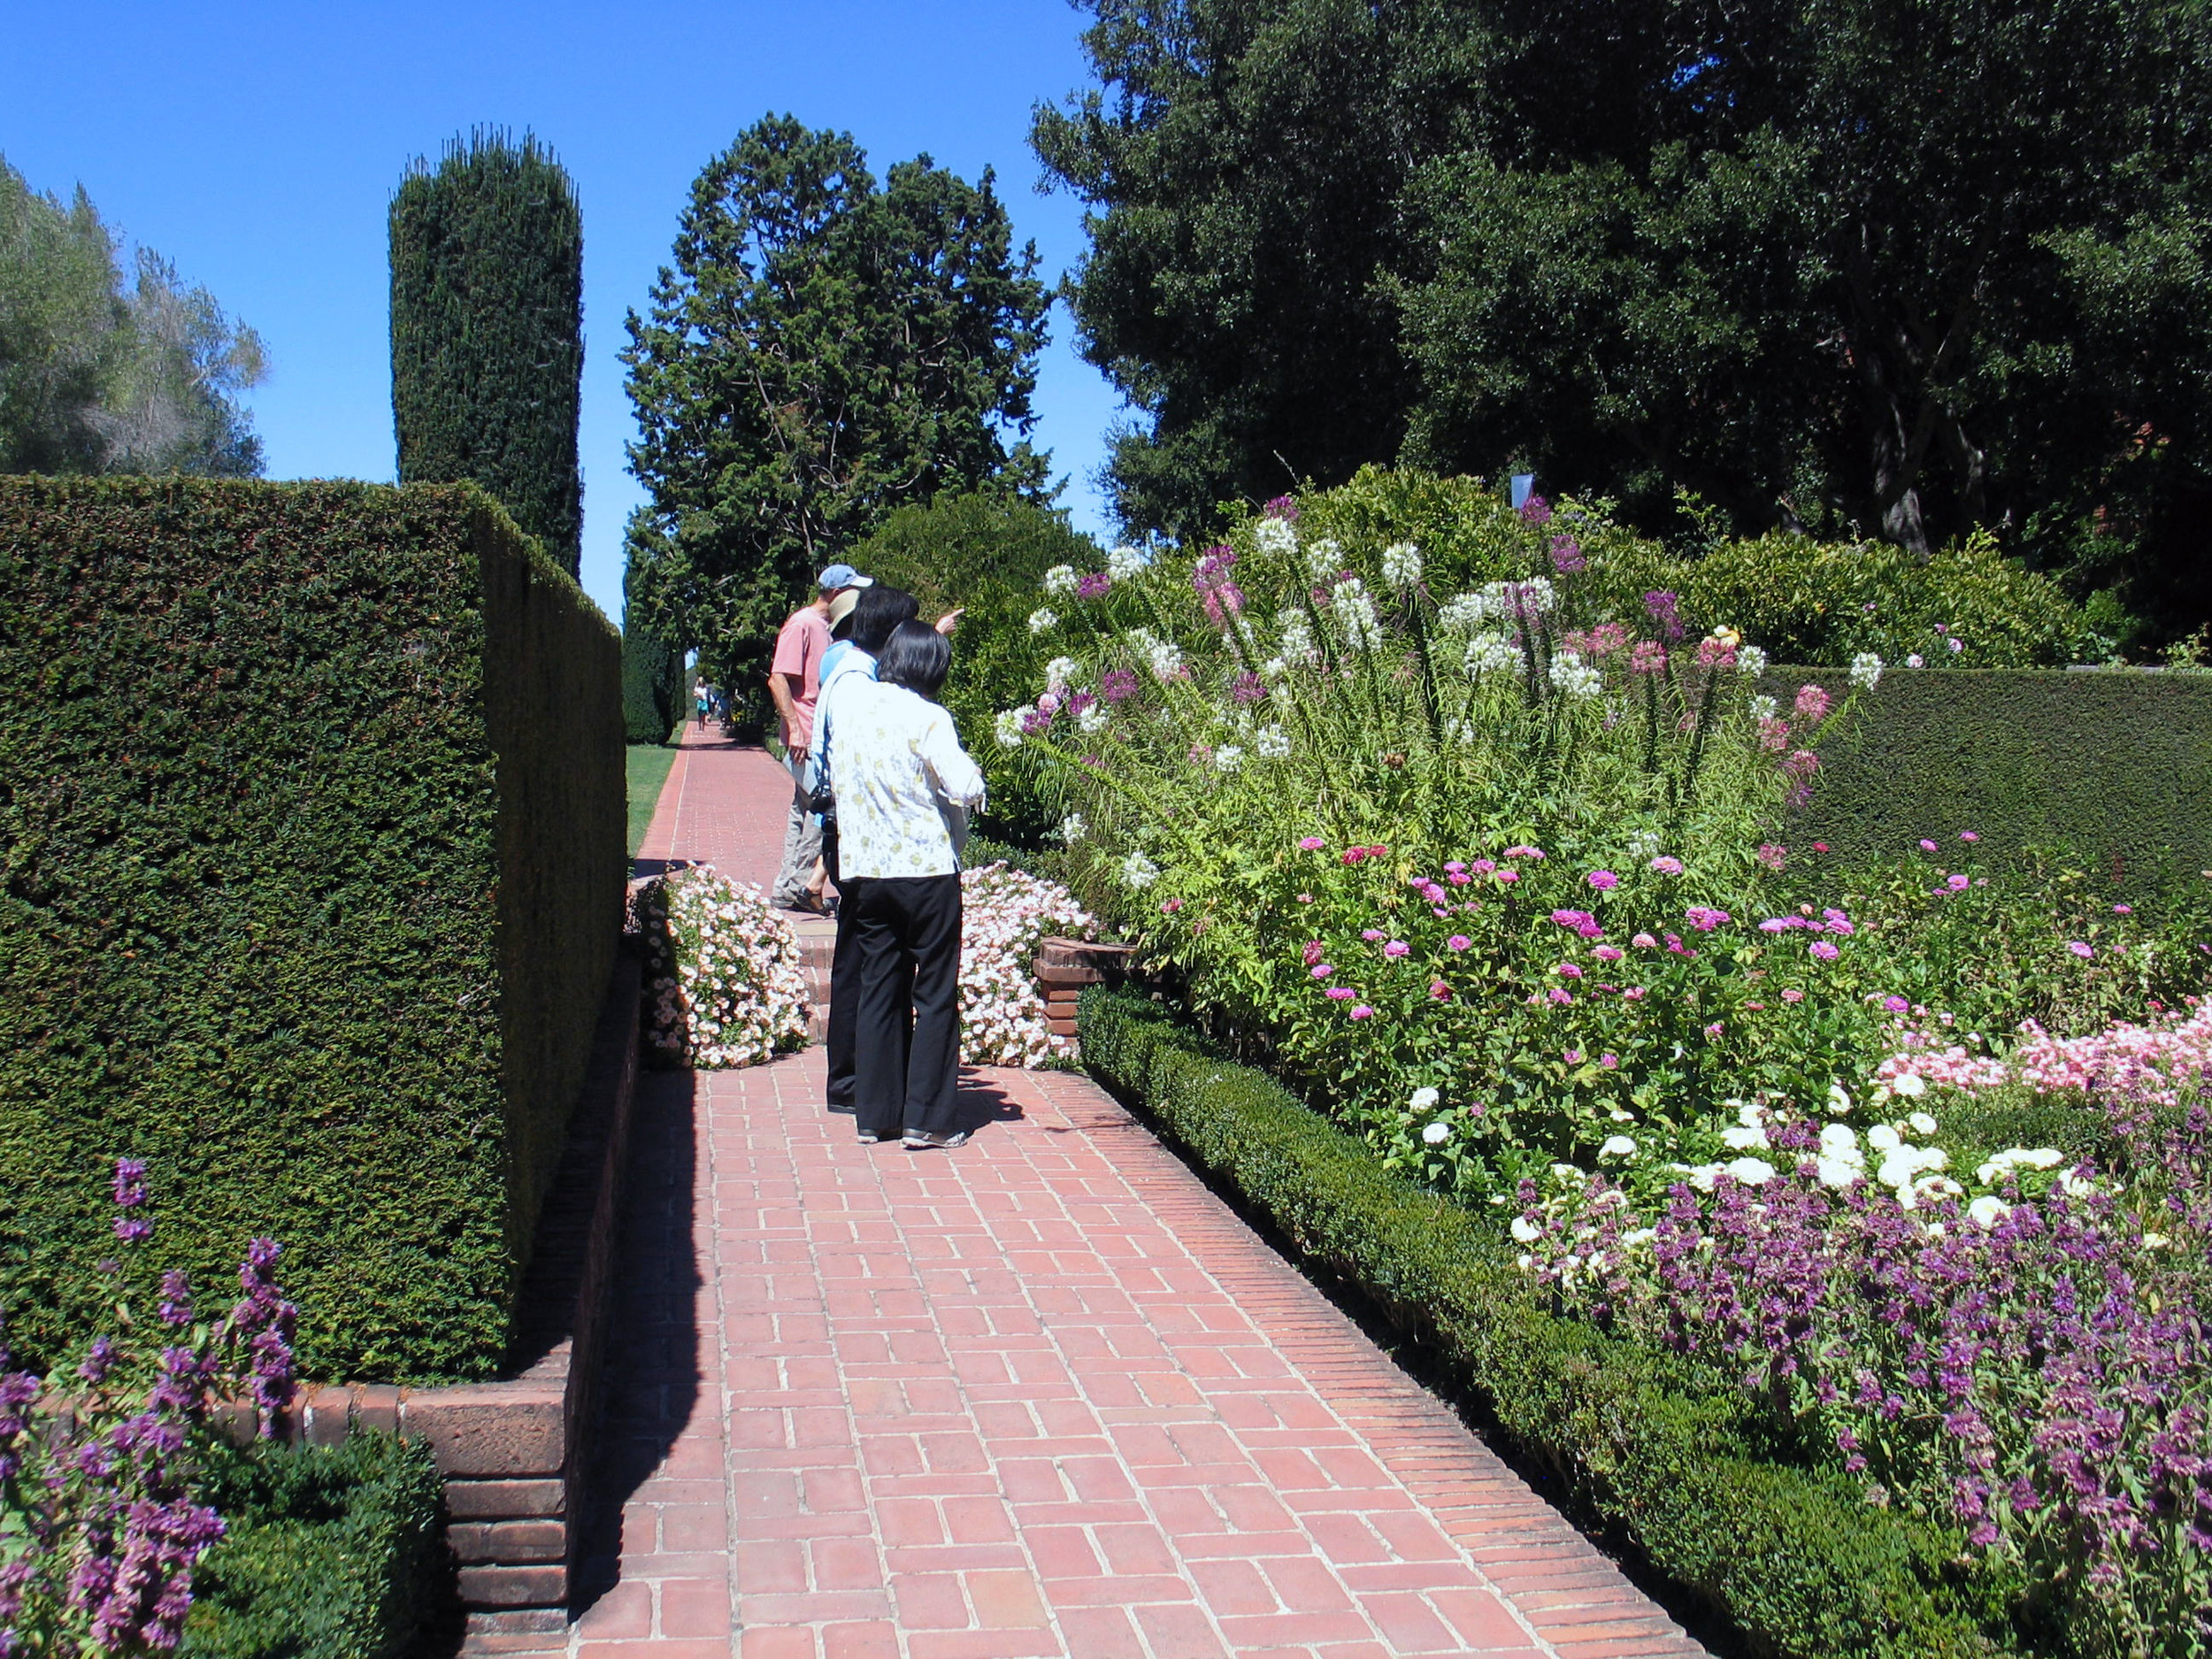
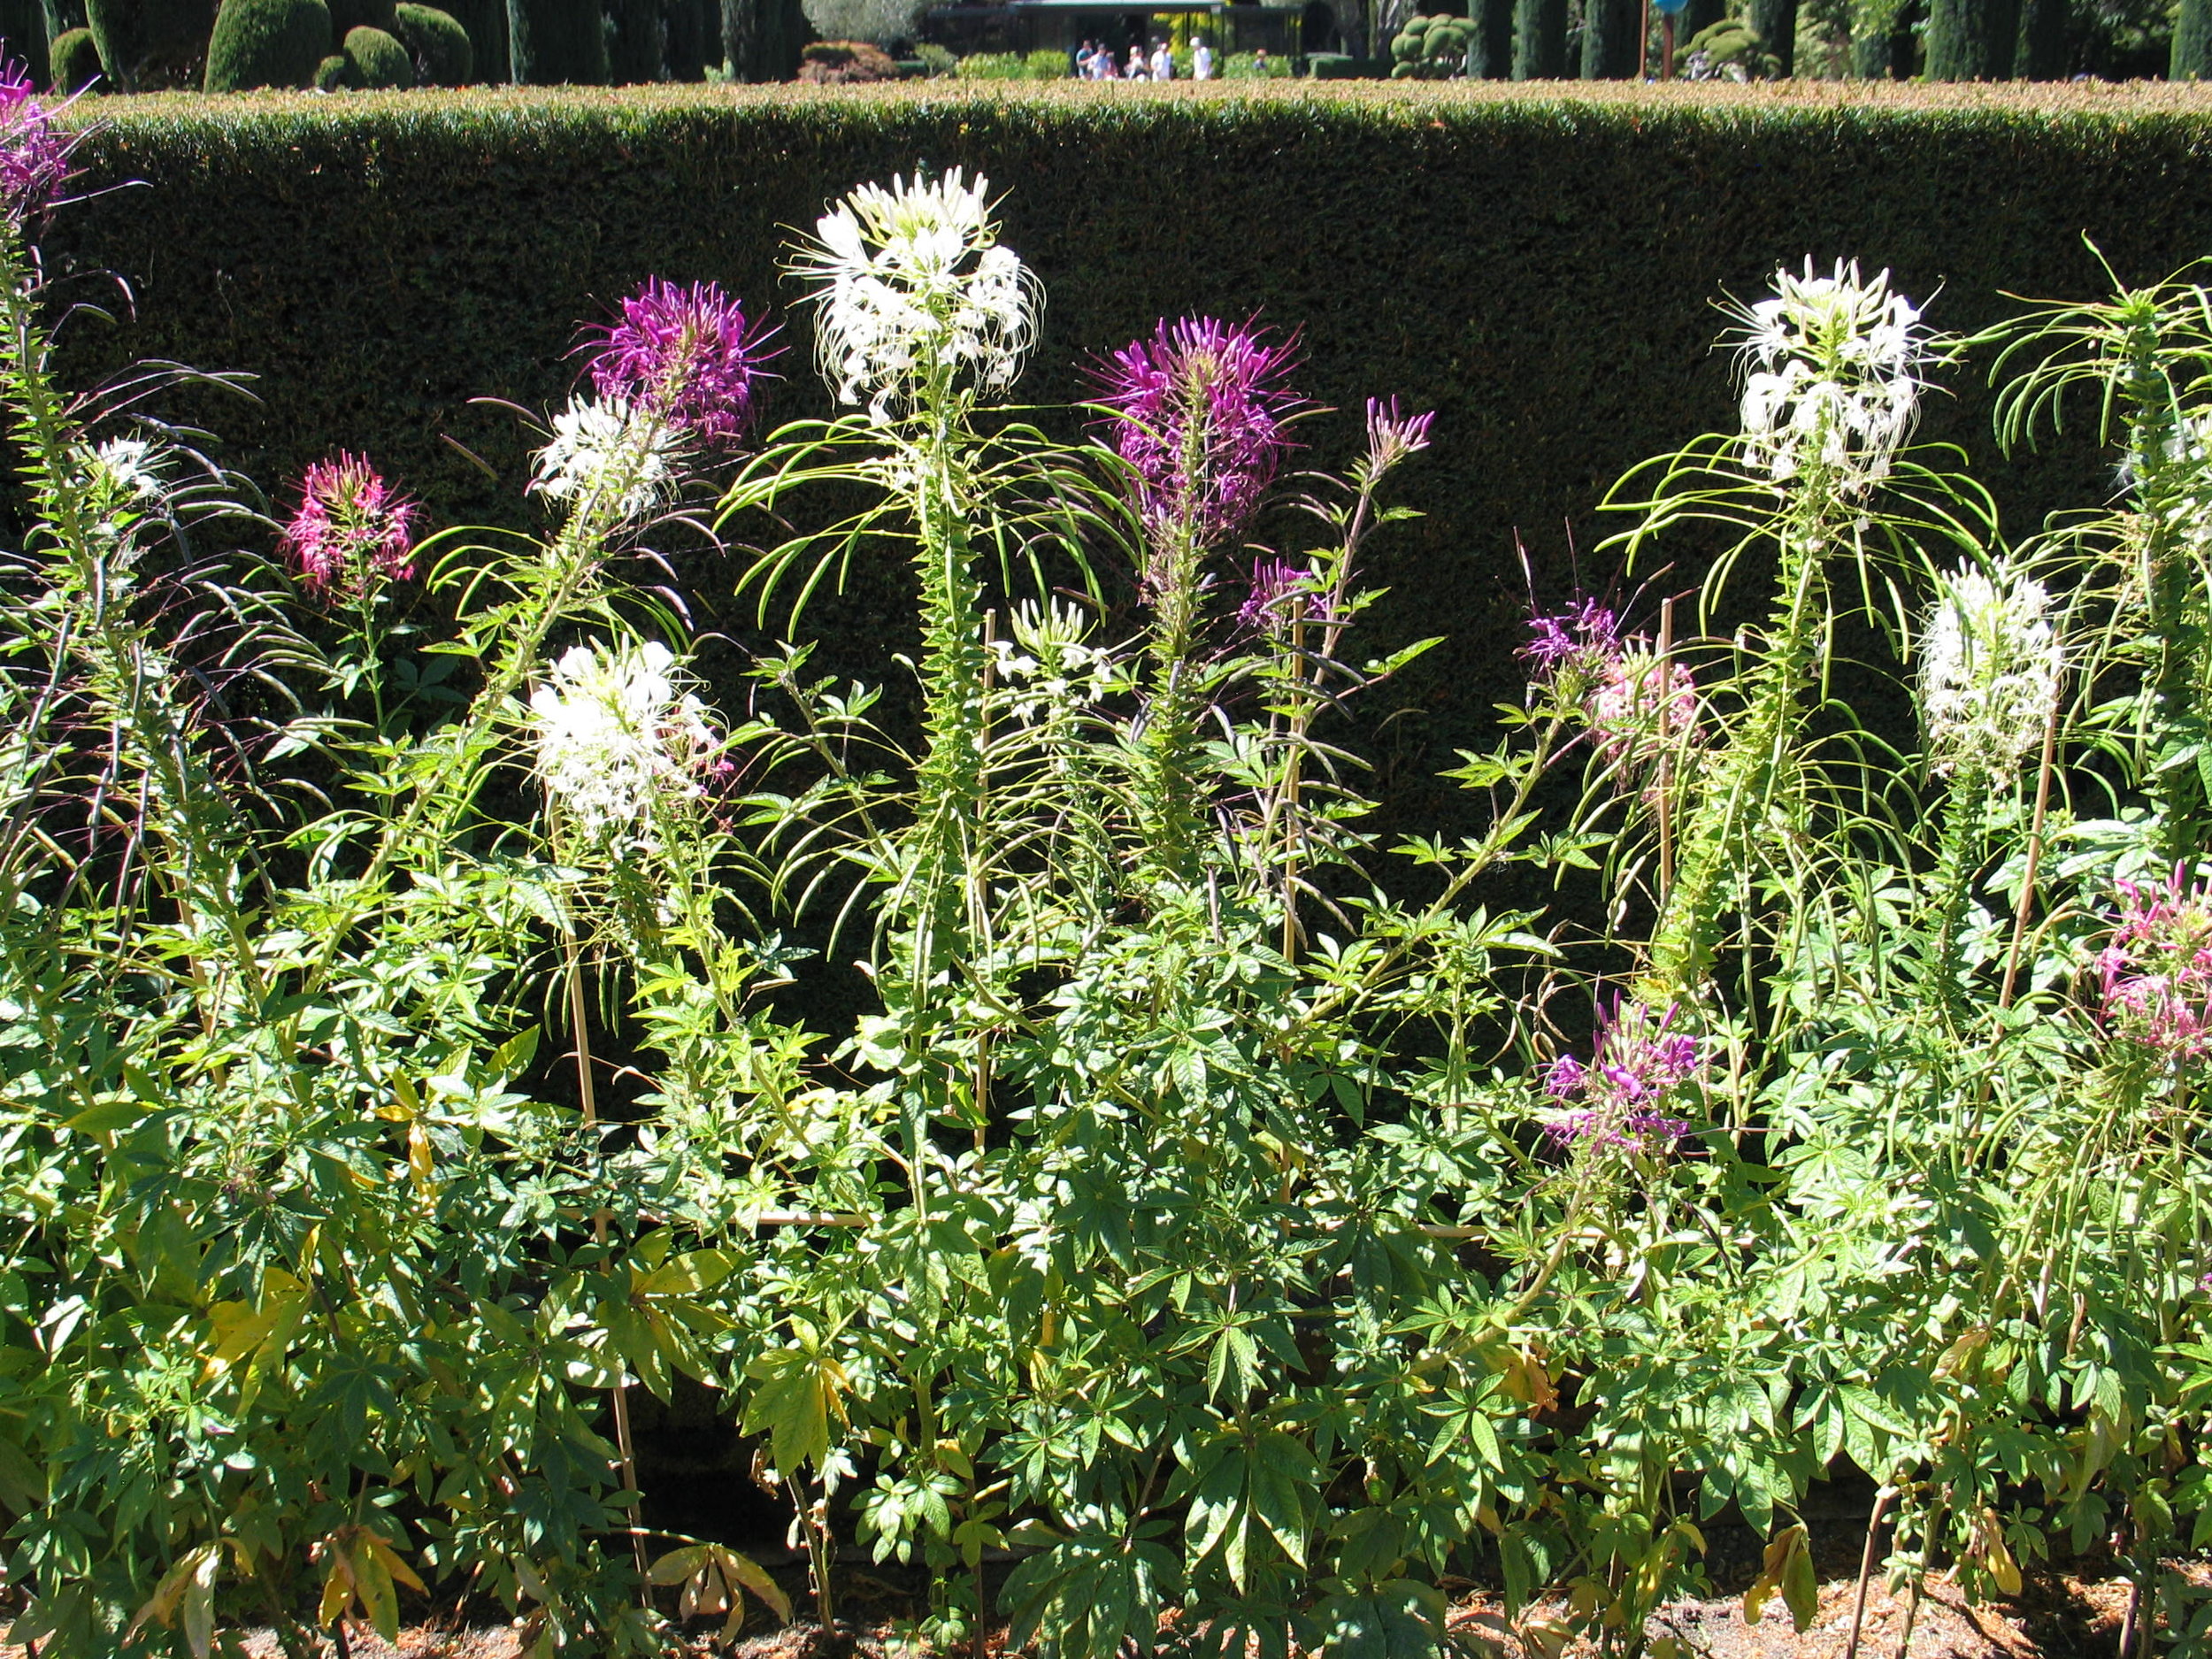
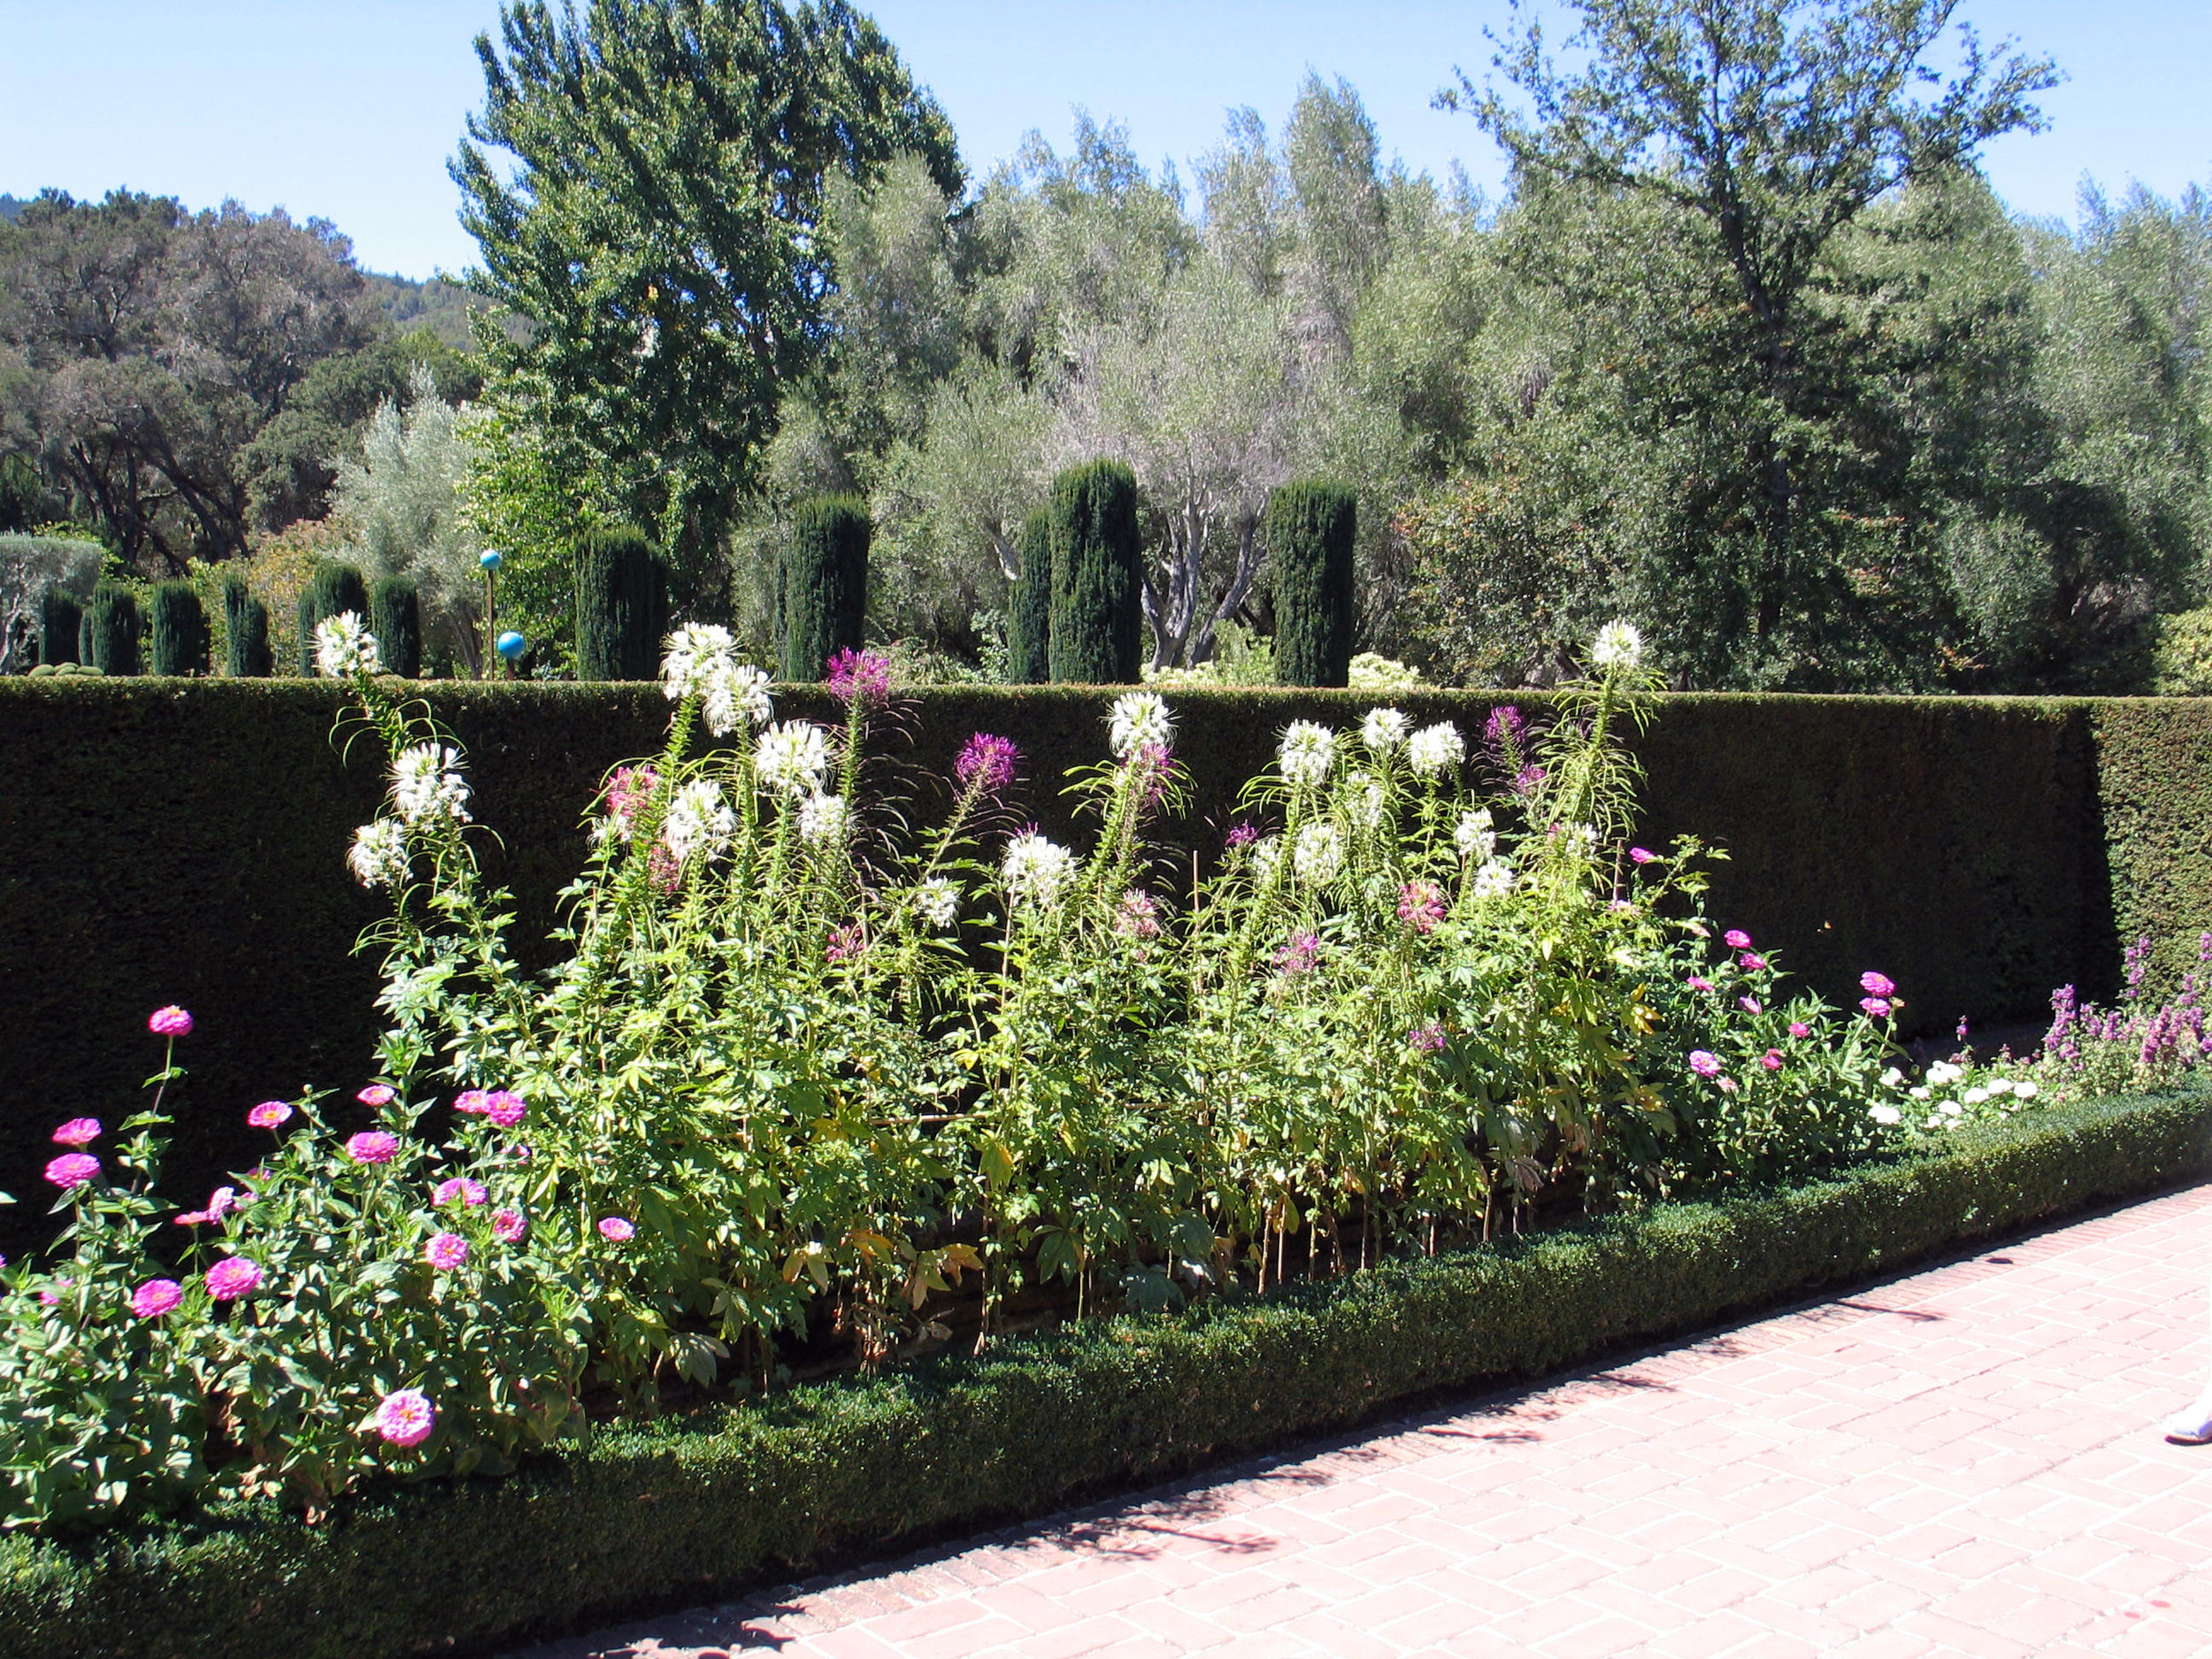 The Cleome were incredible - again, people in the shot to show just how BIG they are (the Cleome, not the people)!
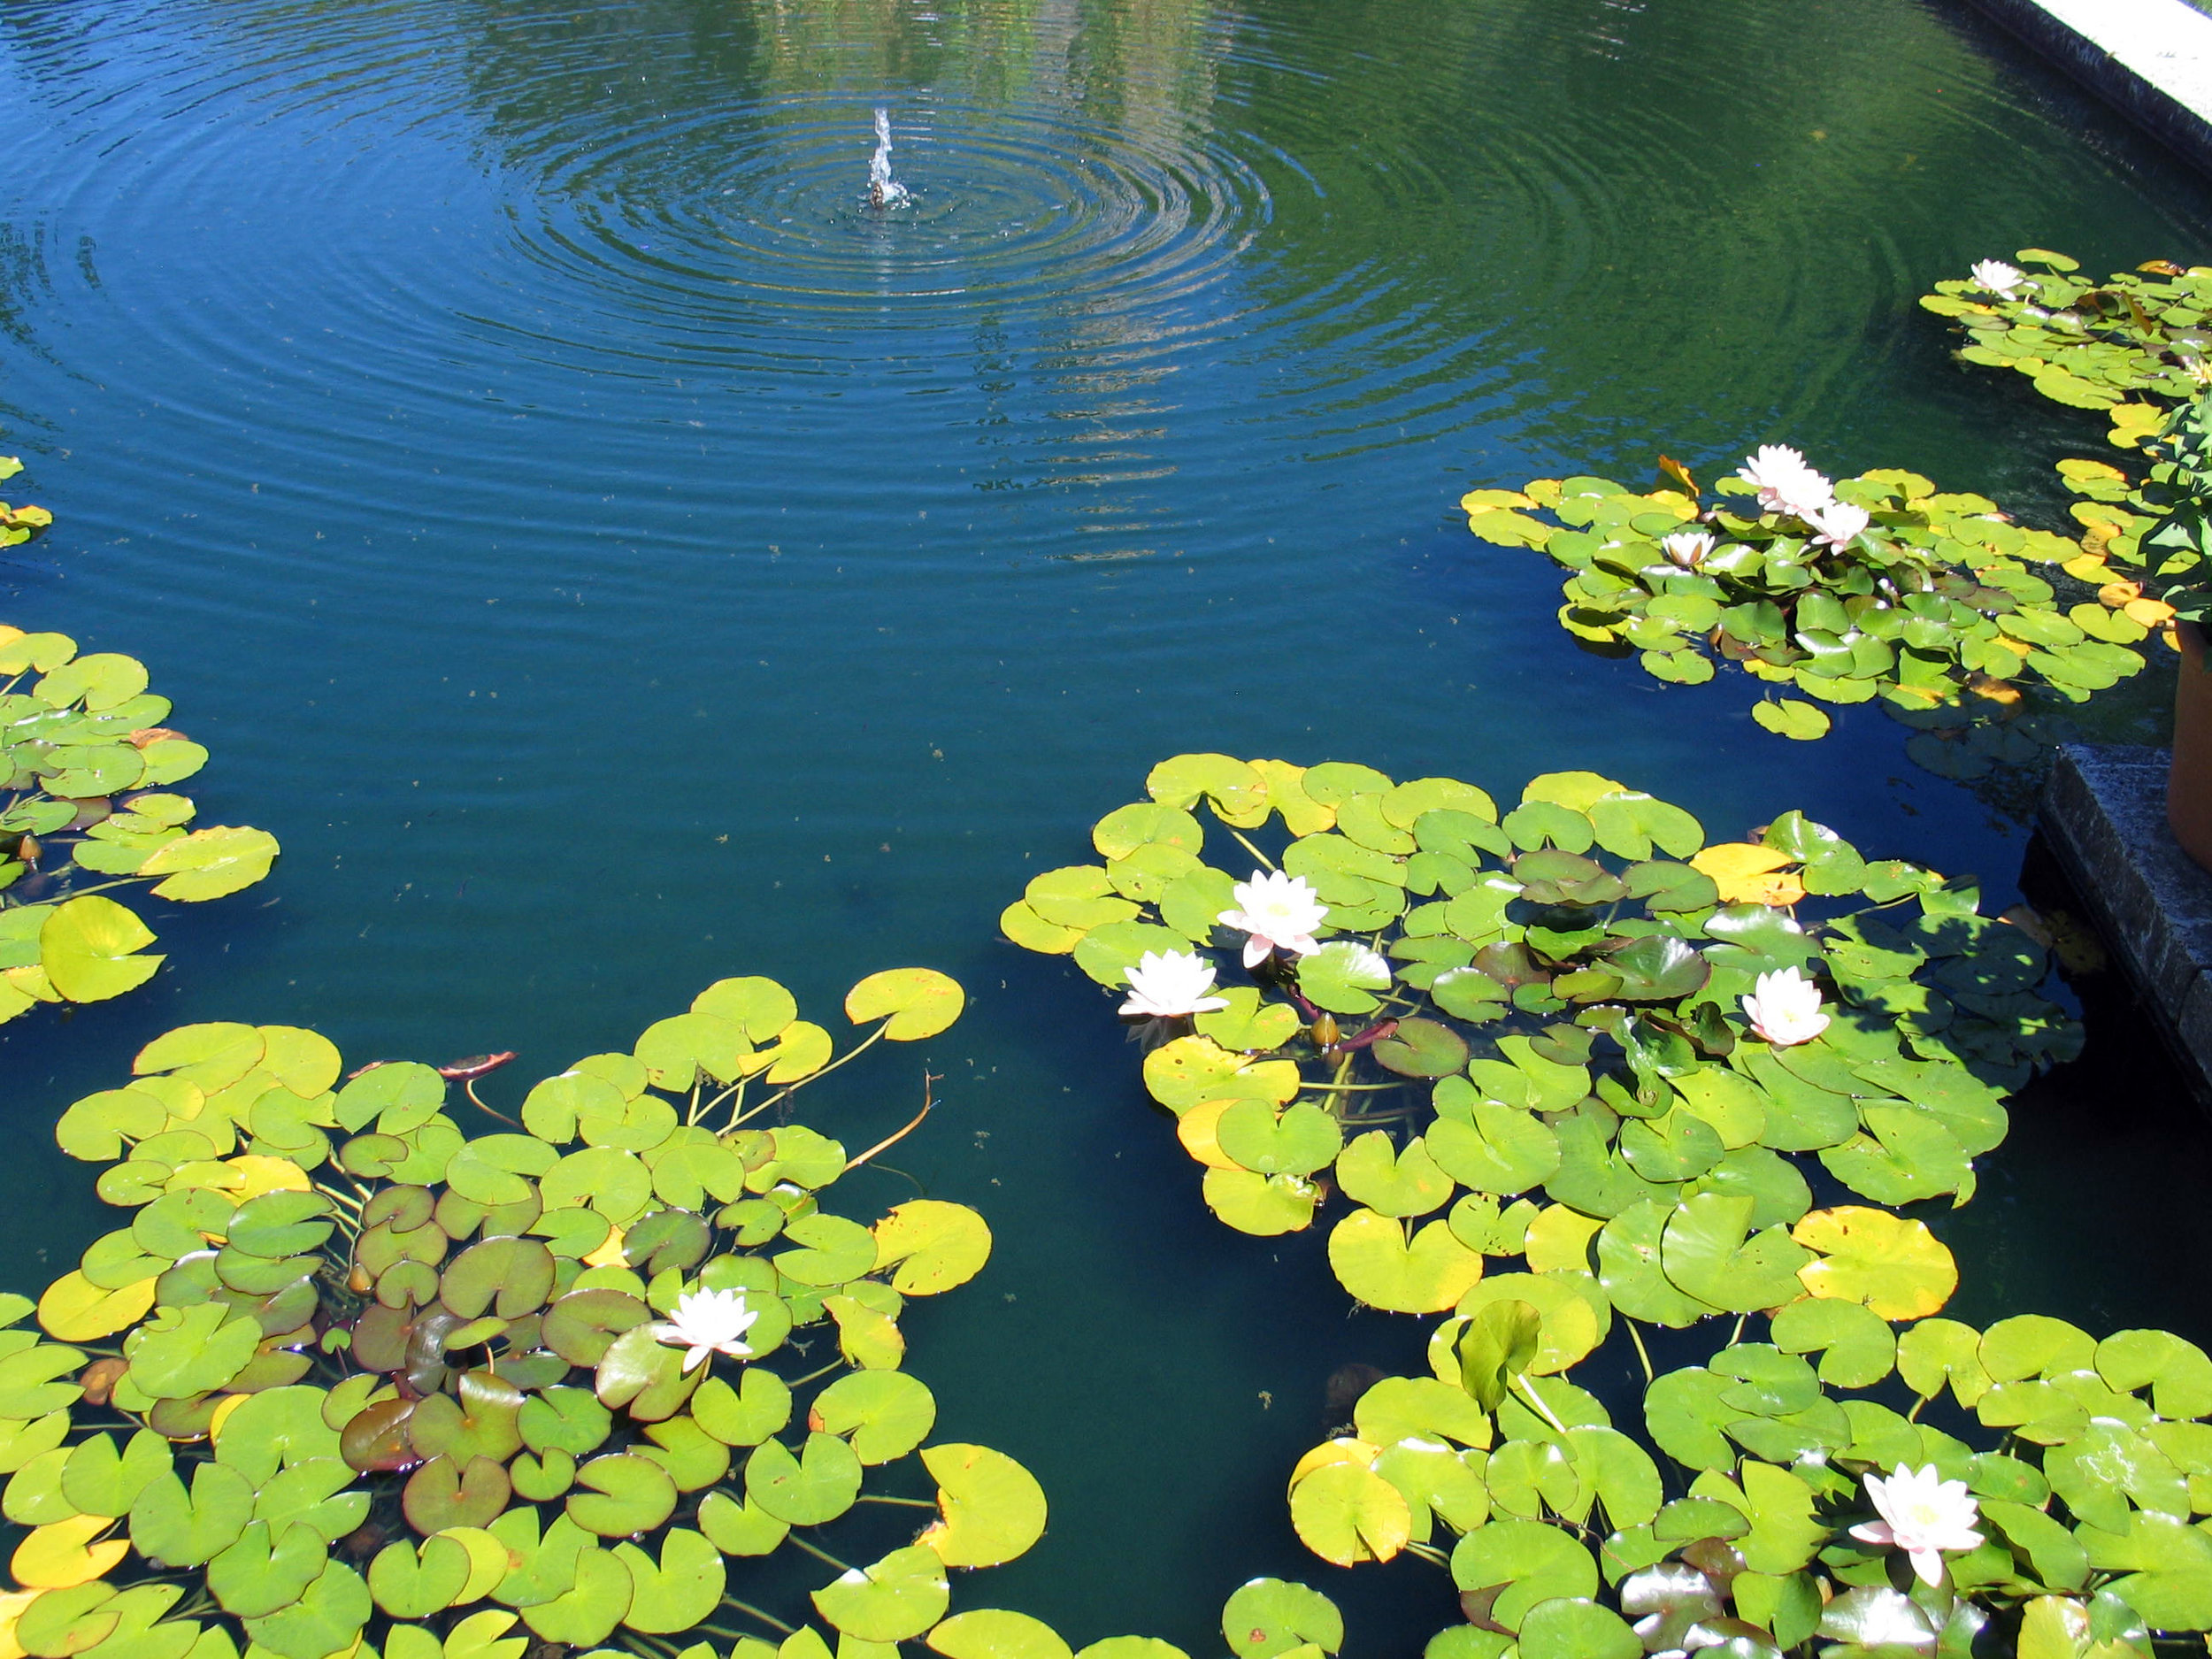
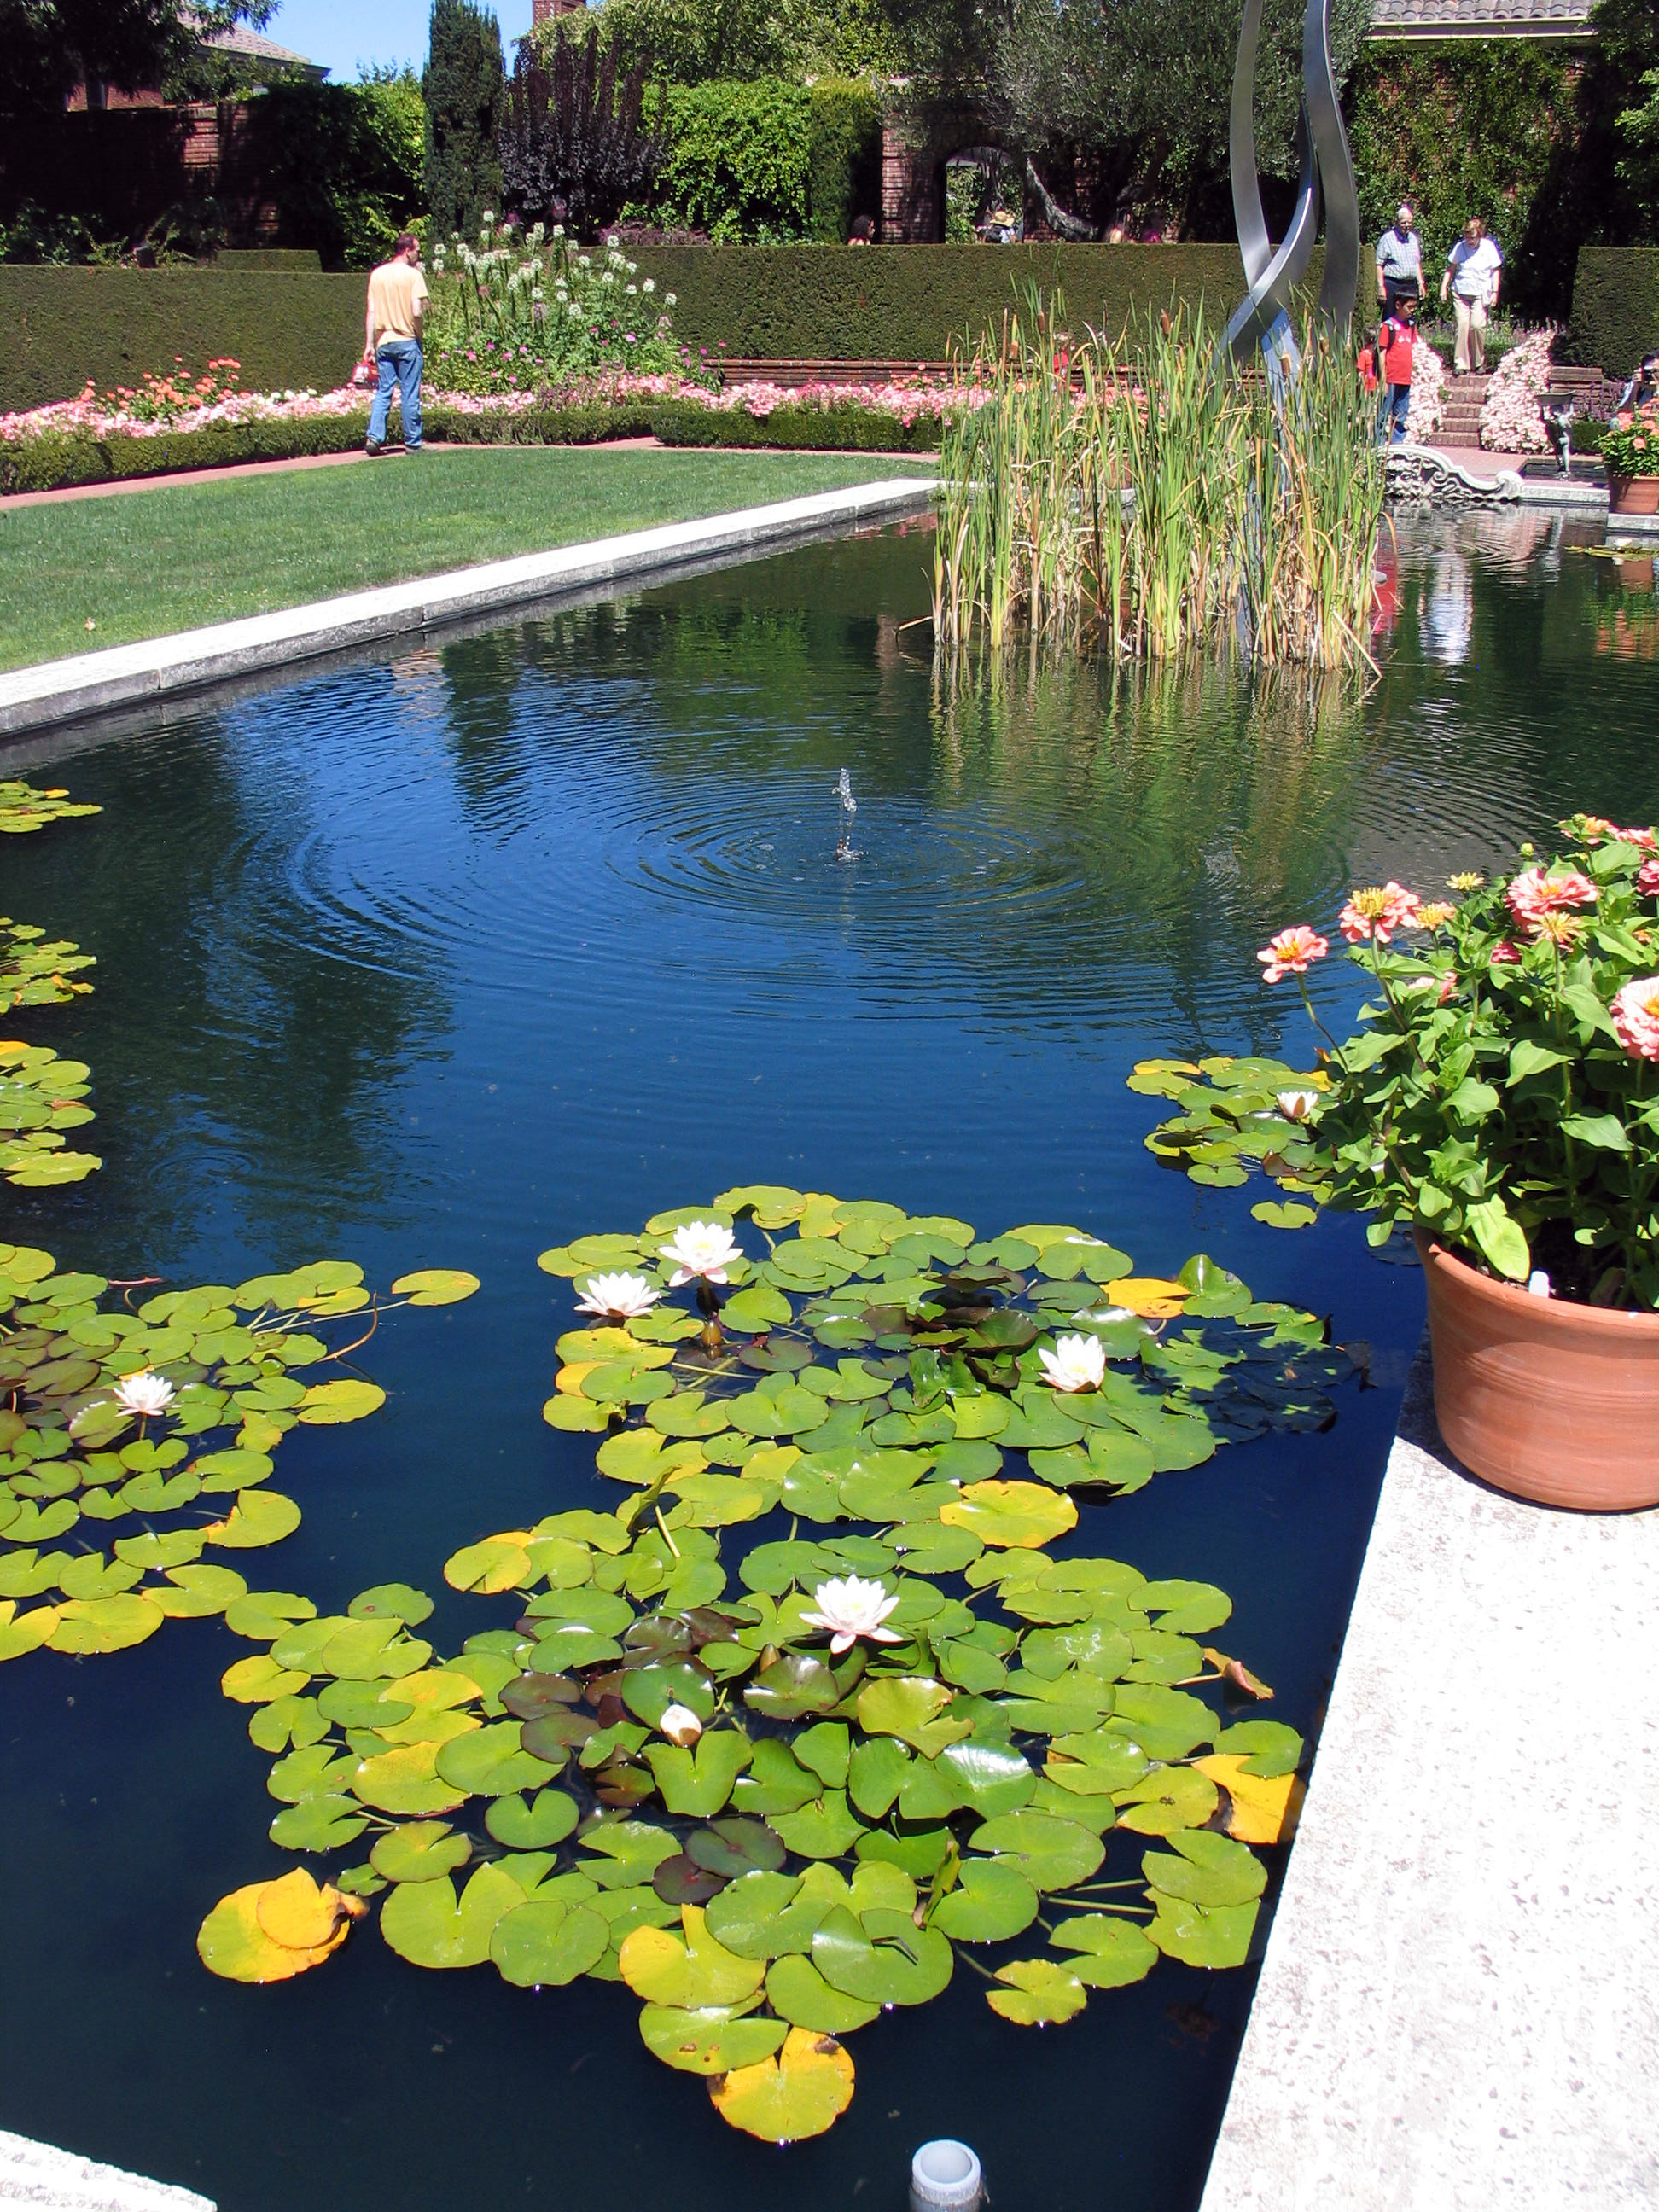 Love the pond, there are fish in there too - I don't know what kind, but I could sit and watch them for a good while, goofing off in the waterlilies (not sure who would goof off more, the fish or me).
 Here I thought I was taking pictures of Magnolias, but these two are so sweet.
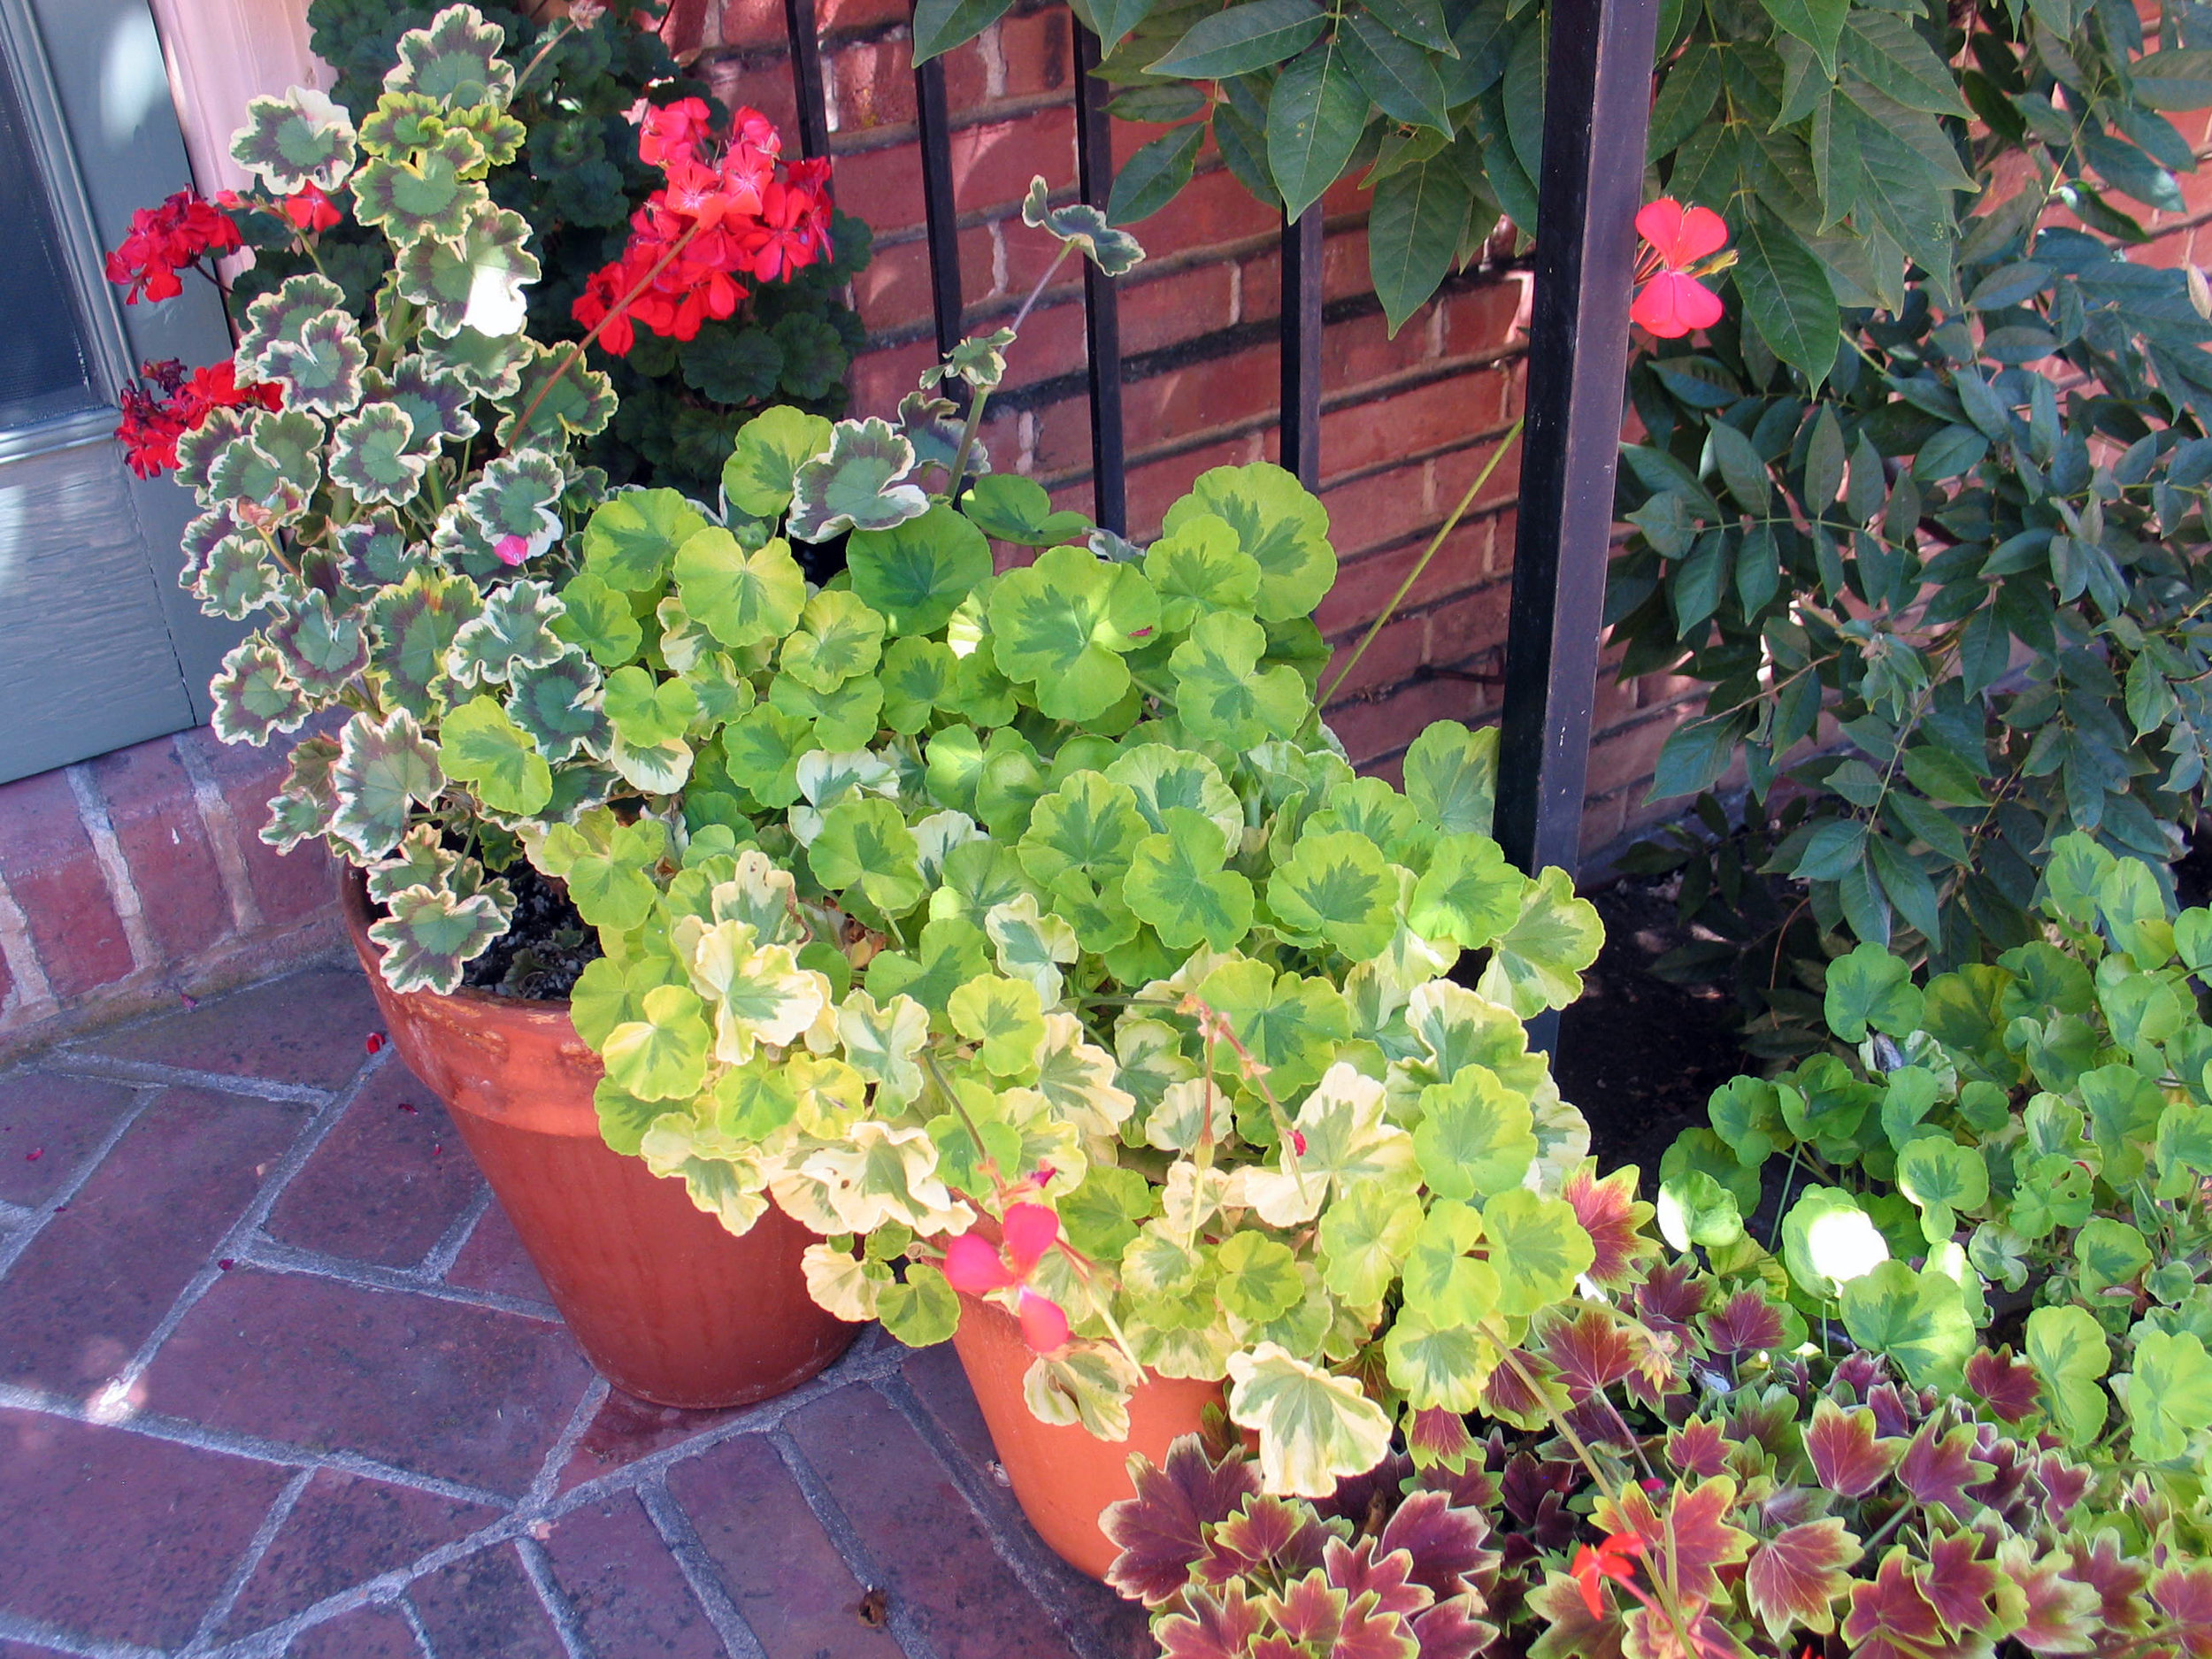
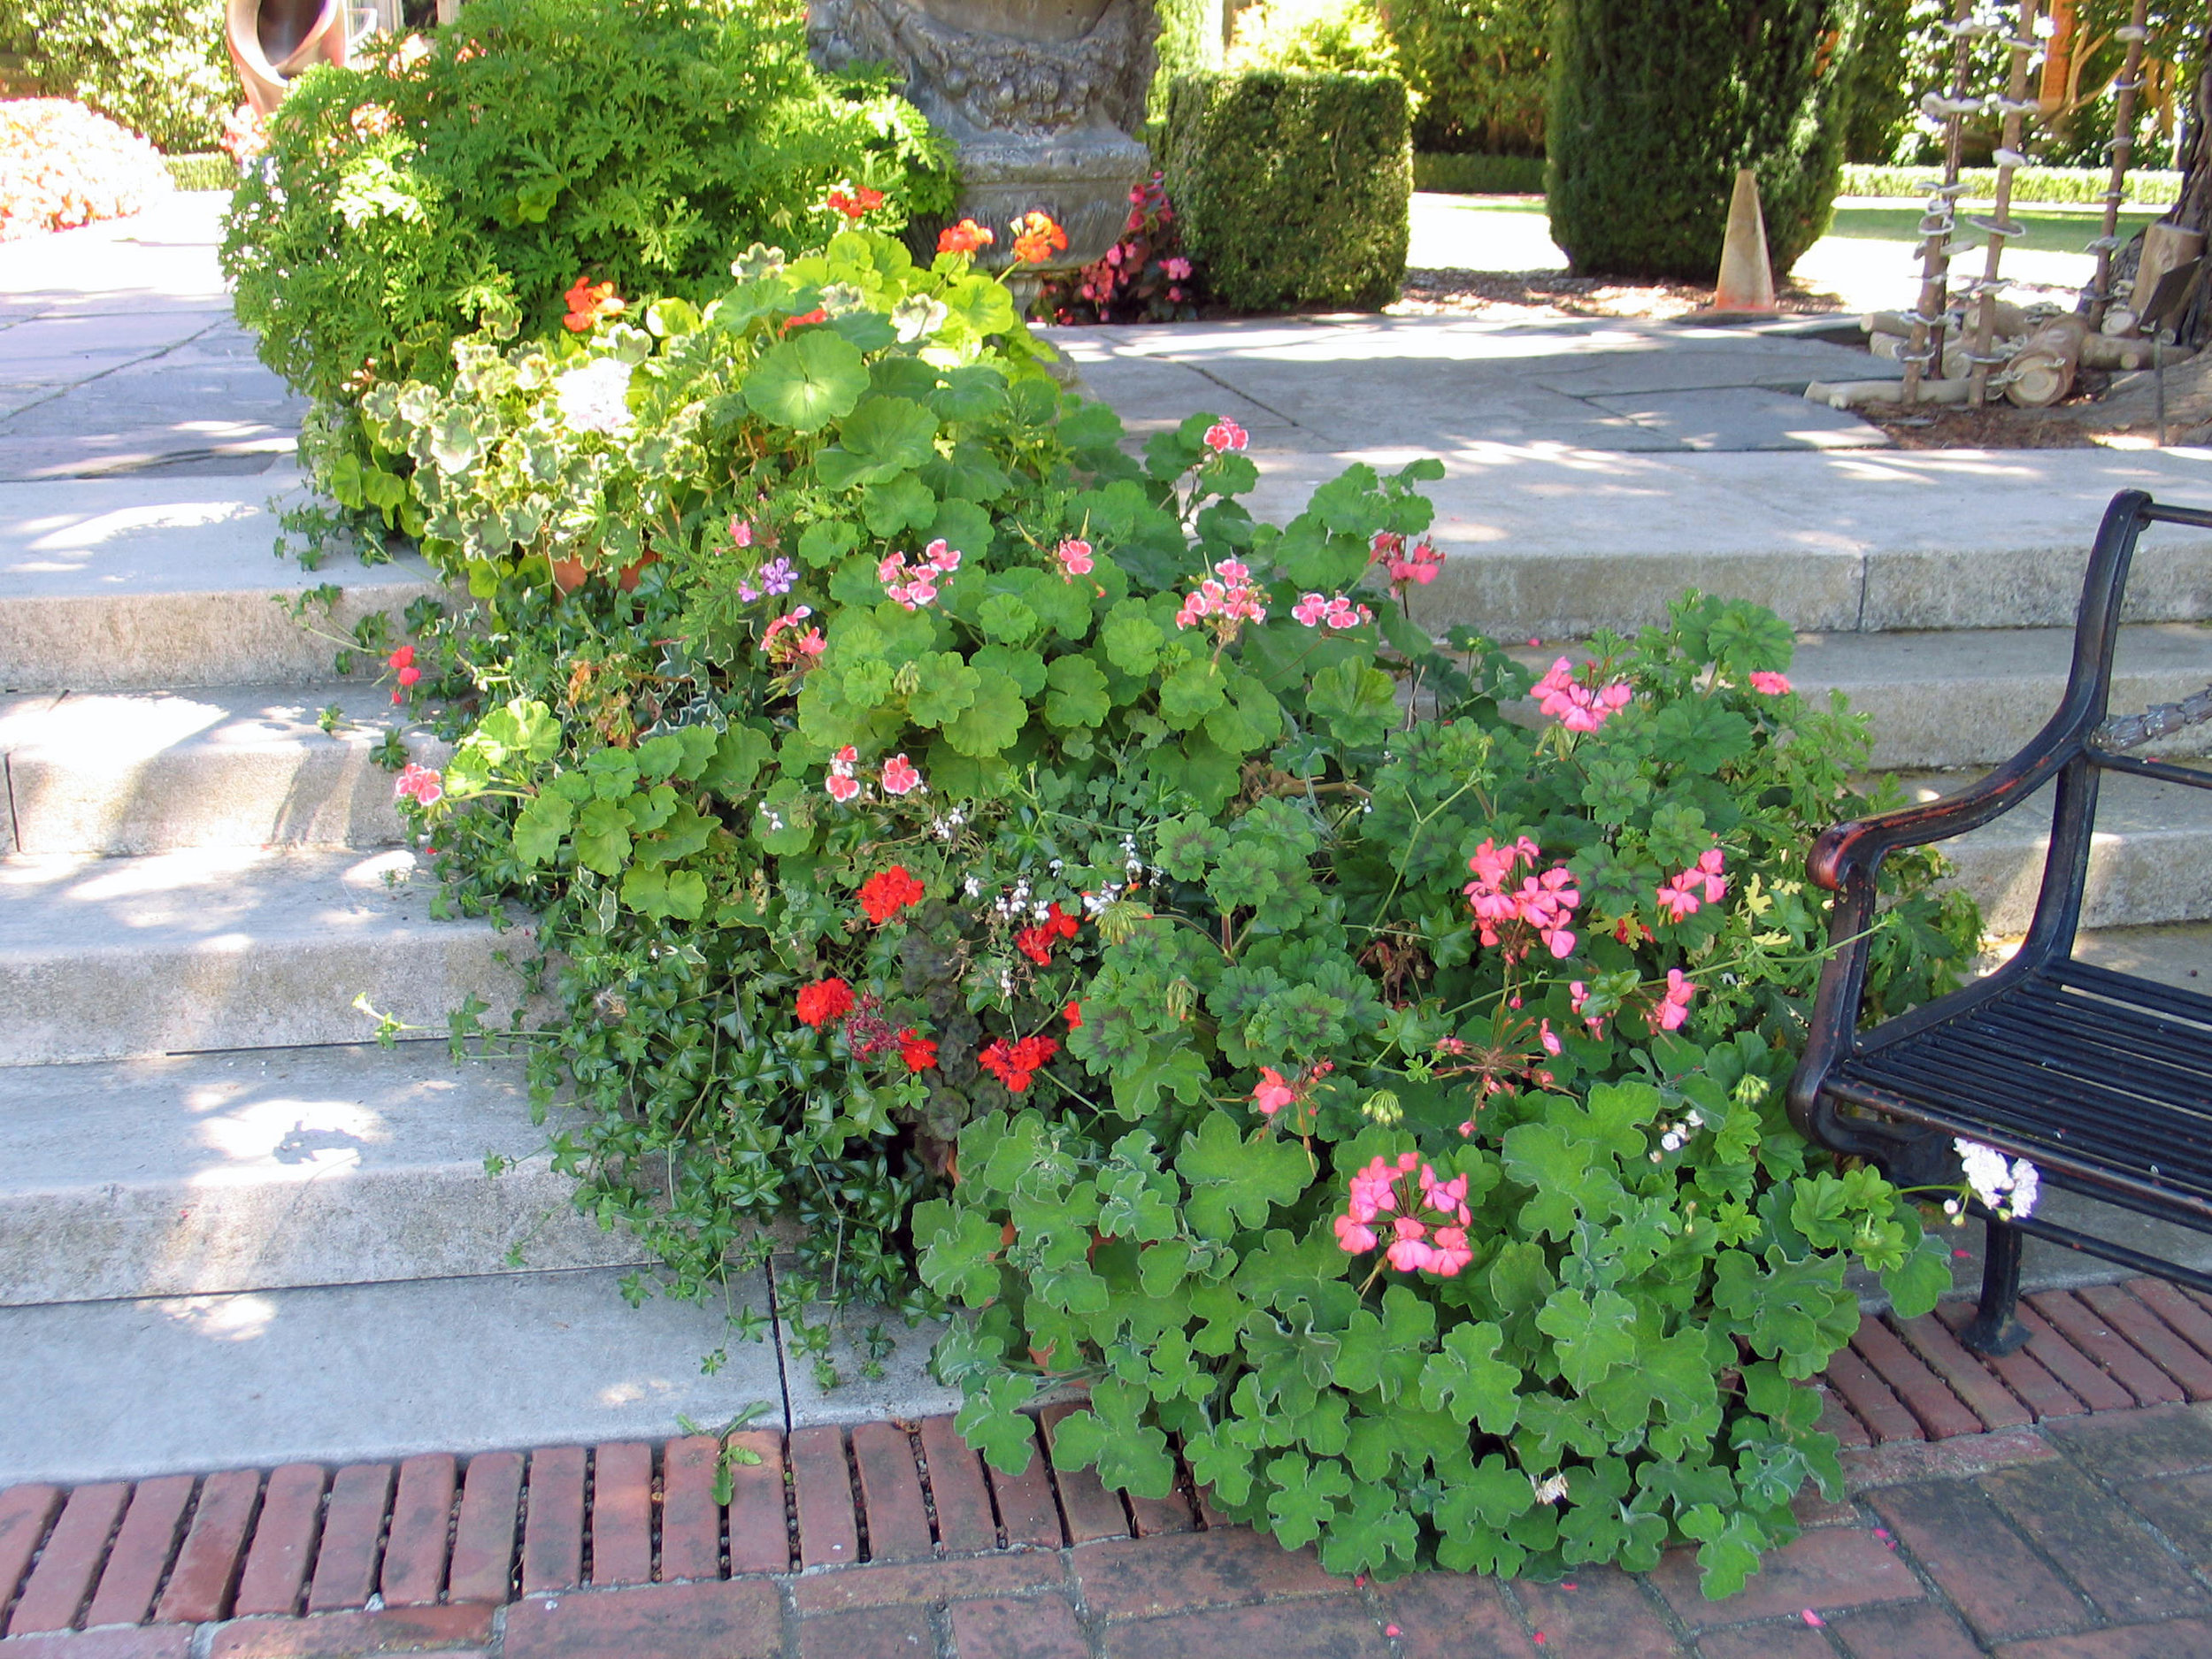 ...and again, Filoli manages to make even ordinary Pelargoniums look amazing! I bought one at the gift shop, just could not resist, so don't be surprised if you see them in future posts...
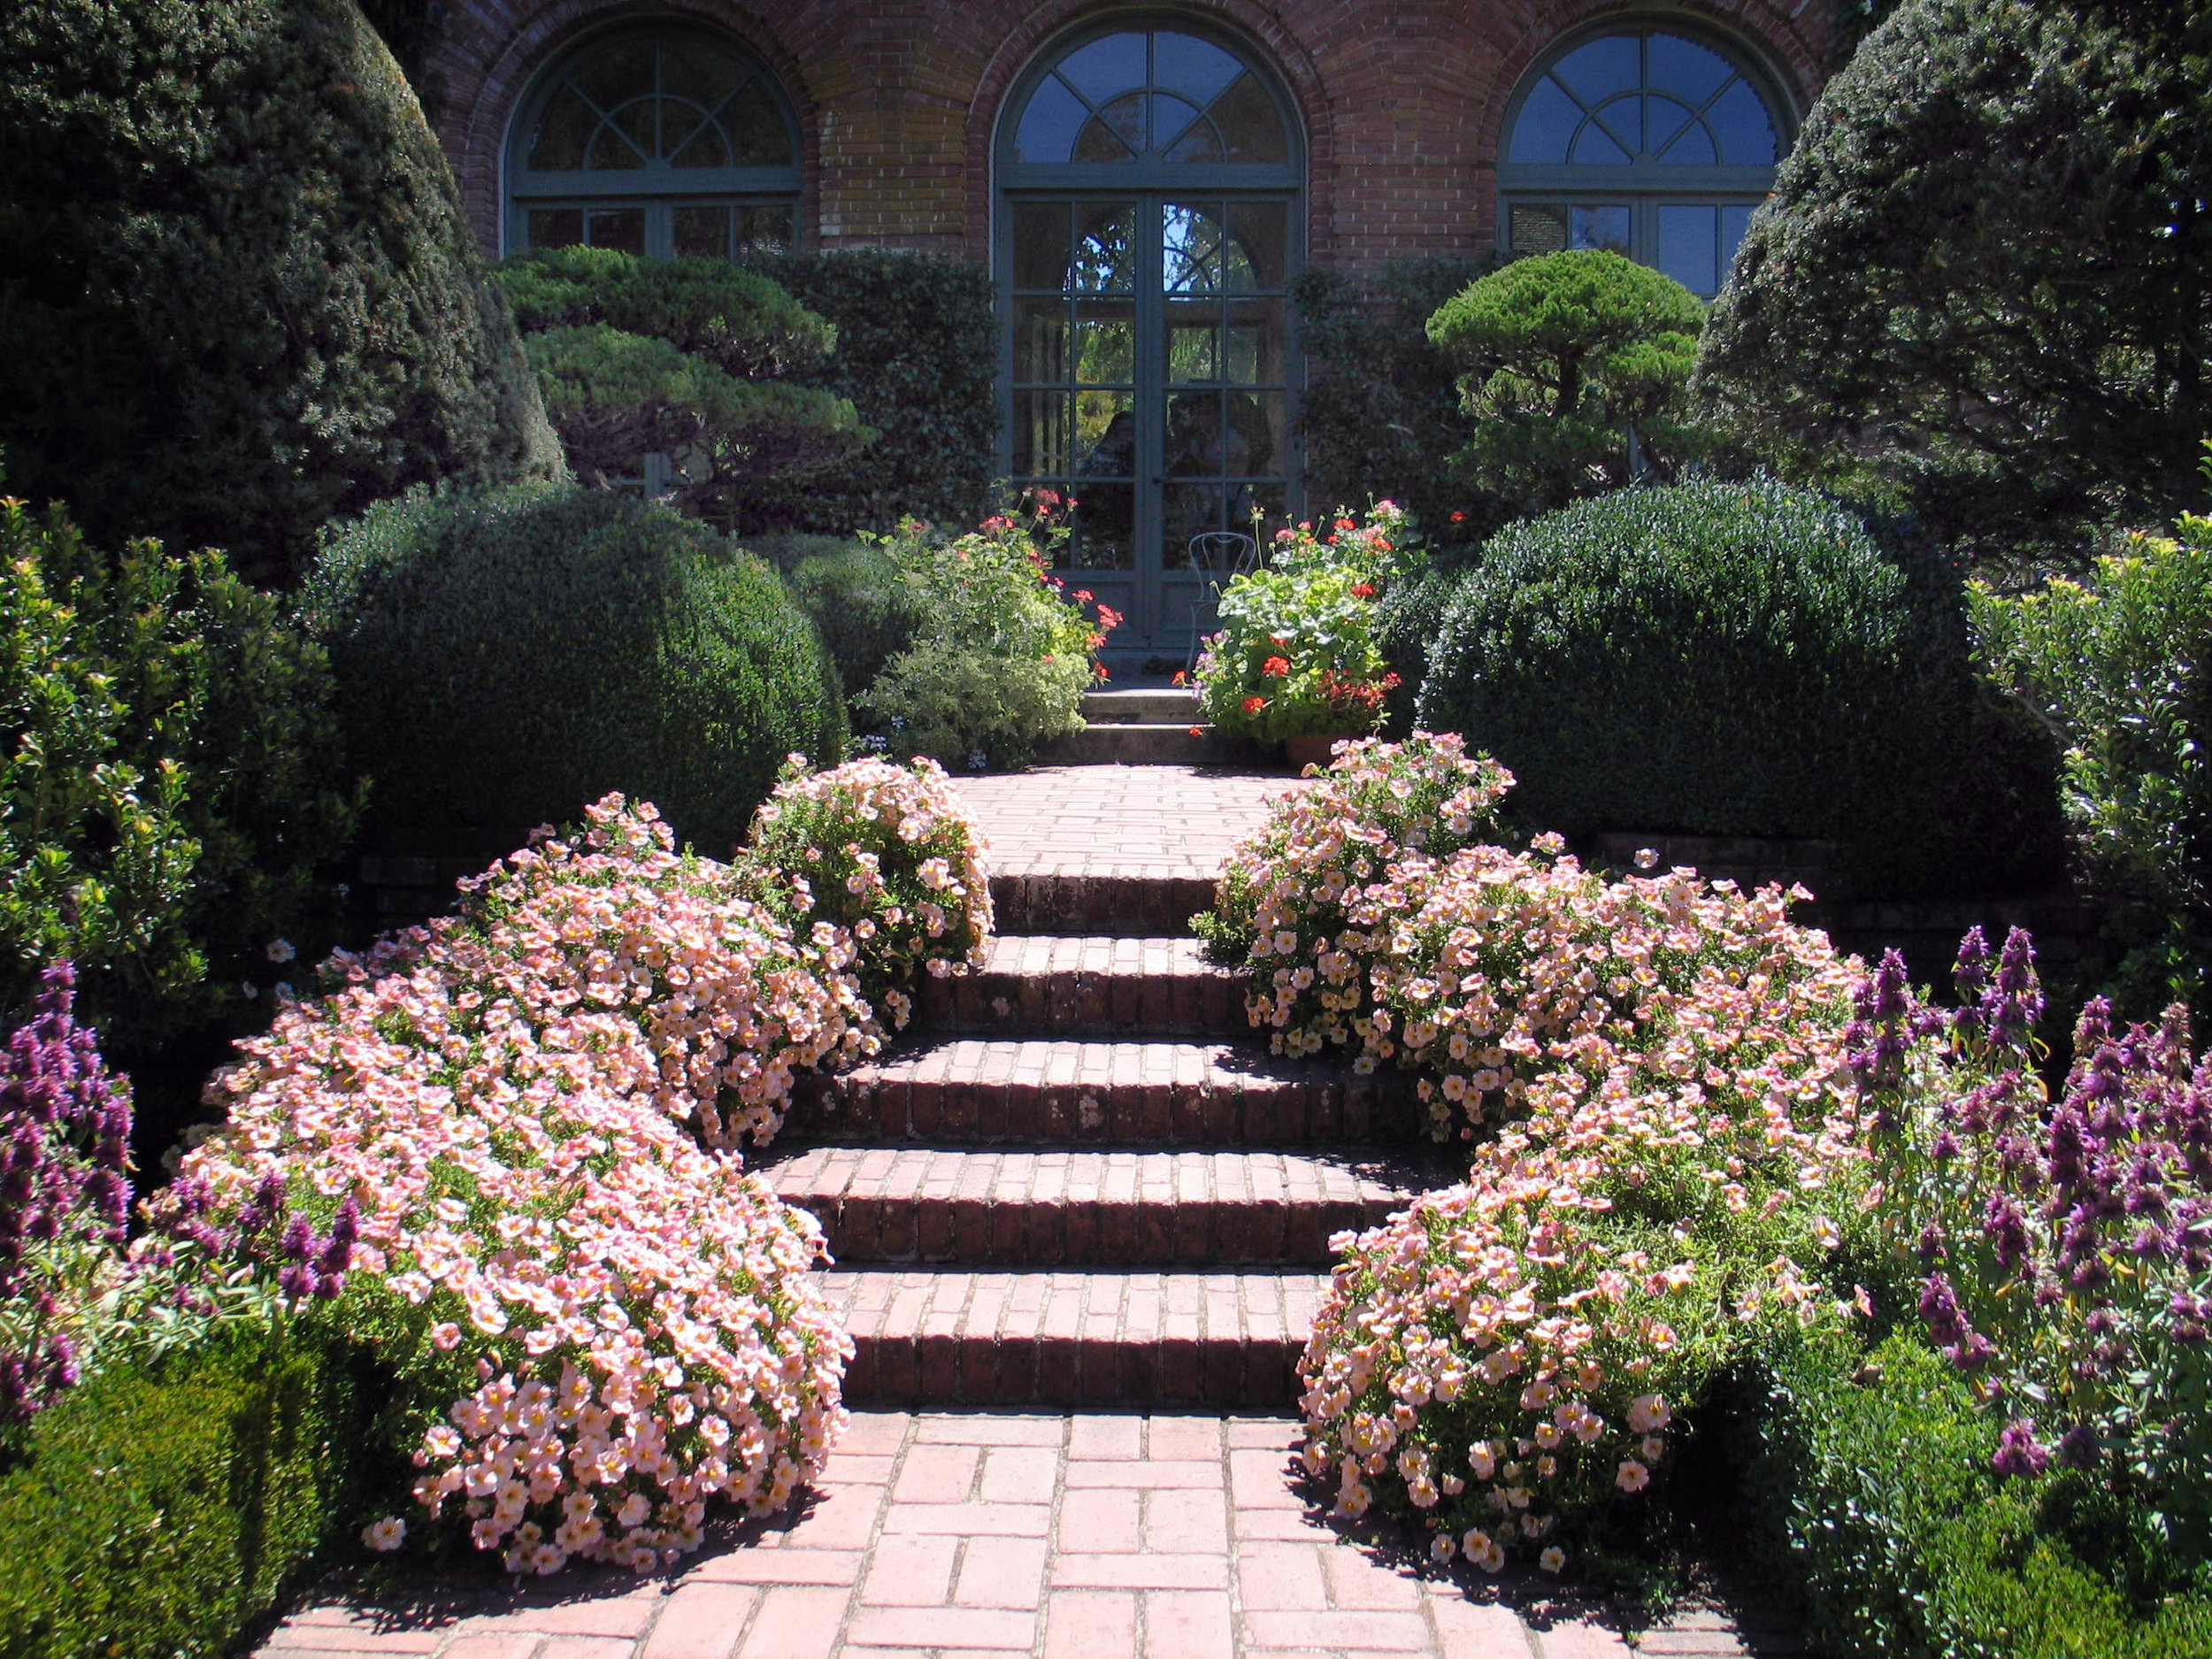
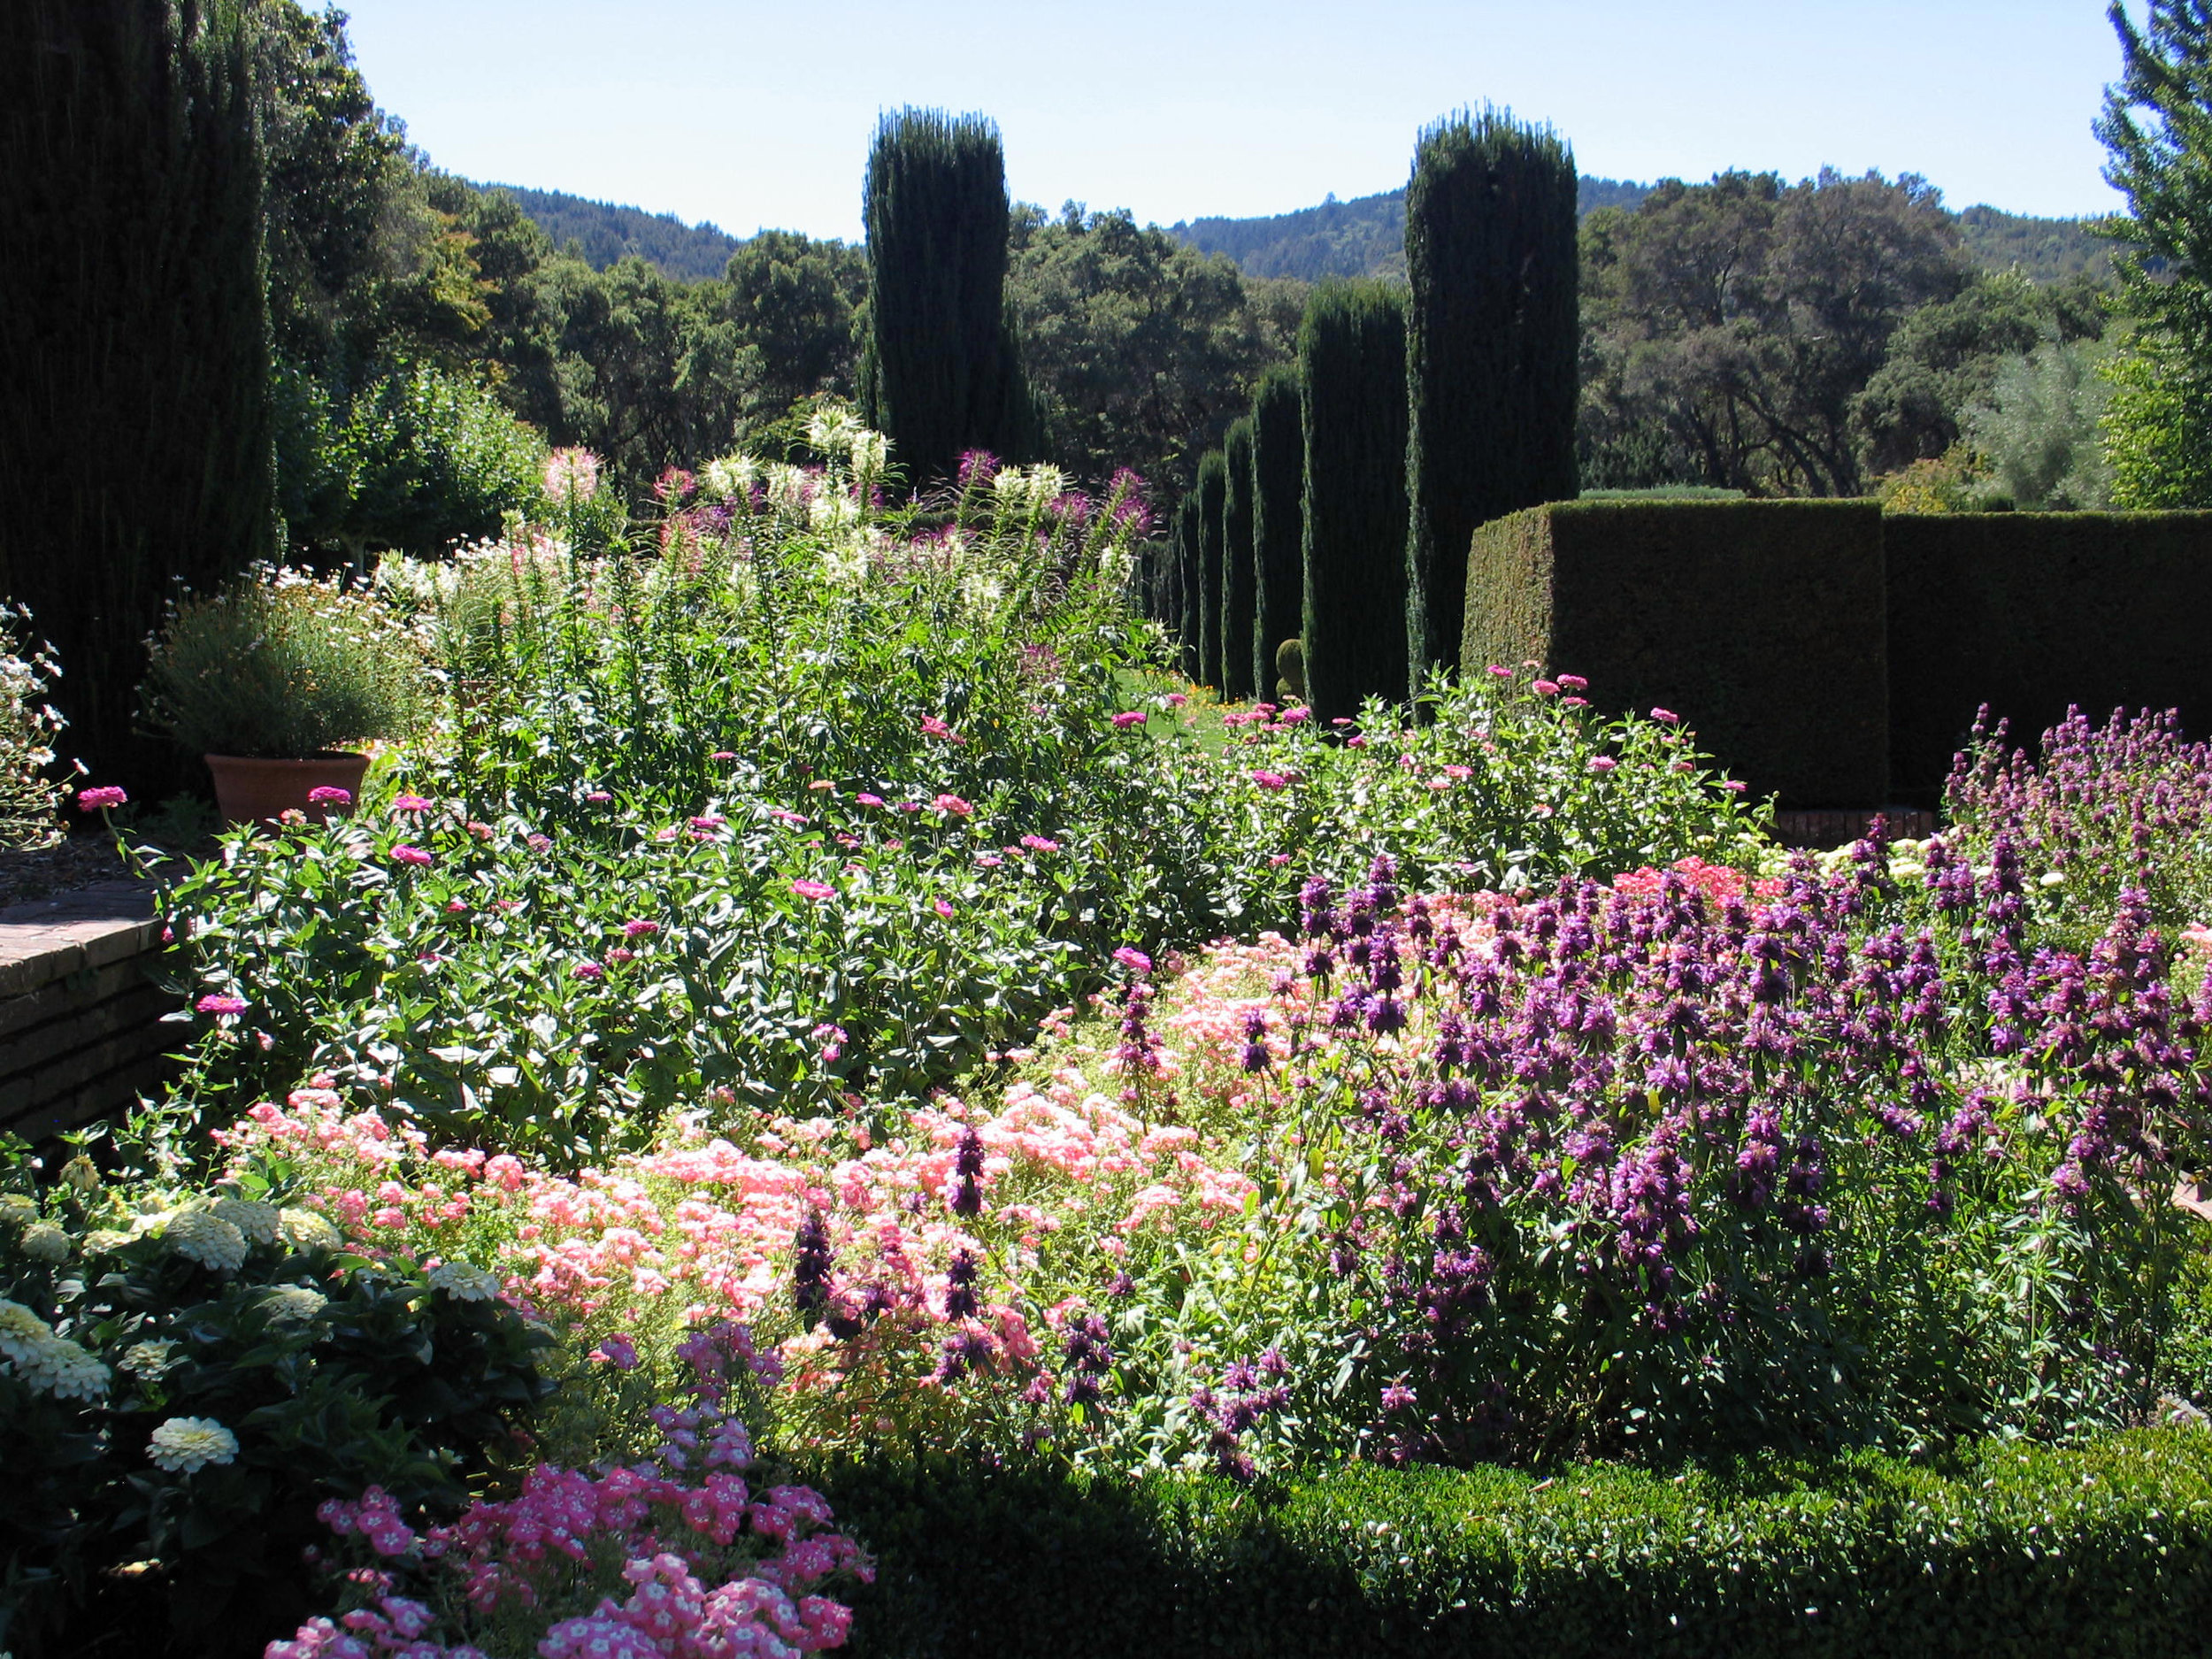
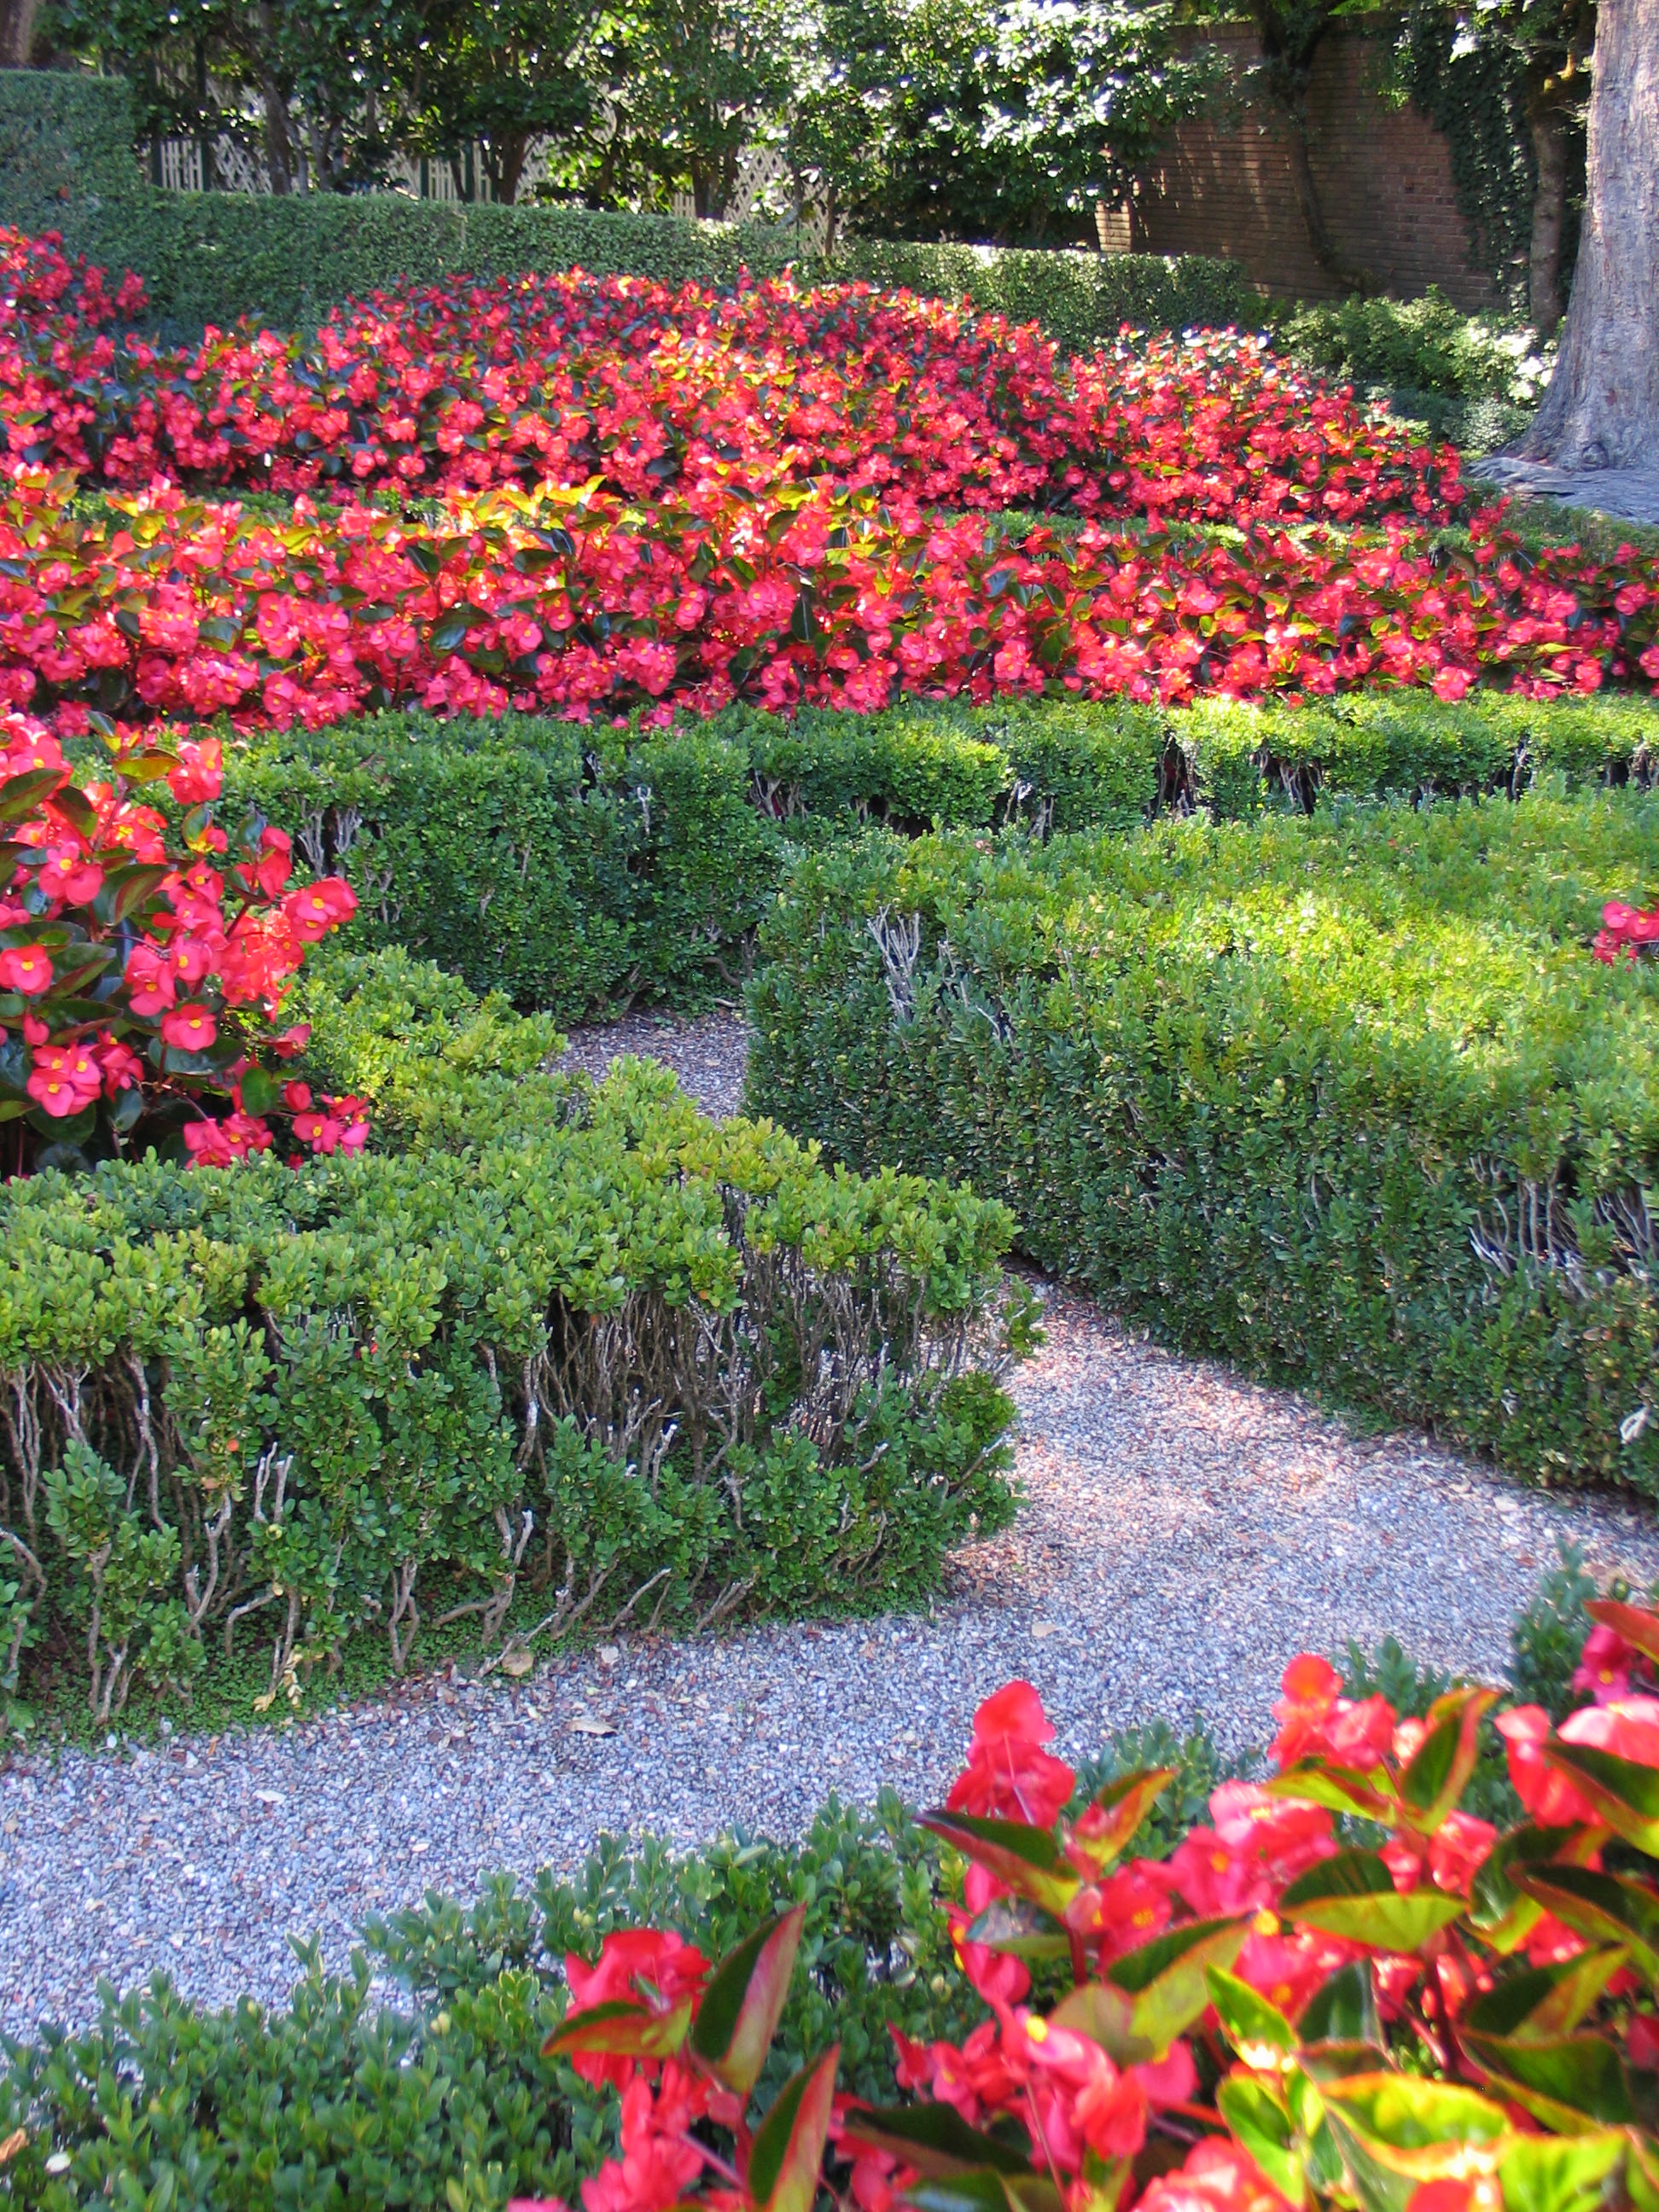 as usual, the intense exuberance of the plantings are utterly breathtaking. Vigor and vibrance around every corner.
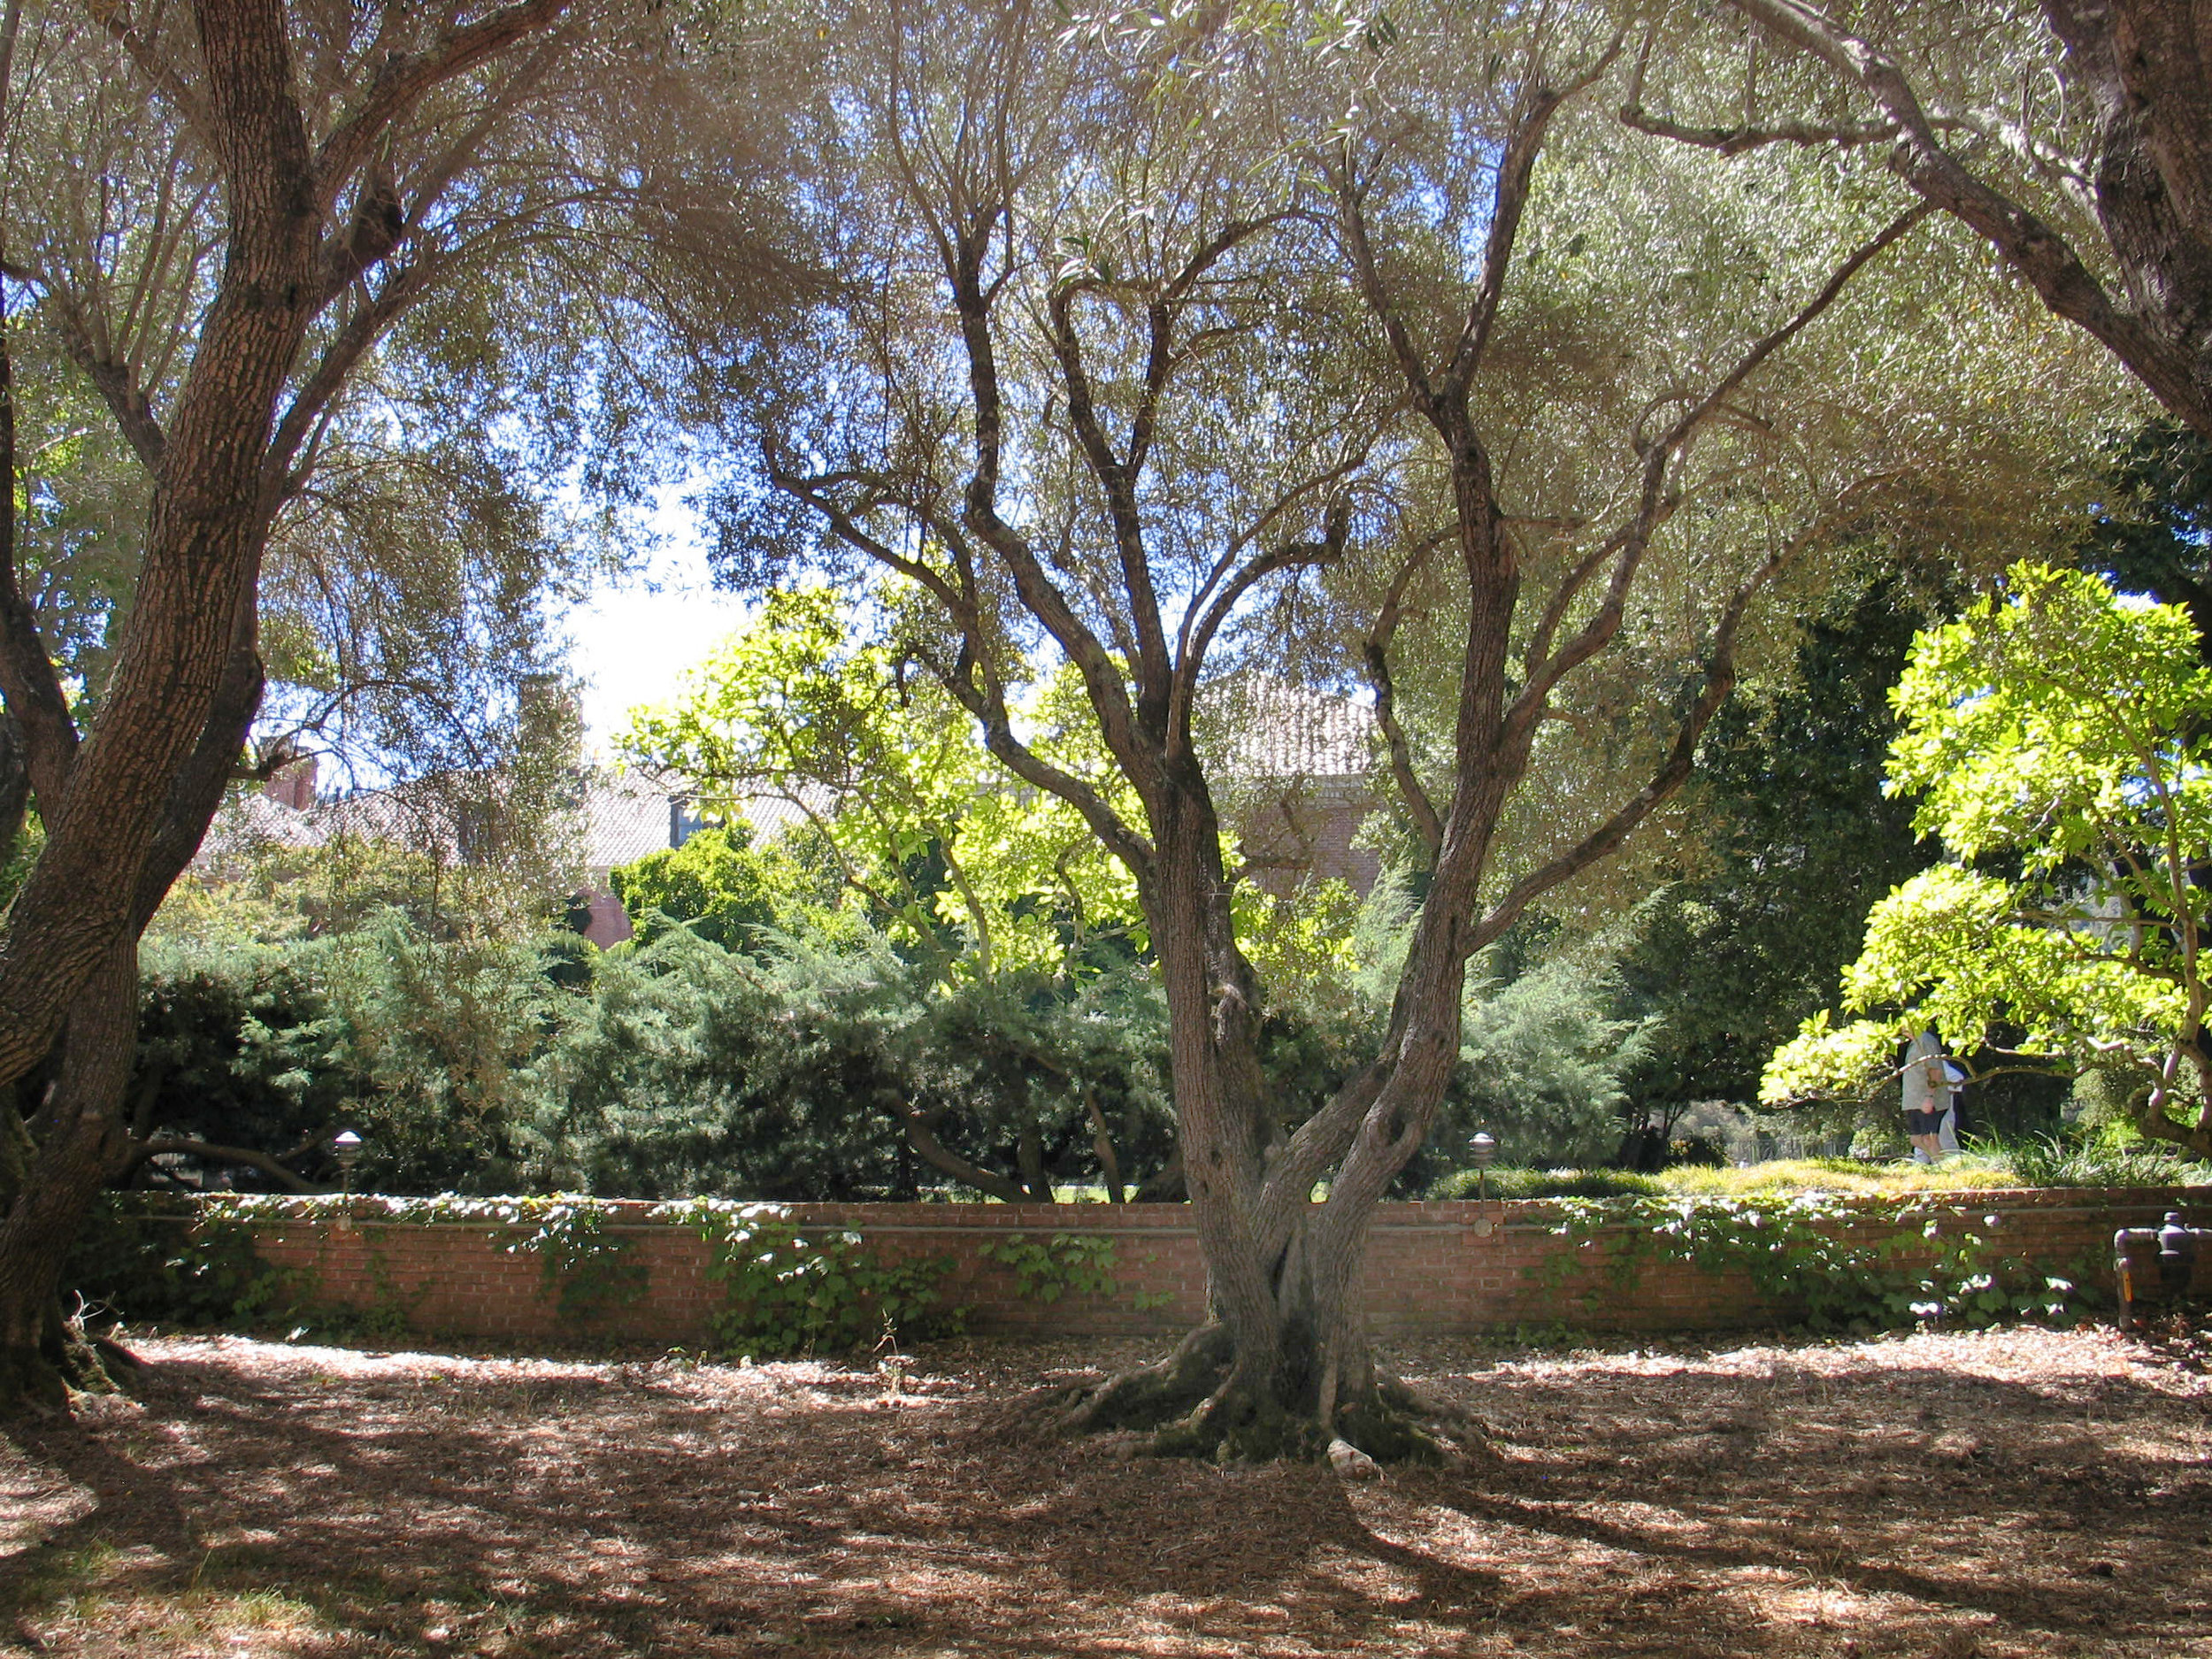
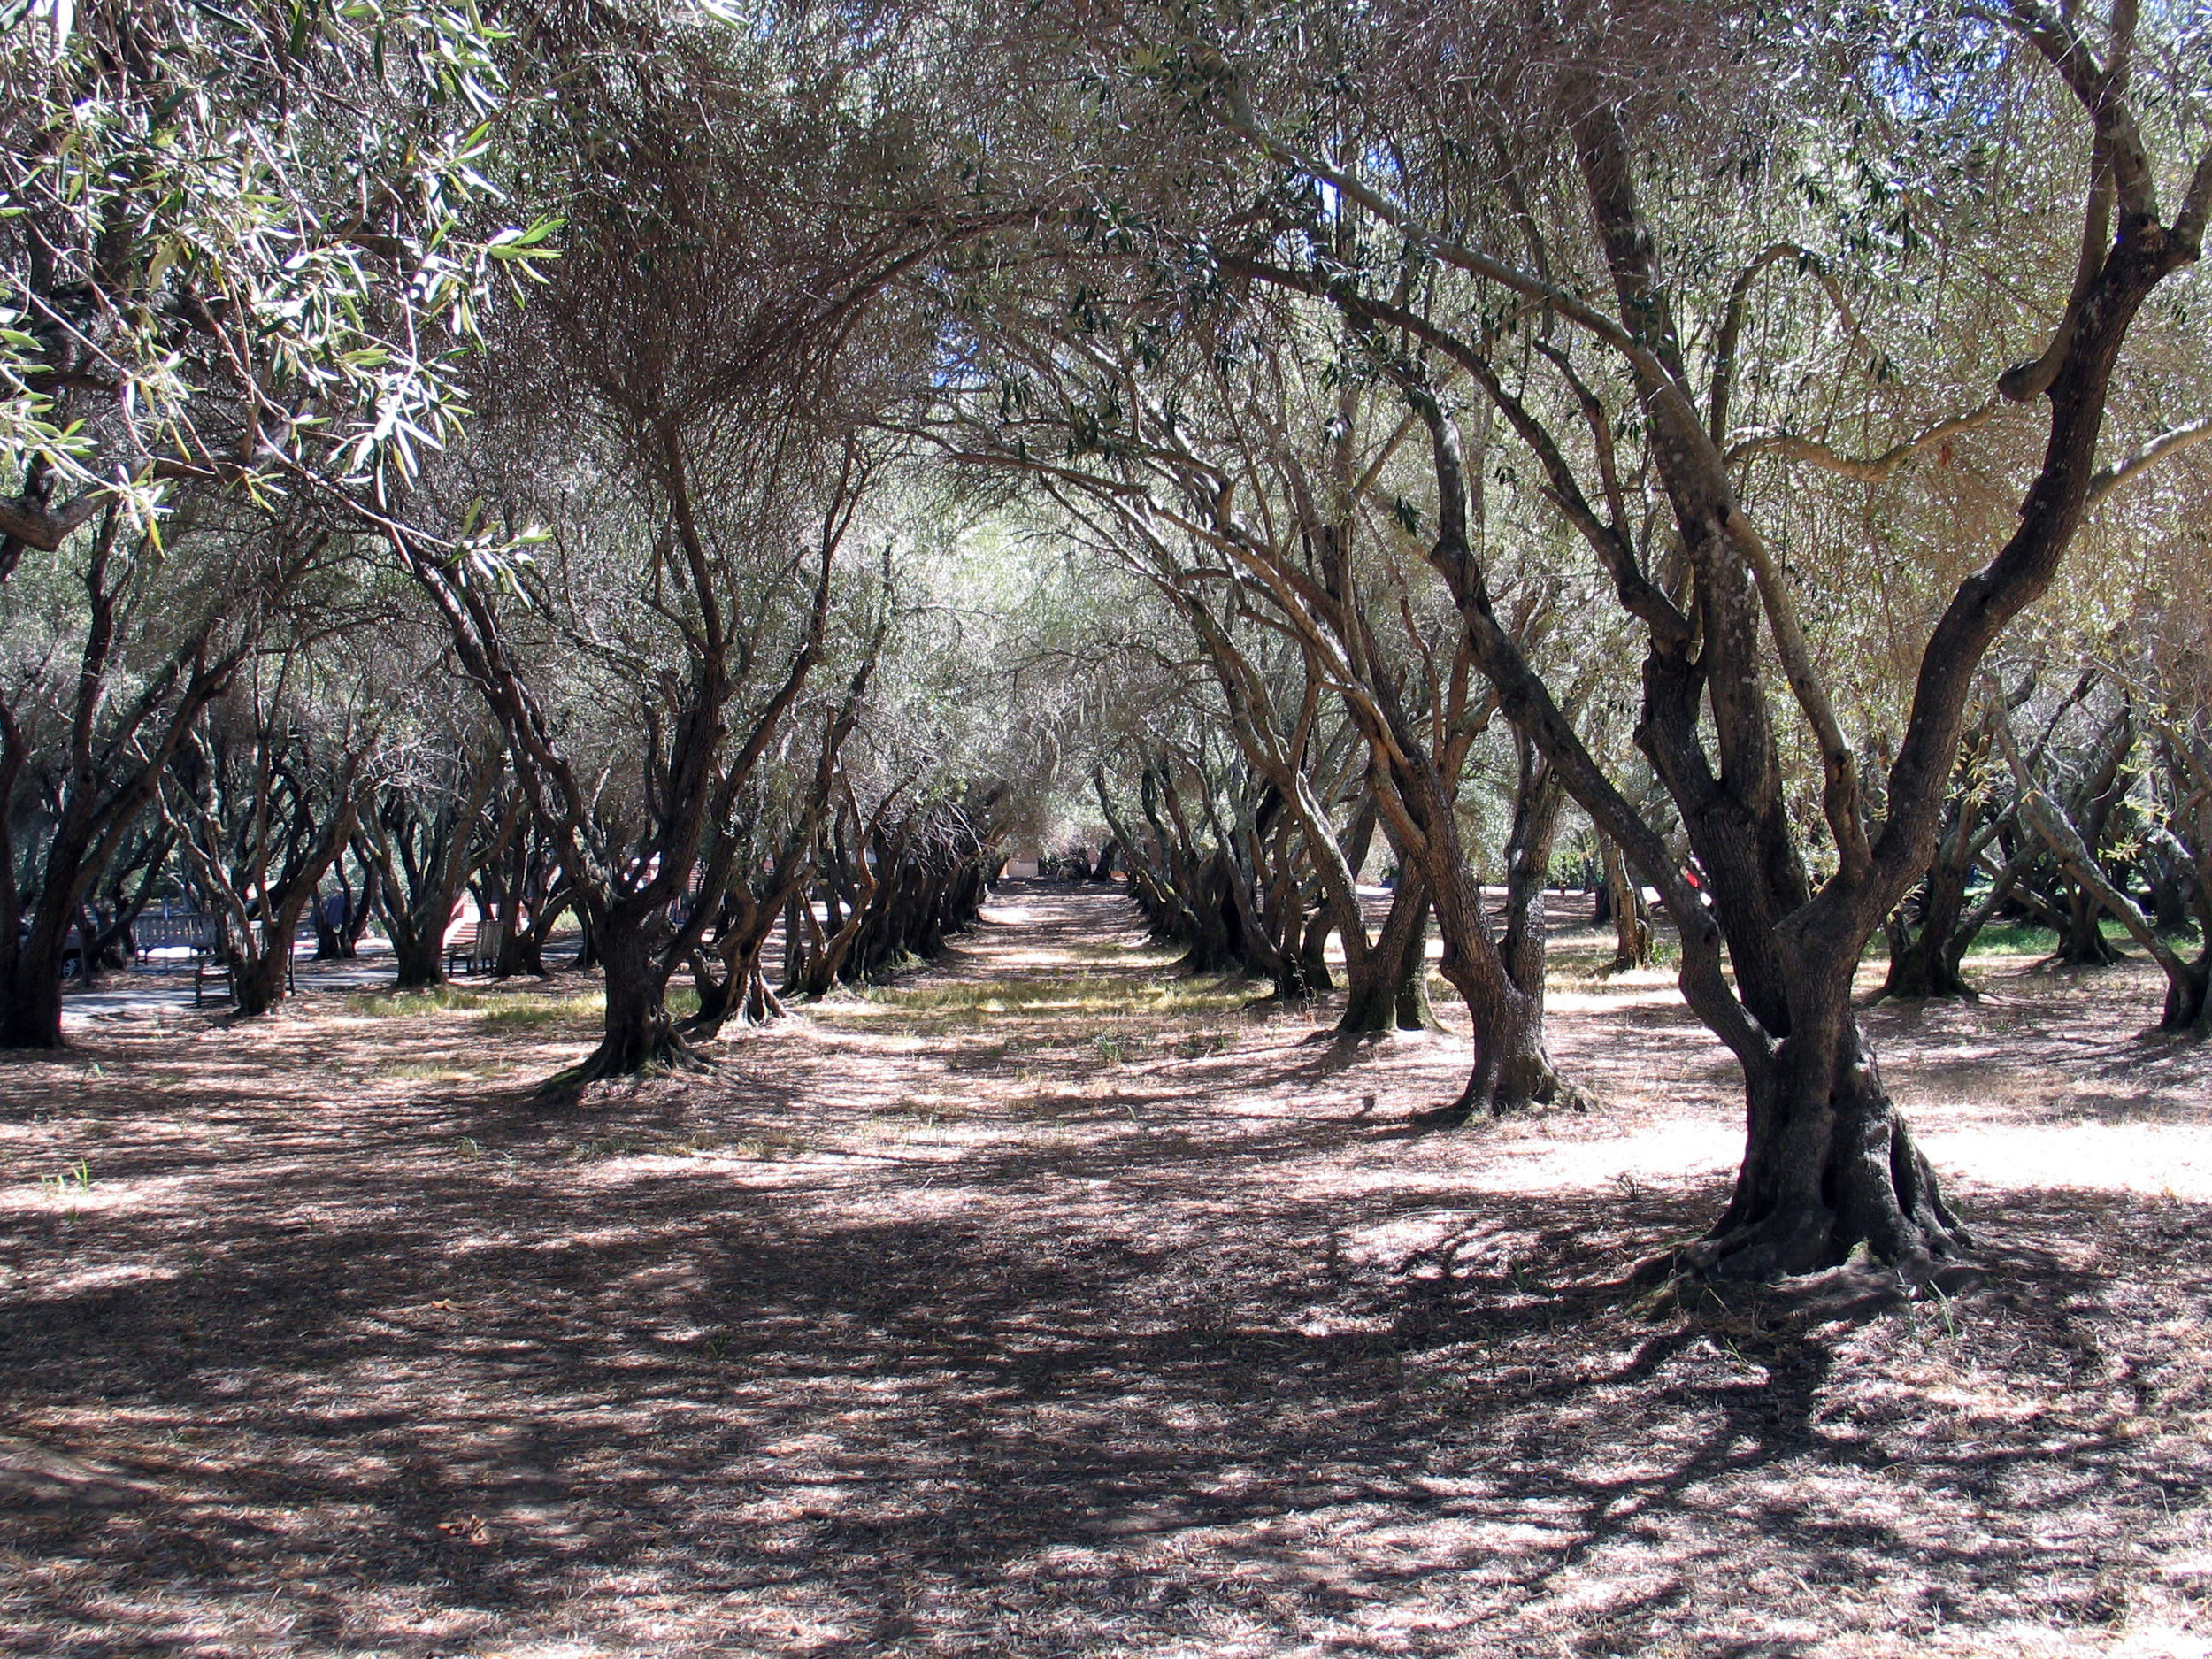 and of course, a trip to Filoli wouldn't be complete without photos in the Olive Grove. Talk about a sense of place!
Oh, Lantana, How You Vex Me!
The front of my new place is awash with purple Lantana (Lantana montevidensis). It is lovely stuff if you are both color blind (unless you're into this sort of purple, nothing wrong with that!) and an admirer of wildlife. There are butterflies, bees, spiders, and lizards all over it. It is absolutely marvelous for year-round blooming and needs no supplemental water once established (at least not here, I turned the irrigation off last fall).The flowers are the pepto bismol of purples - not my favorite, though maybe someday I will find a companion plant with a color that mitigates the pepto purple hue. Meh, maybe not. A dear friend of mine said that the overwhelming amount of purple Lantana in my garden made my place look like a retirement home.As much as I'd like to be able to retire (I'd still spend my time designing gardens - I love it that much), I am not ready to live in a dadgum retirement home! Talk about death by association; I can't look at it anymore without thinking about retirement homes. As if that wasn't bad enough, my lovely boyfriend thinks the foliage smells like poo (the flowers smell nice at night). Charming: a poo scented retirement home.Here's my vexation: as much as I intend to remove the Lantana and put in other stuff, it is happy, healthy, requires no water, and supports oodles of critters. So for now it stays.... providing food and shelter for all those bugs and lizards, but lookout, Lantana! You're living on borrowed time. Wanna know what I think might fill the space above? I'm considering a collection of spineless Opuntia that my friend Melinda sent me from Texas along with a few I've collected on my own here. The ones from Texas are rooting in the shed right now - cross your fingers that they all take!So there's my dilemma - removing the Lantana removes habitat, but goodness gracious, there's so danged much of it, I don't really like it, and the new design/plants aren't ready yet. Patience....
Montalvo Arts Center - update
re-visiting Montalvo Arts Center
Read more


